Premiere Pro Part 4

1. Introduction
We will now proceed with the actual editing using the materials distributed in Part 1.
1.1 Preparing the Data
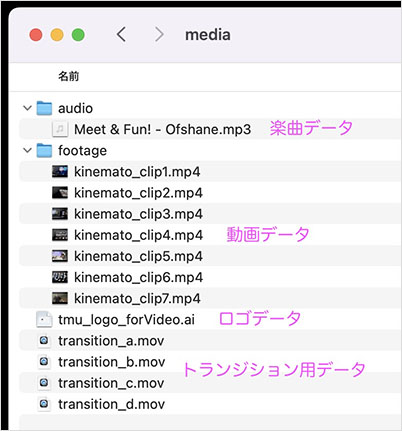
Assume that the “media” folder contains music files, video files, logo files, and transition files, as shown in the figure below.
1.2 Organizing the Project Panel in Premiere
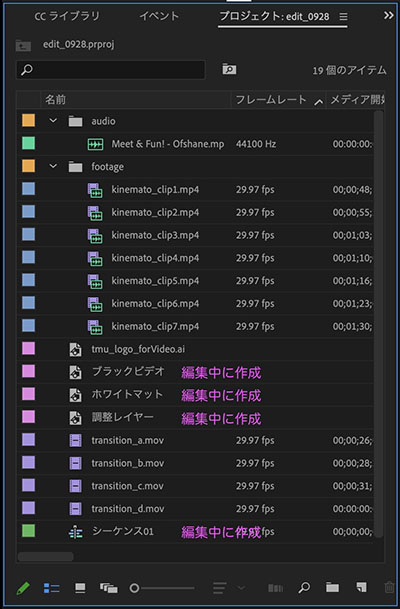
As we did in Part 1, let’s assume the assets have already been loaded, as shown in the figure below.
1.3 Production Process
For this project, we will first adjust the background music and then proceed with production according to the following steps.

1.4 Final Goal
2. Editing Background Music
2.1 The Pause at the Beginning
In some cases, it’s better to leave a brief pause at the beginning of a video rather than starting with music right away. Here, we’ll use a black video to create a 0.5-second pause. Black videos are useful for adjusting the timing of your footage, so it’s a good idea to keep this in mind.
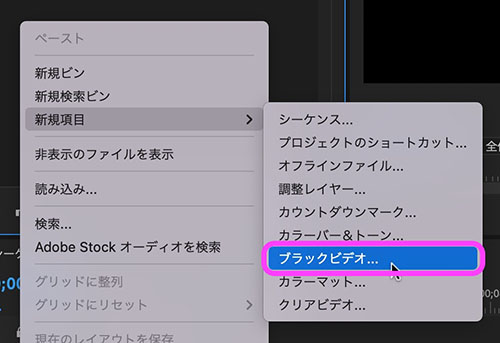
Right-click in an empty area of the Project panel, select “New Item” from the menu that appears, and then click “Black Video.” Alternatively, go to the File menu > New > Black Video.
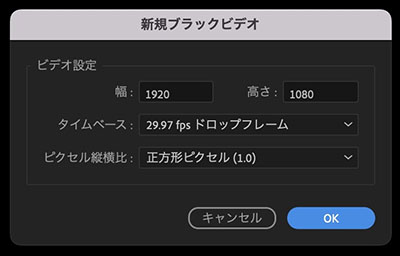
In the settings shown below, the black video settings corresponding to the currently open sequence are displayed, so click OK without making any changes.
Drag and drop the black video created in the Project Panel onto Track V1 of the timeline.
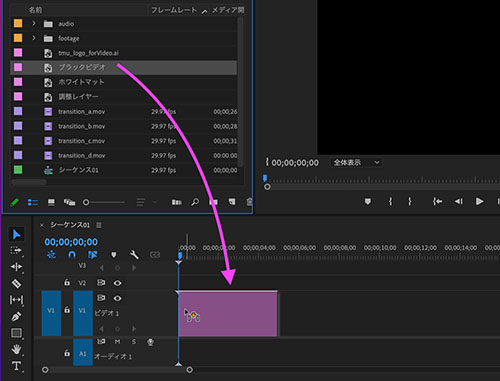
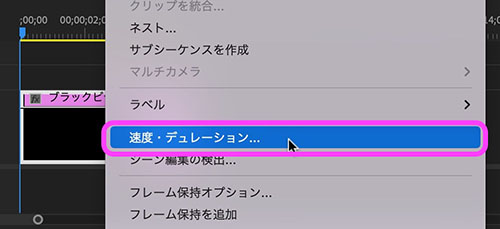
Since the default duration for still images in Premiere is 5 seconds (4.29 seconds at 30 fps), right-click the black video in the sequence and select “Speed & Duration.”
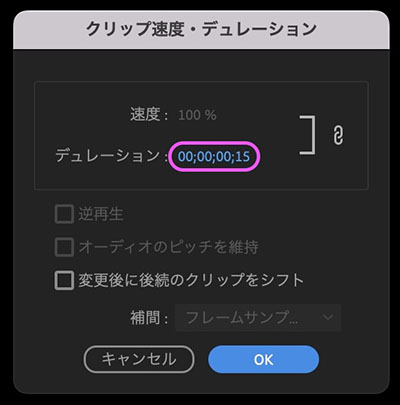
In the dialog shown below, set the duration to 15 frames (0.5 seconds).
Reference: Adjusting clip duration using a specific timecode
It is also common to move the time indicator by entering numbers or performing addition and subtraction on the timecode, and then adjust the clip’s duration by dragging its ends.
I will explain the method during class.
2.2 Cutting and Editing Music Tracks
Drag and drop “Meet & Fun! - Ofshane.mp3” from the Project Panel onto Track A1 in the Sequence.
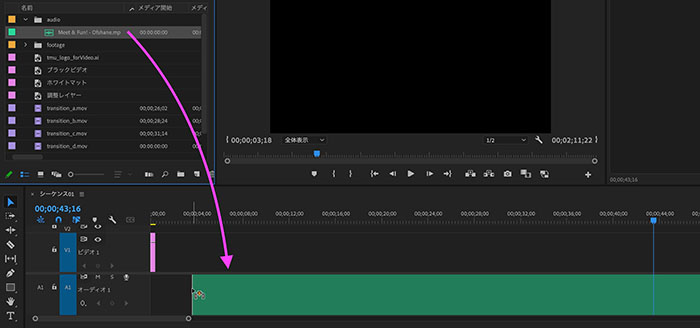
If necessary, adjust the timeline scale and change the track height so that you can view the waveforms for the entire audio track.
In this case, we will only use the portion of the audio source indicated by the pink box in the figure below.

Drag the start and end points of the clip, or use the laser tool to trim it, to extract only the parts you need.

Move behind the black screen as needed.
2.3 Volume Control
Music files are often too loud as they are.

Drag the rubber band on the audio clip downward and adjust the amplitude to between -6 and -12 dB (a general guideline for background music) while monitoring the audio meter. For this audio source, lower the level to around -7.0 dB, as shown in the figure below.
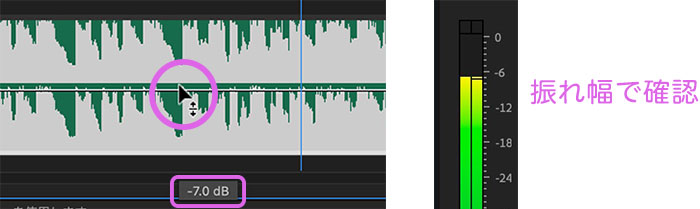
Alternatively, you can right-click the audio clip and select Audio Gain > Adjust Gain to -7 dB.
(Reference) [Premiere TIPS] Audio Gain is a Handy Tool for Adjusting Volume

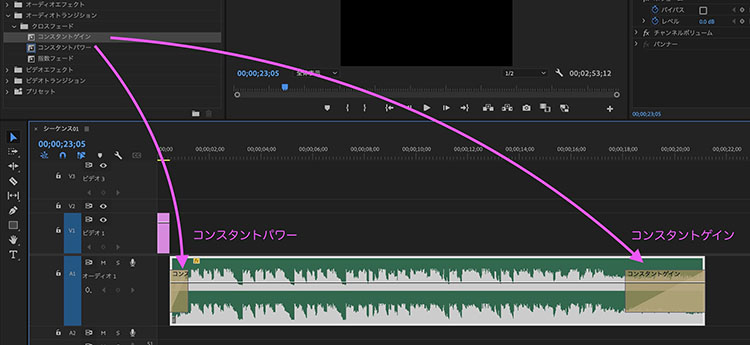
2.4 Fade In, Fade Out
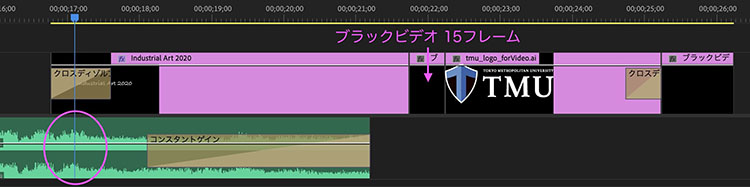
Set “Constant Power” for the fade-in and “Constant Gain” for the fade-out. Then, adjust the start of the BGM to begin after the black screen.
3. Editing the Logo and Title
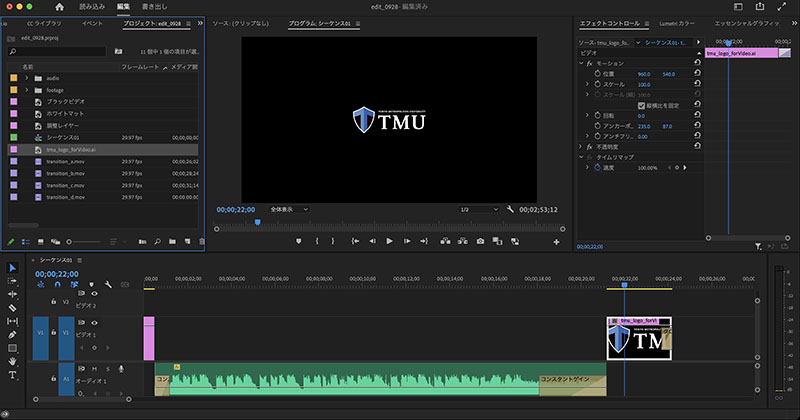
3.1 Tokyo Metropolitan University Logo Data
Drag and drop tmu_logo_forVideo.ai onto the timeline and position it roughly behind the background music. Apply the following settings; you can make fine adjustments later.
- Duration: 3 seconds
- Fade-out (cross-dissolve): 15 frames
- Size: You can leave it as is, but if it’s too small, adjust it using the Scale control in the Effects panel
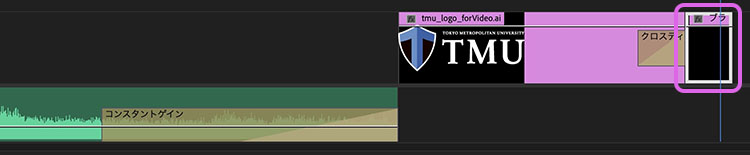
3.2 The Final Pause
Copy the black video at the beginning and place it after the logo clip. Change the duration to 30 frames (1 second).
3.3 Adding and Editing Title Text
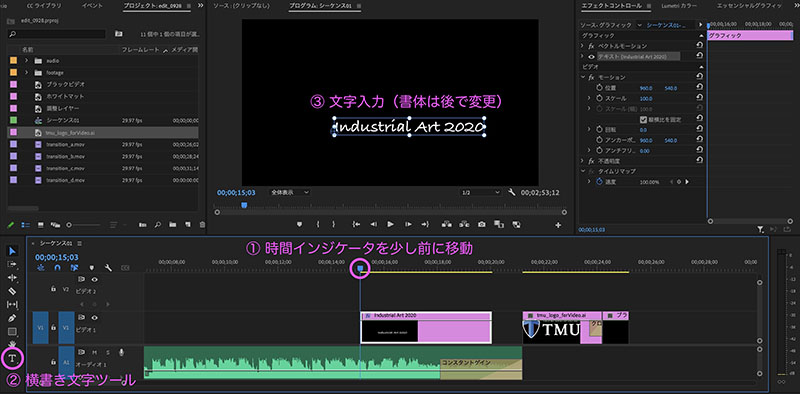
As shown in the figure below, move the time indicator slightly before the logo clip (at least 5 seconds), then select the Horizontal Text tool. Click the Program Monitor panel and type “Industrial Art 202*”.
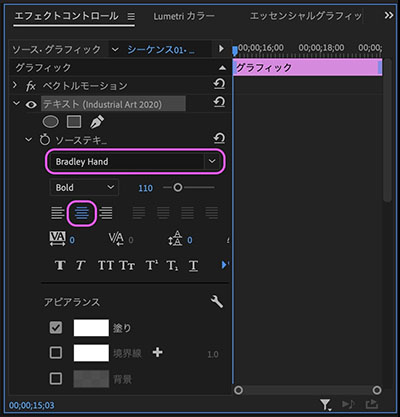
Open the Text parameters in the Effects control panel. Change the font to “Bradley Hand” (or any other font) and set the text alignment to center.
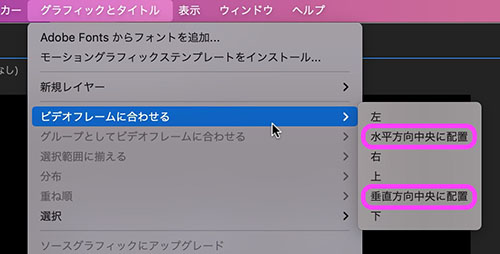
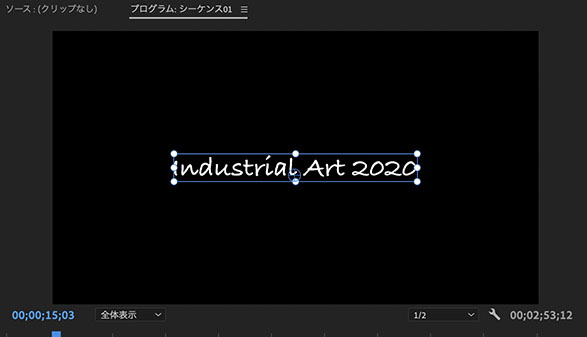
Graphics and Title Menu > Align to Video Frame (formerly Align in CC 2022) > Click “Center Horizontally,” then click “Center Vertically” to position the title text in the center of the screen.
Alternatively, you can enable the “Snap Program Monitor” feature by clicking the wrench icon (Settings) in the lower-right corner of the Program Monitor panel, which allows you to snap the window to the center by dragging it.

In addition, configure the following settings.
- Leave the clip duration at the default setting of 5 seconds
- Add a crossfade (25 frames) at the beginning of the title
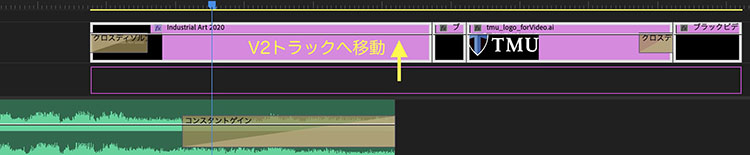
- Insert a black video (15 frames) between the title and the logo
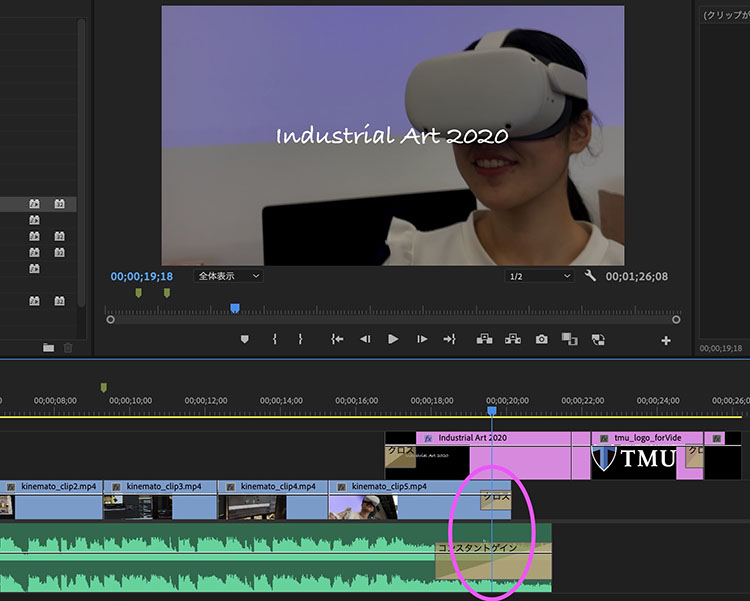
- Move the entire sequence so that the midpoint of the title’s crossfade aligns with the final climax of the background music
To make room for the video, drag the entire block containing the logo and title to Track V2.
4. Video Editing
4.1 Placing Video Clips
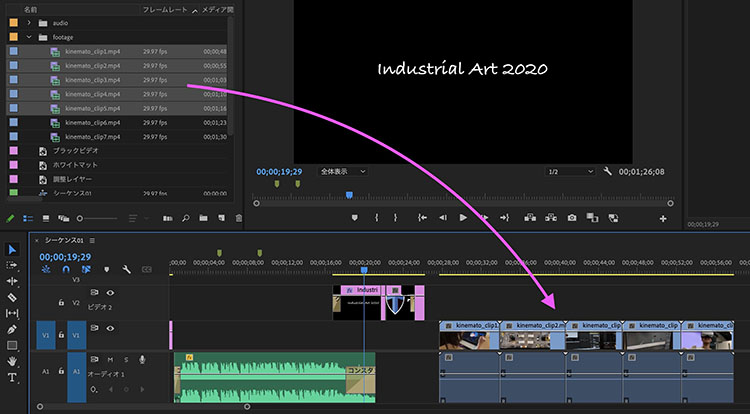
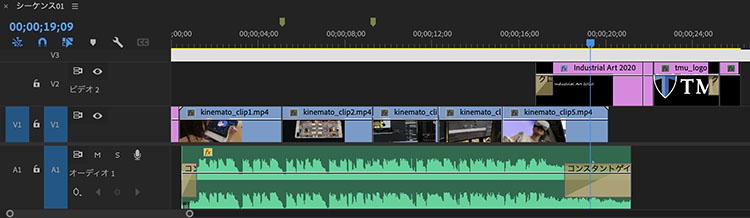
Drag and drop the following five clips onto the timeline in a separate track (behind the BGM and logo).
- kinemato_clip1.mp4
- kinemato_clip2.mp4
- kinemato_clip3.mp4
- kinemato_clip4.mp4
- kinemato_clip5.mp4
4.2 Deleting Audio
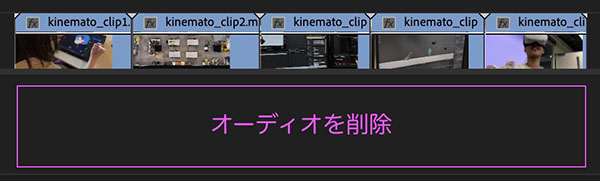
With the five clips selected, right-click and select “Unlink” from the menu.
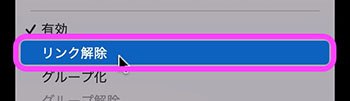
Select and delete only the audio portion.
4.3 Video Adjustments
Move the five clips onto the BGM track and adjust their lengths and timing. There aren’t any strict rules, so just use your judgment to position them roughly where you think they should go. If necessary, you can use markers (M key) to help you keep track of the music’s timing.
The following are reference IN/OUT points for each clip.
- kinemato_clip1.mp4: IN: 00;00;25, OUT: 00;05;13
- kinemato_clip2.mp4: IN: 00;05;13, OUT: 00;08;24
- kinemato_clip3.mp4 IN: 00;08;24, OUT: 00;12;10
- kinemato_clip4.mp4 IN: 00;12;10, OUT: 00;15;13
- kinemato_clip5.mp4 IN: 00;15;13, OUT: 00;20;10
Since we’ve already selected the background music for this project, we’ll fade out the last clip to match the BGM. After adjusting the clip’s position and duration as shown below, set a crossfade (about 40 frames) at the end of the clip.
5. Transitions
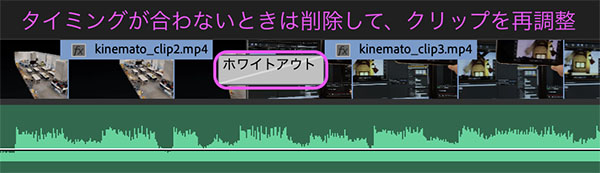
5.1 Whiteout
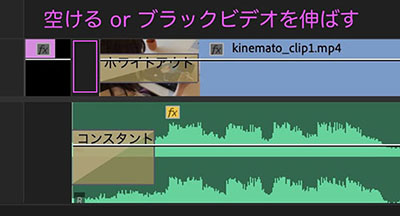
Add a whiteout at the beginning of the first clip and as transitions between the second and third clips. Whiteouts help soften the abruptness of cuts.

In some cases, it’s better to delay the whiteout slightly before the background music starts (similar to setting the IN/OUT points mentioned above). Since this also depends on the timing of the background music’s fade-in, adjust it while playing the clip. The whiteout should last about 25 frames.
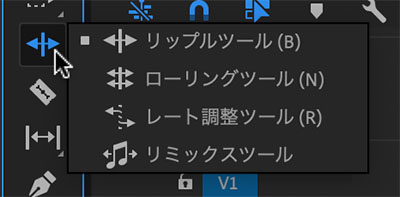
While you can work efficiently by using tools such as the Roll tool, Ripple tool, and Slip tool to adjust clips and transitions, beginners may find this confusing if they aren’t familiar with video editing itself, so it’s best for them to stick to tools whose behavior they already understand.
(Reference) [Premiere Pro] How to Use 4 Tools Related to Editing Points
5.2 Animation Wipe
The transition_*.mov files provided are video clips that include alpha channels and can be used as transitions. Place them on Track V2 as transitions between clip1 and clip2, and between clip4 and clip5, as shown in the figure below. Since these transitions are video clips, you can adjust their speed by changing the playback speed just as you would with any other clip.
6. Curry Grading
Color grading, also known as color correction, refers to the process of adjusting the colors in a video.
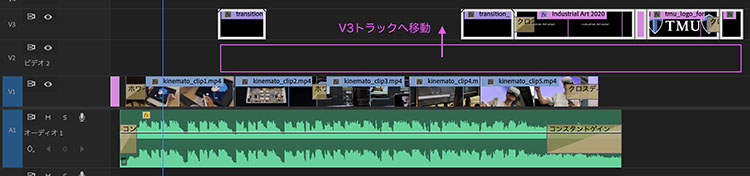
6.1 Move Transitions, Logos, and Titles to the V3 Track
Since I want to place the adjustment layer on Track V2, I’ll move the content from Track V2 to Track V3.
6.2 Adding an Adjustment Layer
Right-click in an empty area of the Project panel > New Item > Adjustment Layer, or click the File menu > New > Adjustment Layer.
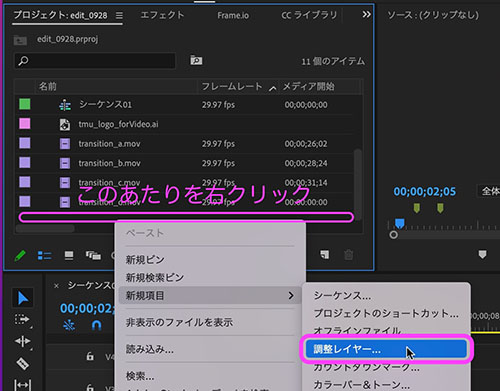
Since the same settings as the sequence are entered automatically, click OK without making any changes.

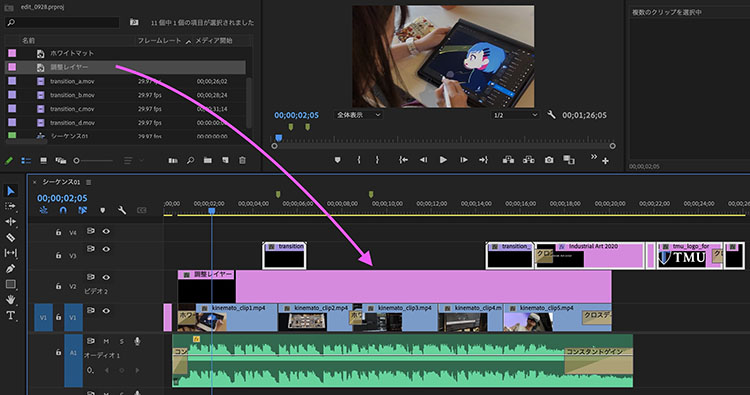
Place the adjustment layer created in the Project panel onto Track V2, as shown below. Adjust it so that it overlaps only the range of the video clip.
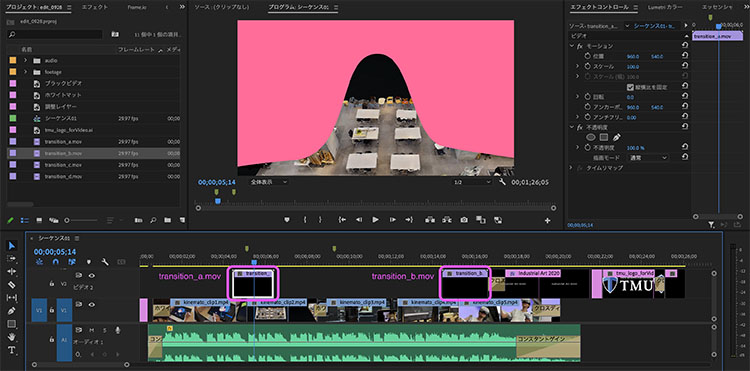
6.3 Applying Lumetri Presets
By applying effects to an adjustment layer, you can apply them to the tracks below it. This allows you to change, adjust, and enable or disable effects more efficiently than if you were to apply them to each clip individually.
Here, we’ll use Lumetri Presets. The Lumetri Presets section of the Effects panel offers a variety of presets that you can apply by dragging and dropping.
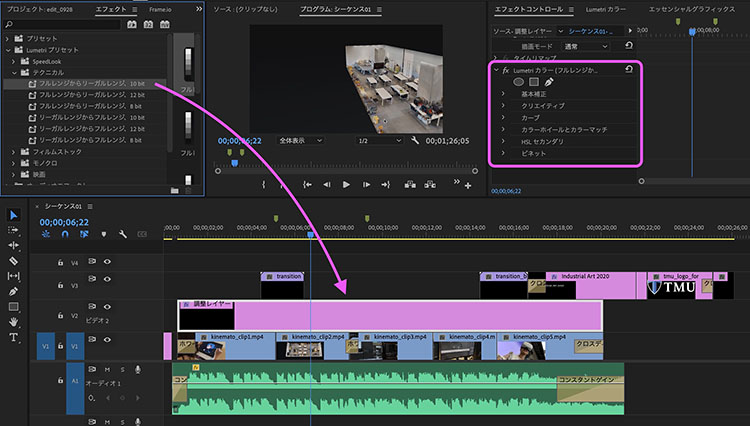
When you apply an effect, it is added to the Effect Controls panel, as shown in the upper right of the figure above. You can use the parameters in the Effect Controls panel to make fine adjustments.
If you drag and drop an effect multiple times, multiple instances of the effect will be added. To undo this, press Cmd+Z or delete the effects in the Effects panel.