Matterport
1. What is Matterport?
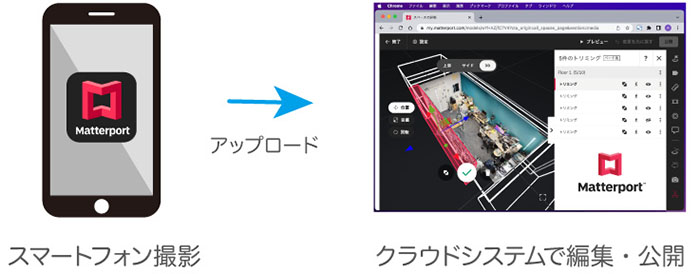
A virtual content development system that handles everything from 3D scanning to cloud-based editing and publishing in a single workflow. It supports iOS and Android devices, as well as 360-degree cameras such as the Ricoh Theta, Matterpot Pro, and Leica BLK 360. By editing content via the cloud system, users can add text information and YouTube videos, as well as automatically generate promotional videos.It is used in various fields, including virtual museums, virtual travel, architecture, and as an information-sharing tool for construction.
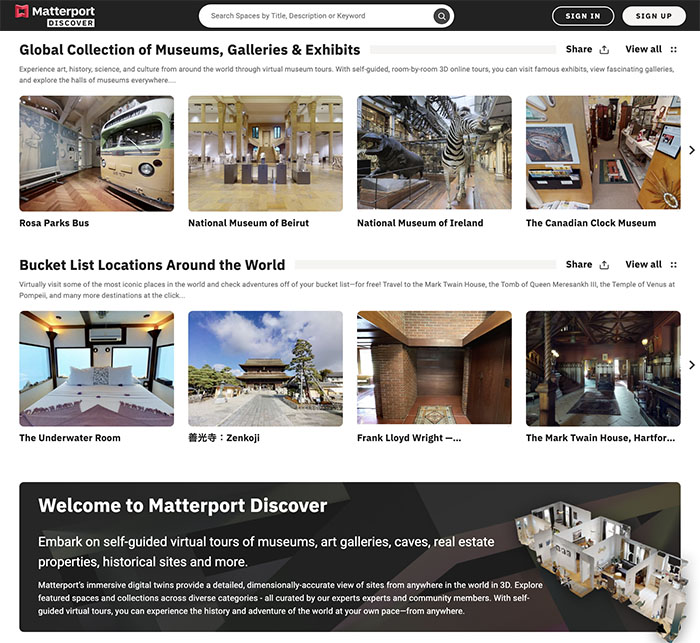
2. Matterport Discover
High-quality virtual content is now available, so why not give it a try?
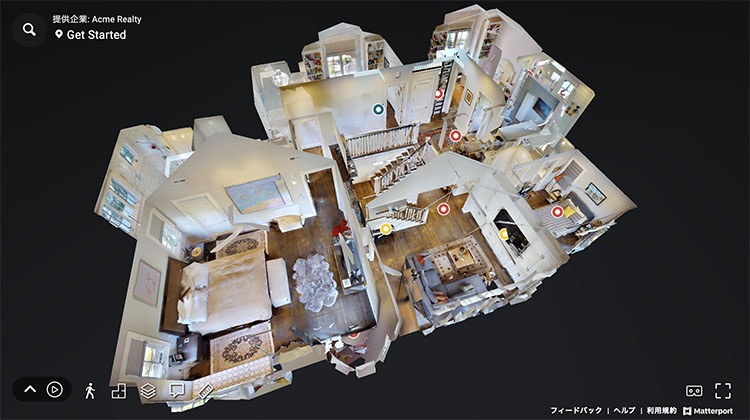
Mouse Controls
- Left-click: Move, manipulate tags, etc.
- Left-click and drag: Rotate the view
- Right-click and drag: Pan the view
- Mouse wheel: Zoom the view
https://matterport.com/discover
3. Other Examples
3.1 Graduate School of Information Science and Technology, Osaka University
https://www.ist.osaka-u.ac.jp/japanese/3d-map/c.html?loc=c10

3.2 Mori Art Museum “Future and Art” Exhibition: 3D Walkthrough
https://my.matterport.com/show/?m=k49Cr68caXk
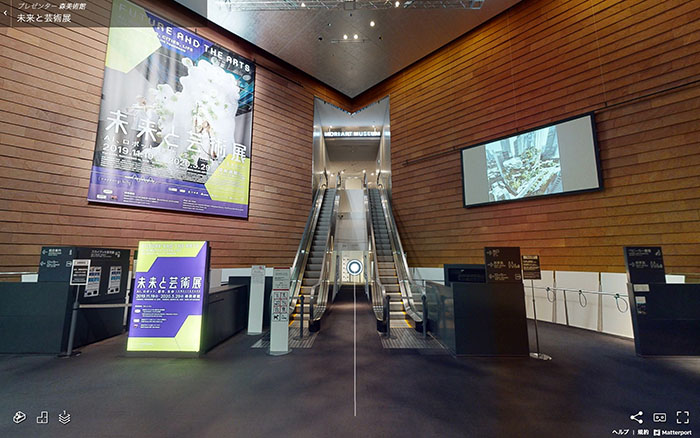
(Reference) The Mori Art Museum Releases a 3D Walkthrough of the “Future and Art” Exhibition
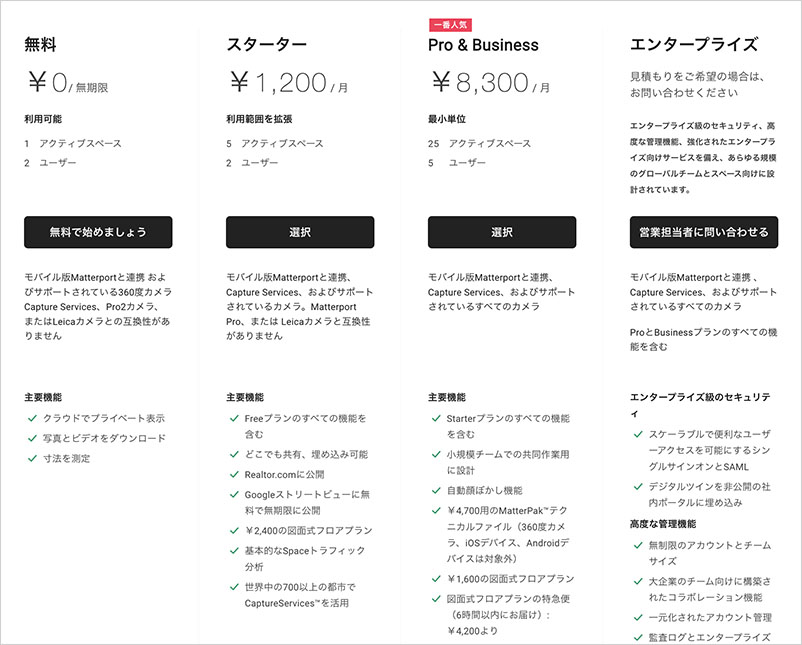
4. Types of Licenses
There are four license tiers available: Free, Starter, Pro & Business, and Enterprise. In particular, a Pro license or higher is required to use high-performance cameras such as the Matterport Pro or Leica. For this guide, we will use the Free license. While the Free license is limited to one active space, there is no limit on the number of scans you can take with a smartphone, and spaces created in the cloud can be archived, allowing you to experiment by switching between different content.
5. Workshop Flow
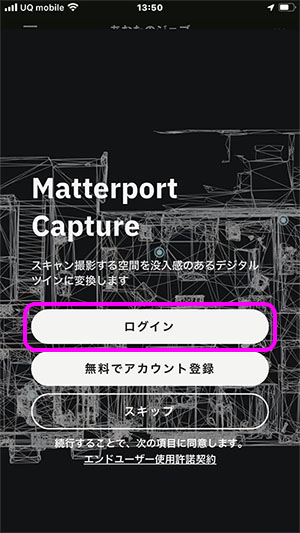
6. Create an Account
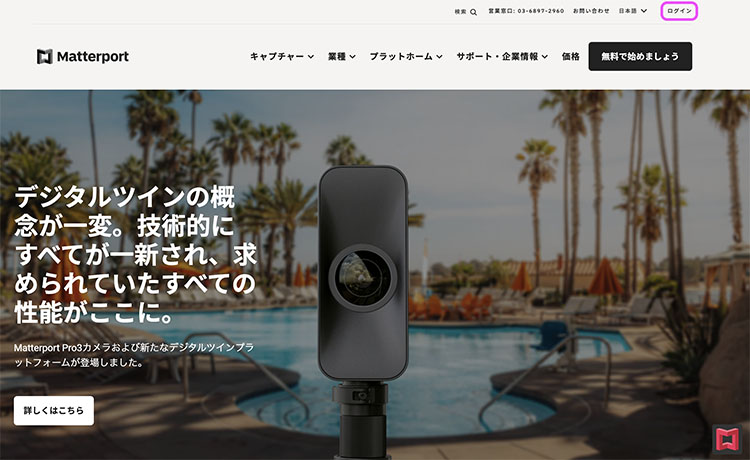
*As of October 2022 Go to the URL below. If you are accessing it from within Japan, you will be automatically redirected to the Japanese page.
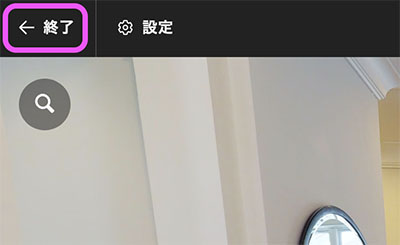
Click “Login” in the upper-right corner of the image below.
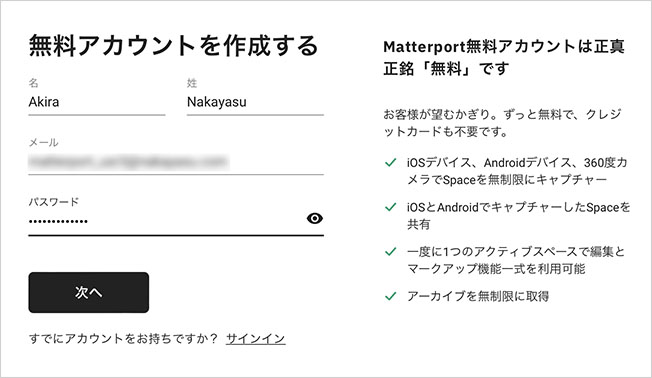
Click “Sign up for free” in the image below.
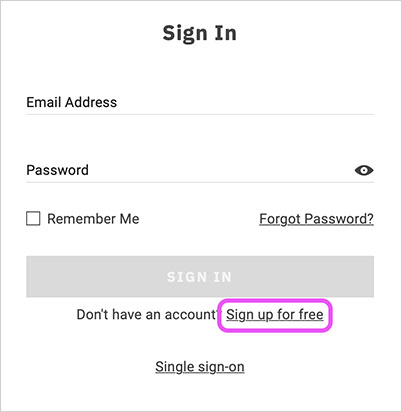
Enter your name, email address, and password, then click “Next.”
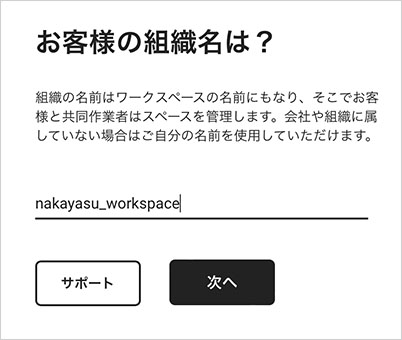
Enter the organization name (i.e., workspace name) in English.
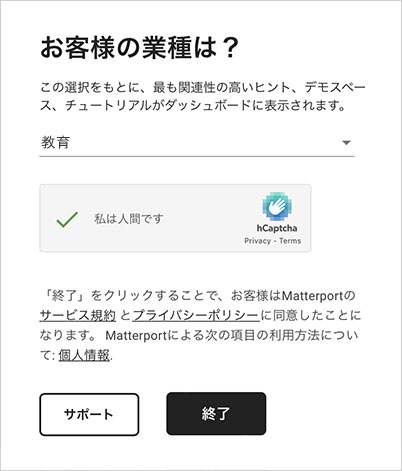
The student’s industry should be listed as “Education.” Select the “I am a human” image and click “Finish.”
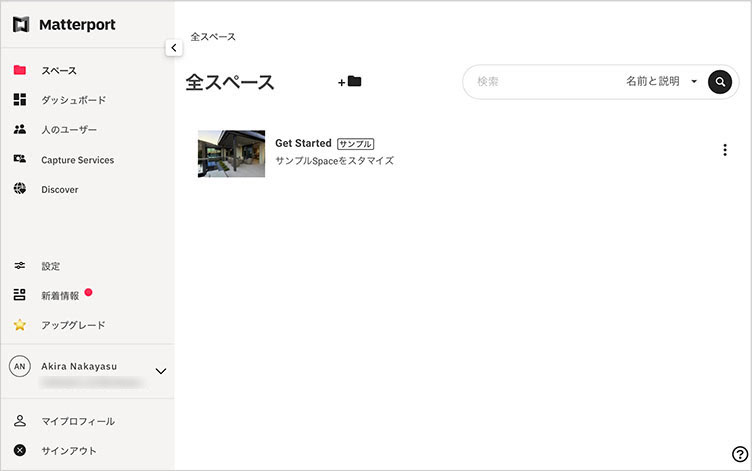
You are automatically signed in to the cloud system, and the Workspace appears.
7. Sample Content Preview
Sample content is provided. You can use it to experience what Matterport has to offer. Since the sample content is not subject to licensing restrictions, you can leave it as is without deleting it. Please note that while you can edit the sample content, you cannot publish it.
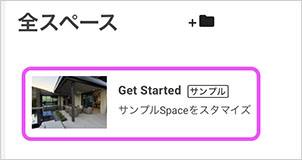
Click “Get Started” in the image above, then click the play icon (anywhere on the screen) in the image below.
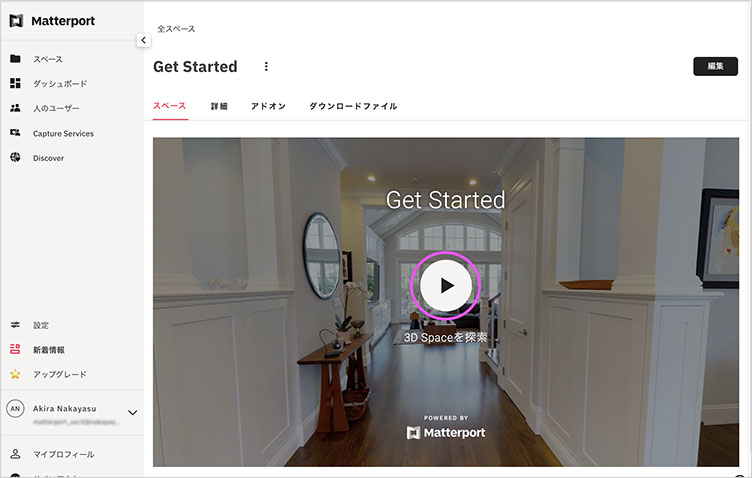
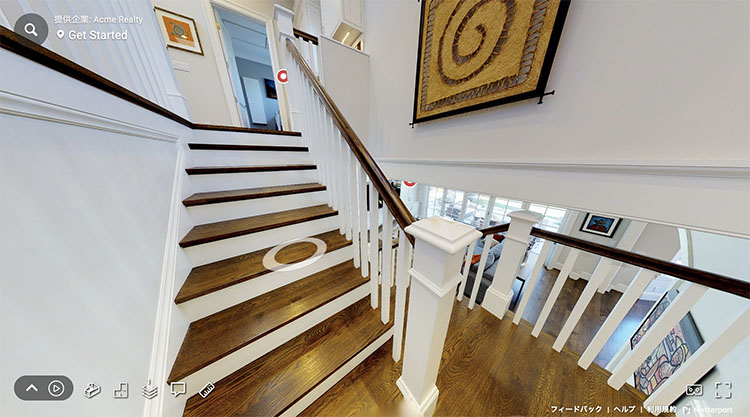
The guided tour is displayed at the bottom of the initial screen. Click the ▽ in the lower-left corner of the image below to close the guided tour. Drag with the left mouse button to move the camera. Left-click to proceed. Since the movement points are predetermined, you can proceed simply by clicking.
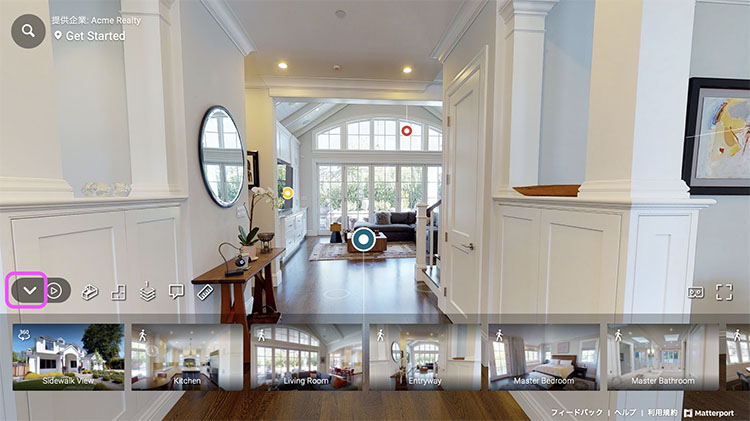
Various tags are placed within the content, and information can be displayed by hovering the mouse over them. These tags can contain text, images, videos, music, and more. By adding this information, you can create content that not only allows users to explore a virtual 3D space but also provides them with a variety of information alongside the spatial experience.
You can also use the stairs to move between floors. Developing content for multiple floors may require shooting with a camera equipped with a distance sensor, such as the Matterport Pro.
From the menu at the bottom left, you can switch to other views, take measurements, and play back highlights (which can be created automatically).
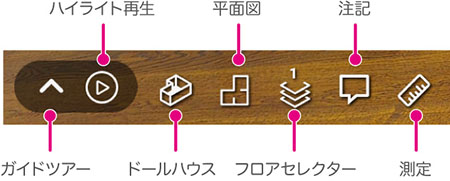
In Dollhouse view, you can rotate the view by dragging with the left mouse button, zoom in and out using the mouse wheel, and move the view by dragging with the right mouse button. Click on your desired location to return to 3D exploration view.
The floor plan view allows you to view the layout from a top-down perspective. For multi-story content, using the floor selector at the same time makes it easier to understand.

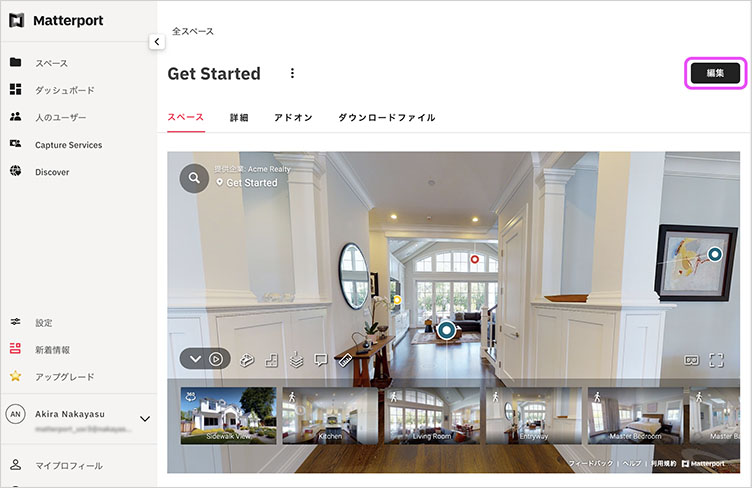
You can enter edit mode by clicking “Edit” in the upper-right corner of the figure below.
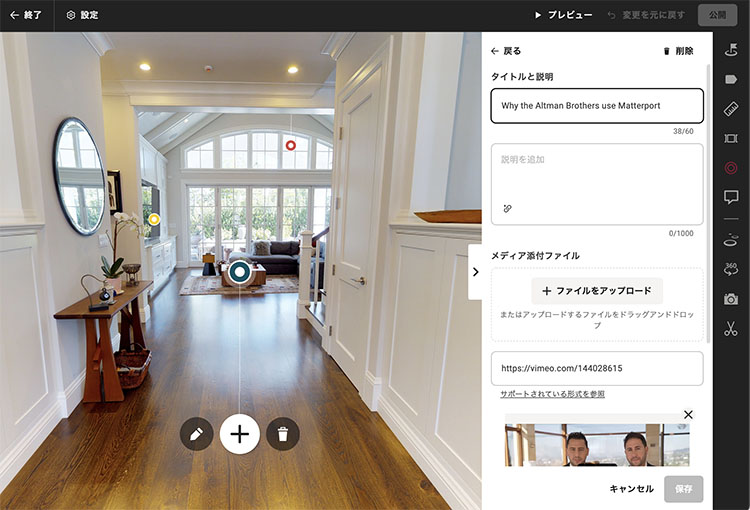
In this exercise, we will cover editing after the actual filming is complete. Click “Finish” in the upper-left corner to return to the space preview screen.
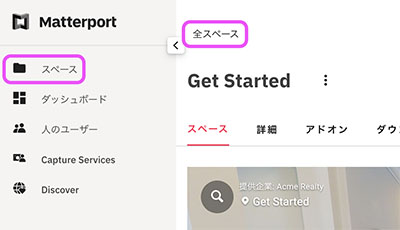
To return to the content list, click “All Spaces” at the top or “Spaces” in the left menu.
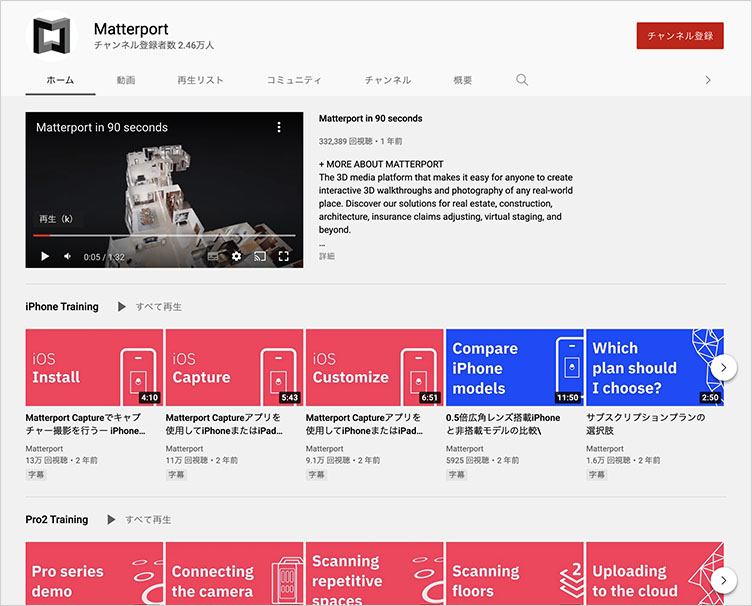
8. Official YouTube Channel
Matterport’s official YouTube channel offers a wide range of tutorials, so you can learn almost everything you need to know through videos.
https://www.youtube.com/c/MatterportInc
9. Installing the Smartphone App
This guide is primarily based on iOS apps.
9.1 Installing the Capture App
There are two types of apps: the Capture app for taking photos (called Matterport) and the Showcase app for viewing content. In this guide, we will install only the Capture app. Installing the Showcase app is optional.
Below is the URL for the Capture app.
https://apps.apple.com/us/app/matterport-capture/id701086043 for iOS (Requires iOS 14 or later, iPhone 6s or later, or iPad Air 2 or later)
https://play.google.com/store/apps/details?id=com.matterport.android.capture for Android
9.2 Instructional Videos for iOS
You can get a general idea of how to use it by watching three videos, each about 5 minutes long (two of which are described below).
9.3 Tutorial Videos for Android
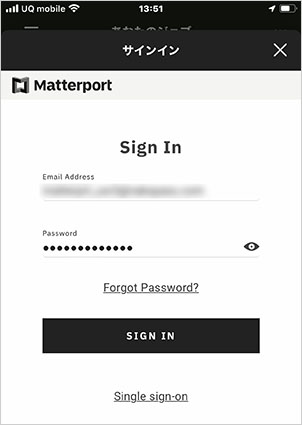
9.4 Signing In to the App
Sign in to the app using the same email address and password you used to create your account for the cloud system.
Click “Login” as shown below. The screen may vary depending on the version or your situation (e.g., logging in again).
Enter your email address and password, then click “SIGN IN.”
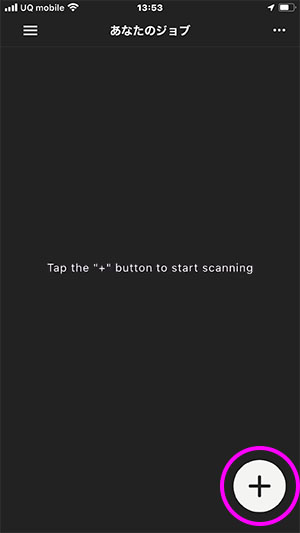
Once you’ve signed in, the workspace name will appear. Click the X in the upper-left corner.
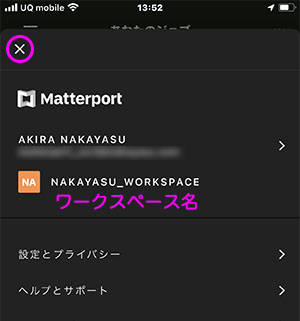
Click the “+” button in the lower-right corner.
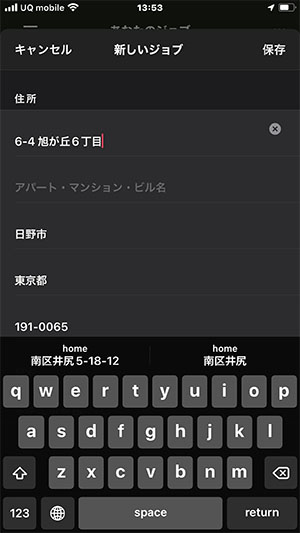
A new job is created, and your current address is automatically entered based on your iPhone’s information. You don’t need to change this during the testing phase. You can change it later when publishing the job to the cloud system.
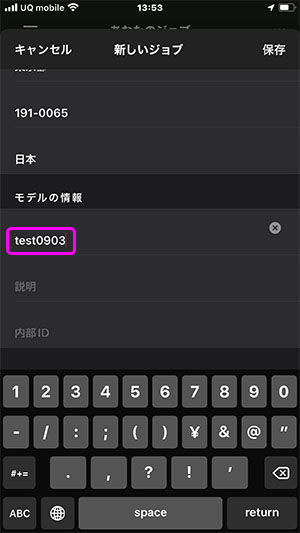
While still on the New Job screen, scroll down to register the model information. Since the model name will also serve as the content name, be sure to choose a descriptive name. In the figure below, it is set to “test-date.” You can change this later in the cloud system.
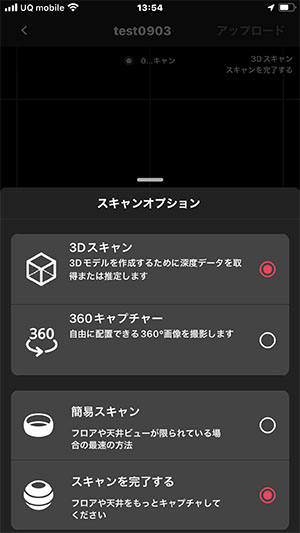
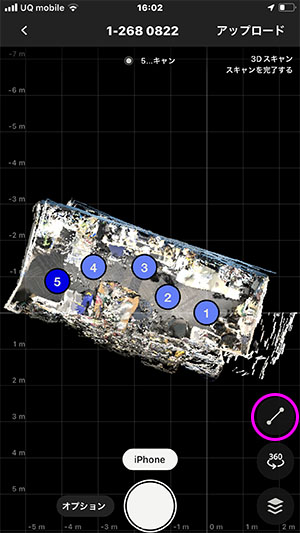
The scan preparation screen appears. Click the option shown in the figure below.
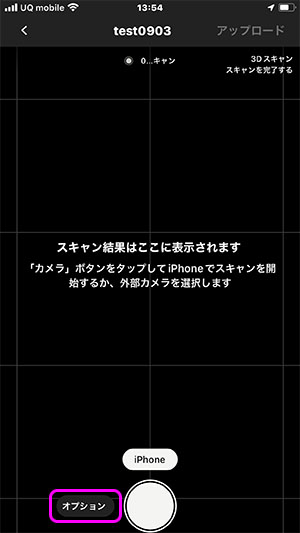
In the scan options, you can choose between two capture methods: 3D scanning and 360-degree capture. You can also capture content using both methods within a single model and combine them. While this exercise focuses solely on 3D scanning, you are welcome to incorporate 360-degree capture as well.
10. Taking Photos with a Smartphone and Uploading Them
10.1 Introduction
This exercise focuses on capturing images in relatively confined indoor spaces.
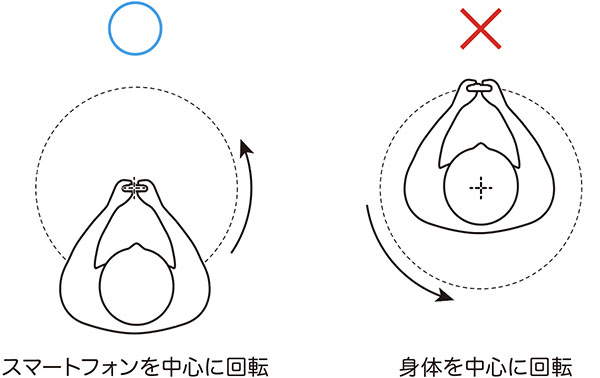
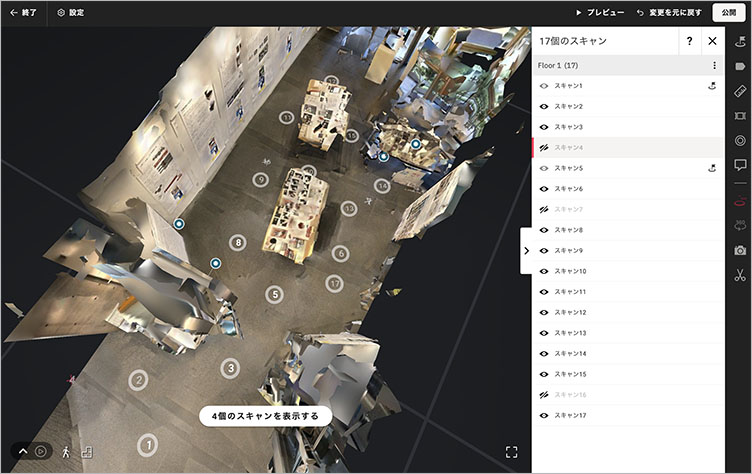
The figure below shows an example from the SD Gallery in Building 2 at Tokyo Metropolitan University. It took about 40 minutes to capture images at 17 different vantage points. While capturing images from as many vantage points as possible improves the accuracy of the analysis, it also requires significant effort. In particular, when using a smartphone, you need to rotate around the camera while taking photos, so it is essential to master the technique for accurate analysis.

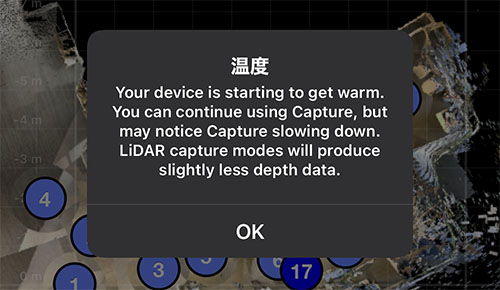
The Capture app performs camera alignment based on the captured data. Since this alignment process places a heavy load on older smartphones and consumes a significant amount of power, you must ensure your battery is sufficiently charged before taking photos. A heat warning may appear while the process is in progress.
10.2 Tutorial Videos
Although this exercise isn’t conducted exactly as shown in the tutorial video, you should still watch it for tips on filming and other useful information.
10.3 Photography Tips
As explained in the video above, film while moving around the camera. If this is difficult, use a stick or a broom.
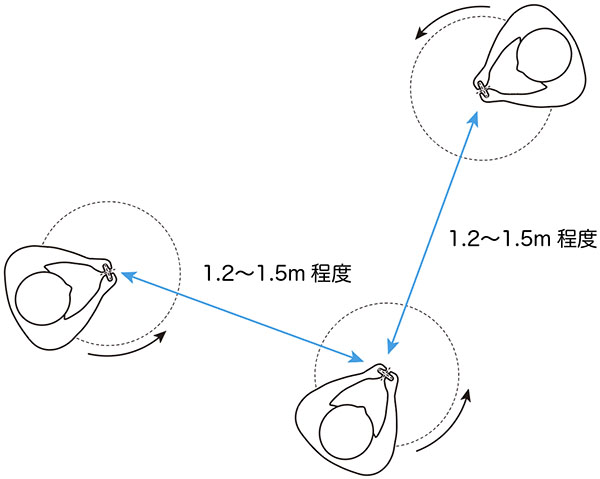
Take photos from a distance of about 1.2 to 1.5 meters (4 to 5 feet).
10.4 (Reference) Matterport Axis
Using the Matterport Axis allows you to automate smartphone photography. Although we won’t be using it in this exercise, observing how the Axis moves will help you understand that it’s important to keep the smartphone steady when taking photos manually.
https://matterport.com/ja/axis
10.5 Marking Tools (Crop, Window, Mirror)
You can configure cropping, windows, and mirrors during the smartphone alignment phase. Since transparent or reflective windows and mirrors cannot be accurately analyzed as part of the space, configuring them in advance ensures that those areas are treated as flat images. While cropping can be adjusted even after uploading to the cloud, windows and mirrors can only be configured during the smartphone phase.
Click the bookmark icon in the lower-right corner of the screen below.
In the Marking feature, use the top menu to switch between Crop, Window, and Mirror. Use the bottom buttons to add or remove marks. Drag on the map to place marks.

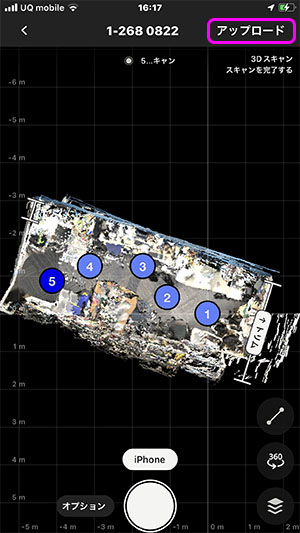
10.6 Uploading
Once you’ve finished taking the photos and adding tags, upload the model. Click “Upload” in the upper-right corner.
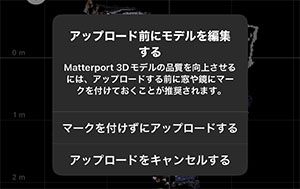
If no mark is set, the warning shown below will appear. If no mark is required, simply upload the file.
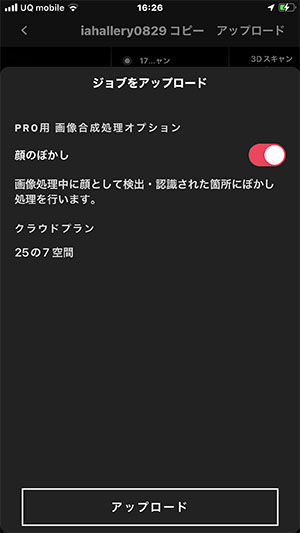
If you have a Pro license or higher, you can enable a feature that automatically blurs human faces. However, please note that this may also blur objects such as dolls.
11. Overview of the Matterport Cloud System
11.1 Accessing the Cloud System
Click on a space in the left menu to view all spaces.
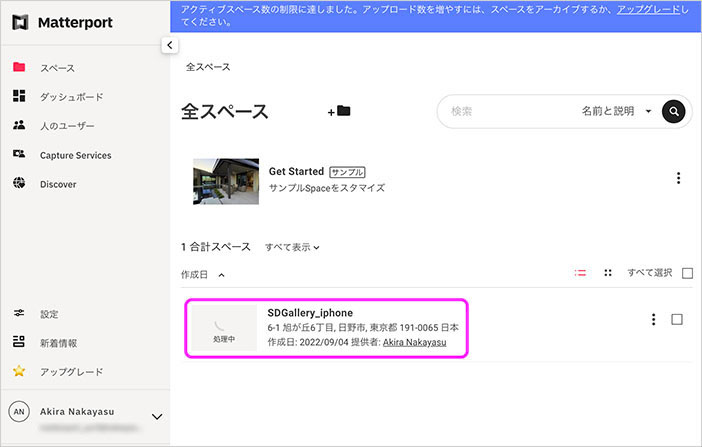
Immediately after uploading, the analysis process has not yet been completed, so a “processing” thumbnail will be displayed, as shown below. The duration of the analysis process varies depending on the number of capture points and the condition of the images. It may take several tens of minutes to an hour for 10 points, several hours for 100 points, and up to about three days for 1,000 points.
Once the process is complete, a thumbnail image will be displayed, as shown below. You will also receive a notification of completion via email.
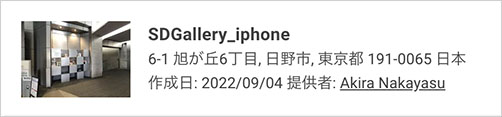
Click the thumbnail (or the text) shown above.
11.2 Space Tab
Click the play icon (or image) shown below.
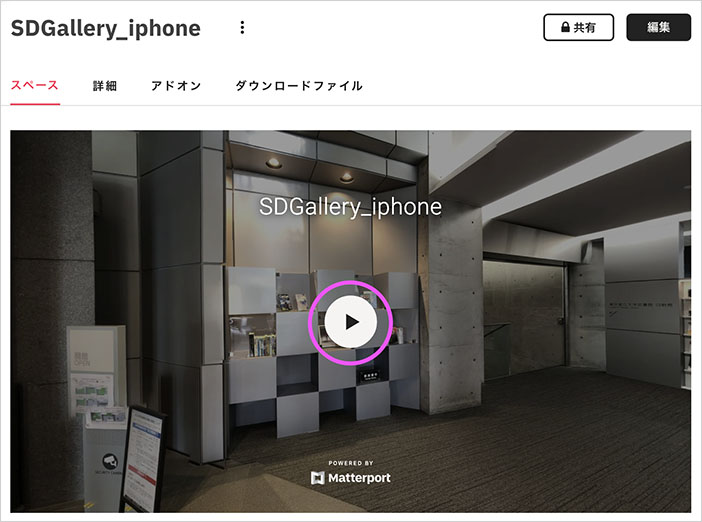
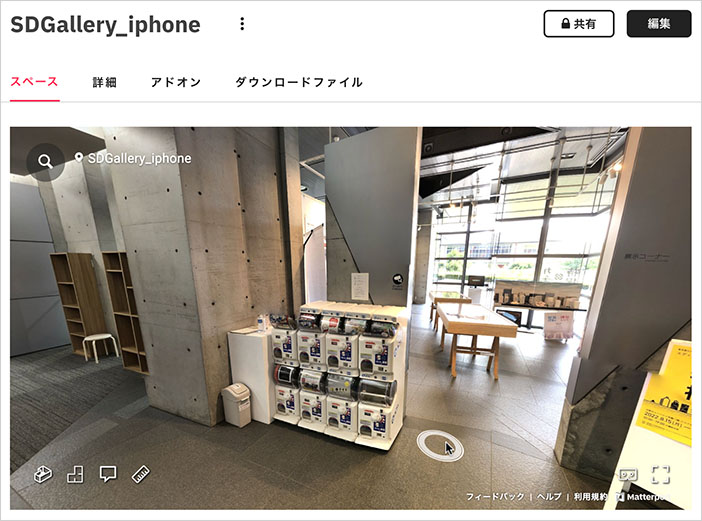
The virtual content is loaded. You can check it while interacting with it in the same state as when it was published.
Mouse Controls
- Left-click: Move, interact with tags, etc.
- Left-click and drag: Rotate the view
- Right-click and drag: Pan the view
- Mouse wheel: Zoom the view
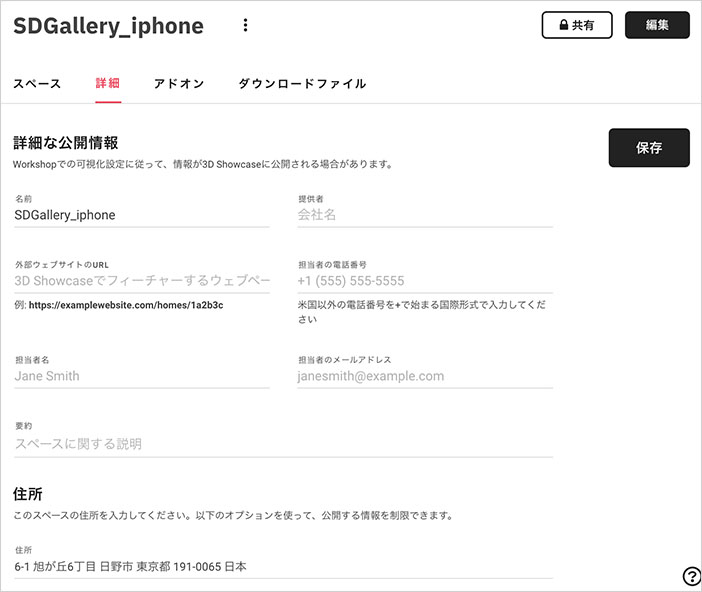
11.3 Details Tab
You can configure the information to be displayed upon publication.
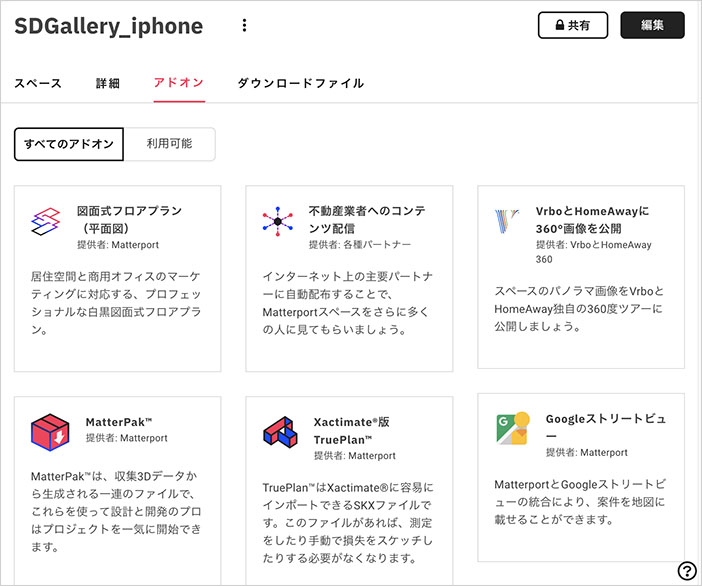
11.4 Add-ons Tab
There are several add-ons available with advanced features. Since these are paid options, we will not cover them here.
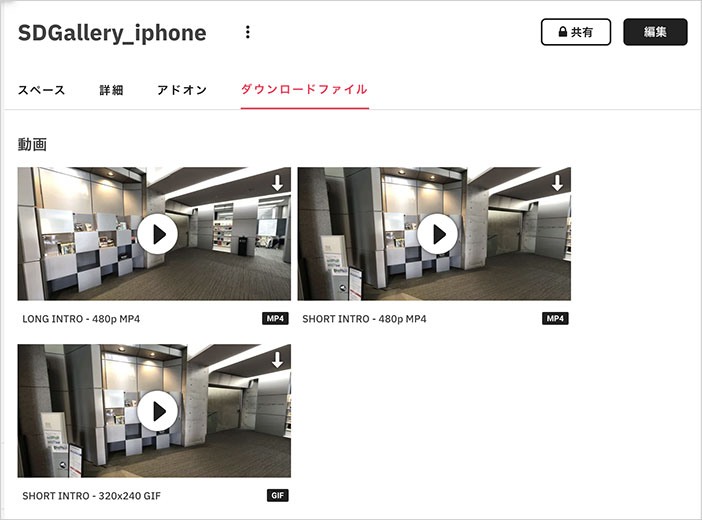
11.5 Downloads Tab
A handy feature that automatically generates videos and images perfect for promotional use.
12. Editing
12.1 Tutorial Videos
Please note that there are some differences from the current version.
12.2 Edit Mode
Click “Edit” in the upper-right corner.

Here, we will focus only on the items in the pink box in the right-hand menu.
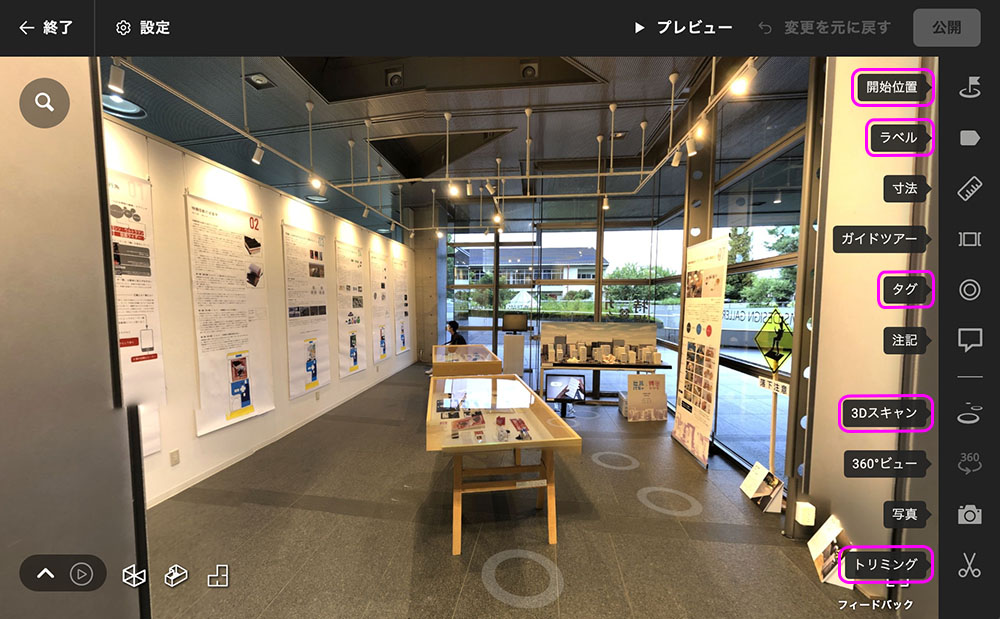
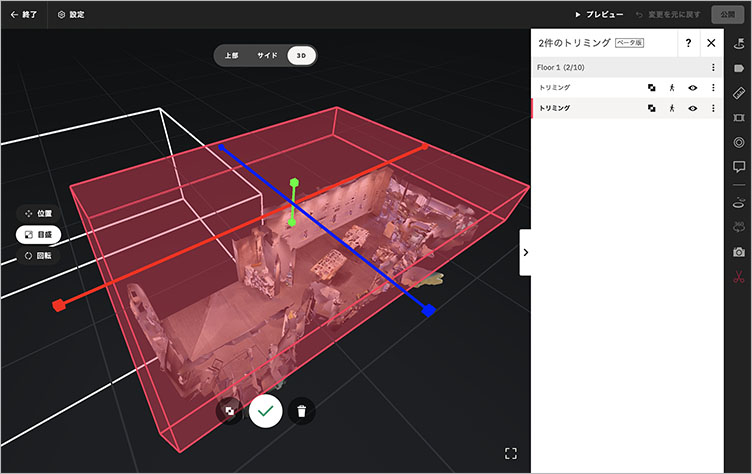
12.3 Trimming
You can crop out unwanted areas. While the smartphone app only allowed cropping on the floor plan, this version allows for precise vertical cropping as well.
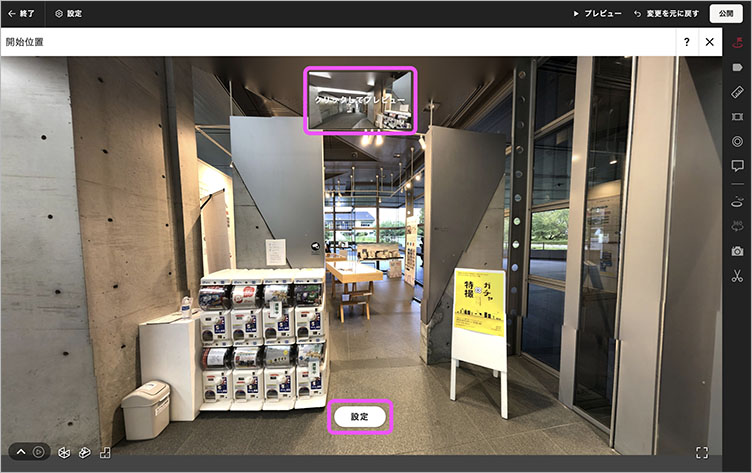
12.4 Starting Position
You can set the starting position when the content opens. Use the mouse to move to the starting position, then click the settings button below. Click “Click to Preview” above to view the opening animation.
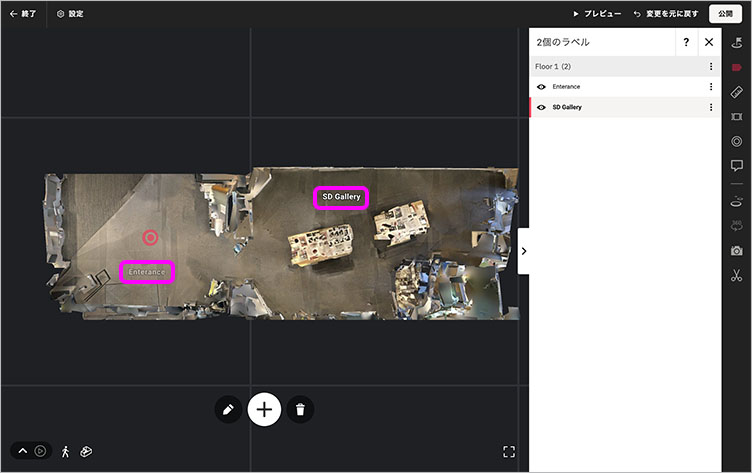
12.5 Labels
Labels are text that indicates the location shown on floor plans or in dollhouses. They are not displayed in Exploration Mode.
You can add and move labels in the dollhouse view, but it’s easier to see them in the floor plan.

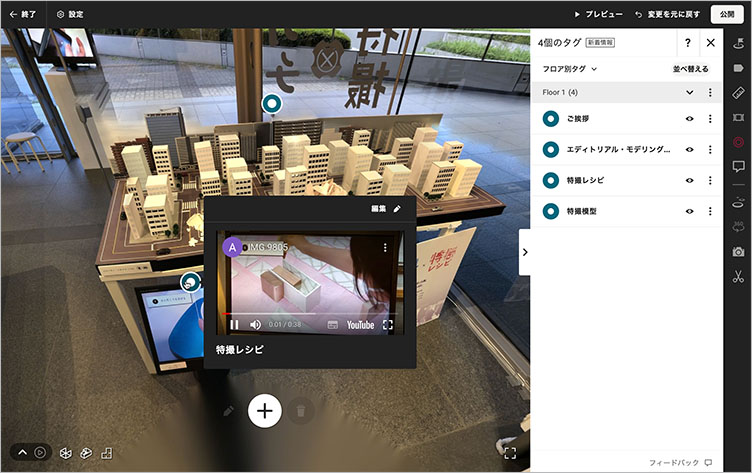
12.6 Tags
By using tags, you can add various types of information—such as text, images, videos, and downloadable data—to a 3D space. Effective use of tags allows you to create content that offers a rich, immersive experience.
12.7 3D Scanning (Setting the Movement Range)
You can set scan points to be hidden (and unable to be moved). This feature is useful for editing clear movement paths or preventing players from approaching areas you don’t want them to see.
12.8 Exiting Edit Mode
Click “Exit” in the upper-left corner.

13. Making Do Within Space Limits
13.1 Limitations of the Free License
With the free license, you can only set one active space. Therefore, you must archive the currently active space before uploading the model you photographed with your smartphone. Please note that once a space is archived, even users with editing privileges will no longer be able to view its content.
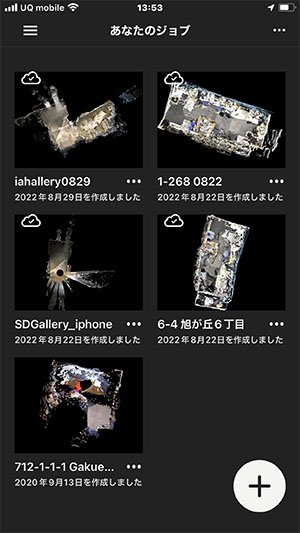
13.2 Model Data on Smartphones
There is no limit to the number of model data files you can capture with your smartphone. Changing the account you sign in with does not affect the data stored on your smartphone, so you can upload files separately for each model—whether using a free account or a paid account.
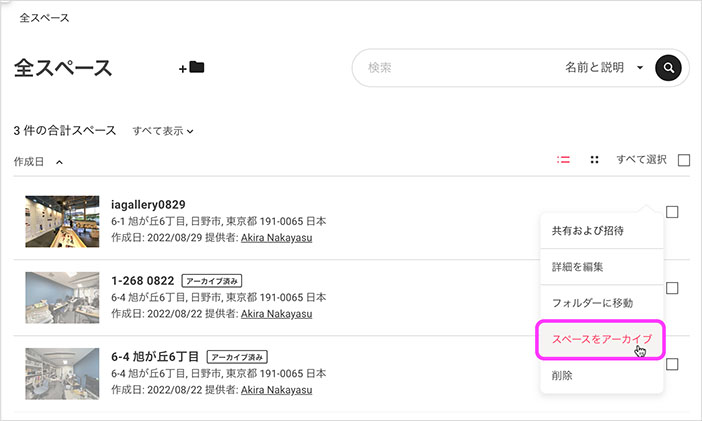
13.3 Archiving Spaces
Click the ⋯ (Actions) icon on the right side of the list of all spaces, then click “Archive Space.” Even with a free license, you can upload additional models from your smartphone as long as all spaces are active.
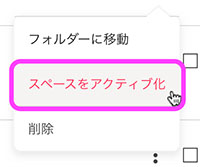
13.4 Activating a Space
Click the ︙ icon next to the active space, then click “Activate Space.”
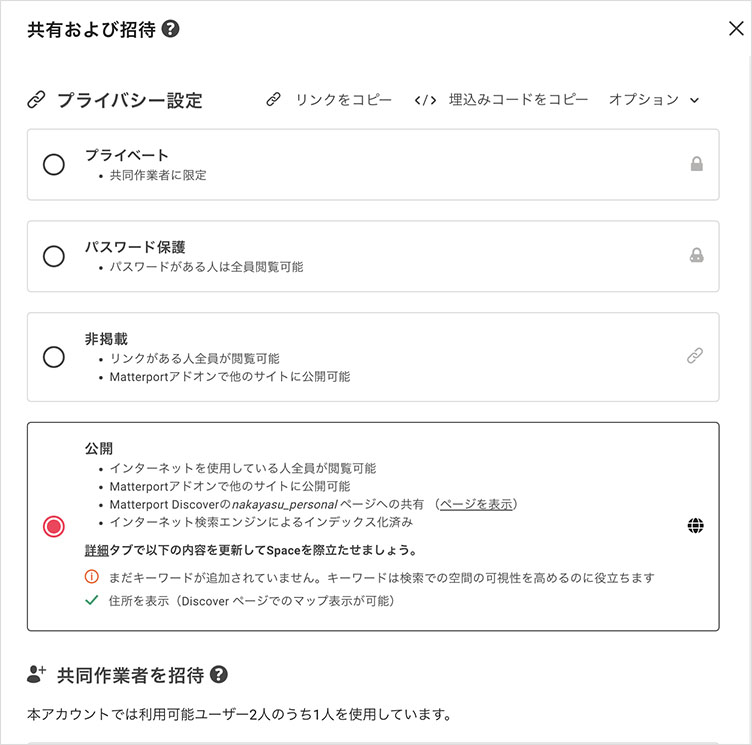
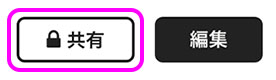
14. Privacy Settings
Set the privacy settings by clicking “Share” in the upper-right corner of the Space’s content page.
There are four visibility options available: Private, Password-protected, Unlisted, and Public. Select a visibility option using the radio buttons shown below. You can copy the link or embed code from the top-right corner.
When submitting assignments for class, submit the URL with the setting set to “Unlisted.” If it is determined that there are no copyright or other issues, you may set it to “Public.”