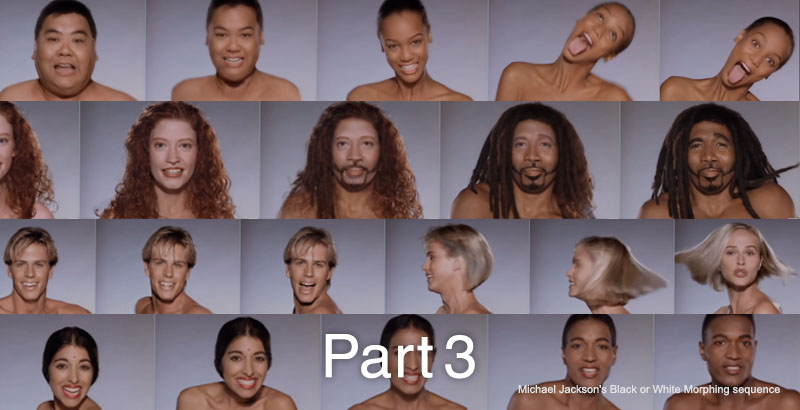
Morphing Part 3
1. RE:Flex Motion Morph (Video Morphing)
This section introduces techniques for morphing between videos.

Video morphing requires a keyframe for the mask path for each frame, so it takes longer to complete than still image morphing.
2. Points to Consider Regarding Video Morphing in Production
Because morphing is a visual technique that is inherently unconventional, it is not effective unless used in the right context and can easily come across as cliché. Since morphing alone rarely works well on its own, many examples incorporate it subtly alongside changes in hairstyles, clothing, and other visual elements.
In the video below, in addition to the morphing plugin RE:Flex, the author uses FreeForm—a tool for converting 2D images into 3D—to create deformations in a shirt, jacket, and helmet (mettle blog).
In this exercise, we’ll cover the basics of video morphing, but much of the work involves trial and error. Since it’s difficult to judge the quality of the work until it’s mostly complete, you’ll often find yourself having to start over. As is true of VFX in general, this kind of expertise can only be acquired over time.
When shooting footage for compositing, keep in mind that morphing is often performed over a very short duration—typically around one second—so you need to decide in advance which parts to morph before you start shooting. You can adjust the timing of the overall movement later using the time-remapping feature. Since you may need to slow down the footage using time-remapping, shoot at the highest frame rate possible.
3. How to Make the RE:Flex Demo Version Less Prominent
I will explain this in more detail during class.
- Use source images with the highest possible resolution (this is feasible for still images since pre-composing doesn’t require much processing power)
- Specify the colors for the demo display under Effects > Keying > Color Range
- Place a crossfade of the source material on the layer below
4. Problem-Solving Exercises
4.1 Project Description
- Materials to use: pete.mp4, richard.mp4
- Submission format: MP4
- Submission method: Submit via email using GigaFile. Nakayasu will upload the files to the Scrapbox shared folder for this assignment.
4.2 Preparing Source Footage
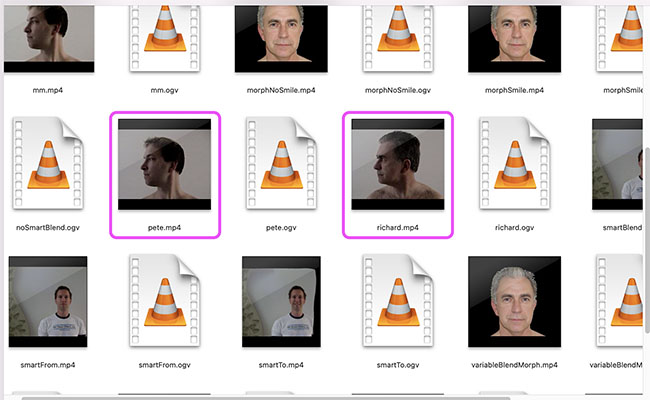
Here, we will use the sample data included with the RE:Flex manual. On a Mac, the files pete.mp4 and richard.mp4 (shown below) are located in /Applications/REVisionEffects/REFlex5AE/REFlex5AEManual/movies/.
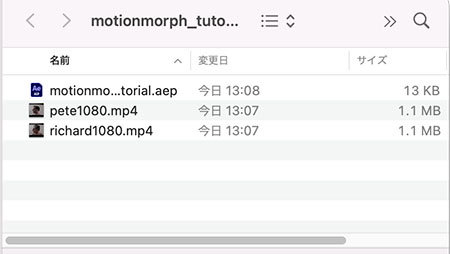
As shown below, create a folder (named “motionmorph_tutorial” in the figure) and copy the files “pete.mp4” and “richard.mp4” into it. Create the After Effects project (.aep) file in the same folder.
In this example, we will use data with artificially increased resolution (pete1080.mp4, richard1080.mp4).
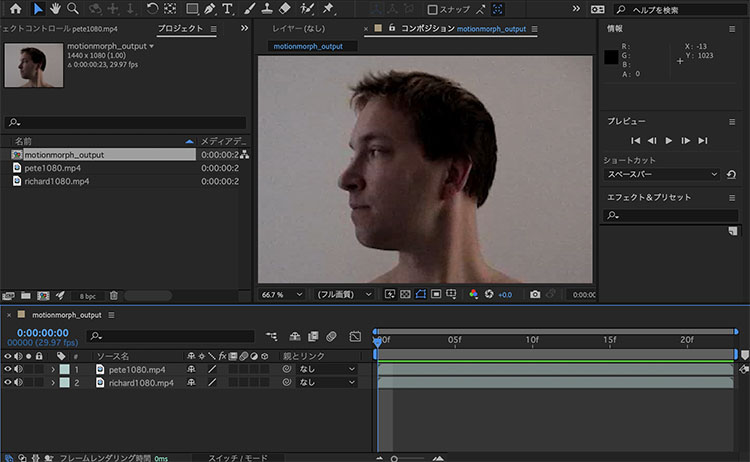
4.3 Creating a Composition (motionmorph_output)
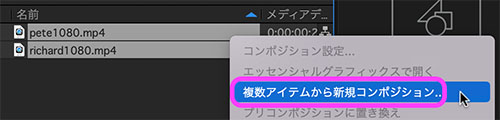
Load the two videos into the Project panel, select both, and right-click. Click “New Composition from Multiple Items” in the menu. Alternatively, drag the two videos and drop them onto the “Create New Composition” icon at the bottom of the Project panel.
In the settings below, click OK without making any changes.
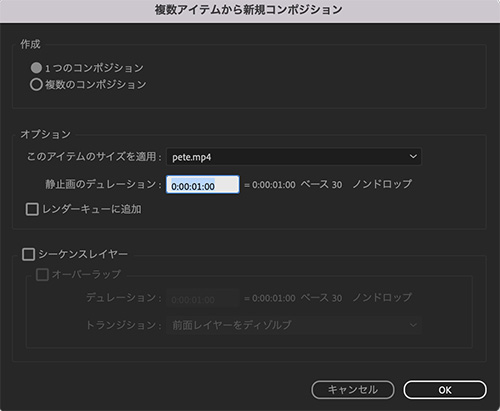
Change the composition name to “motionmorph_output” (optional).
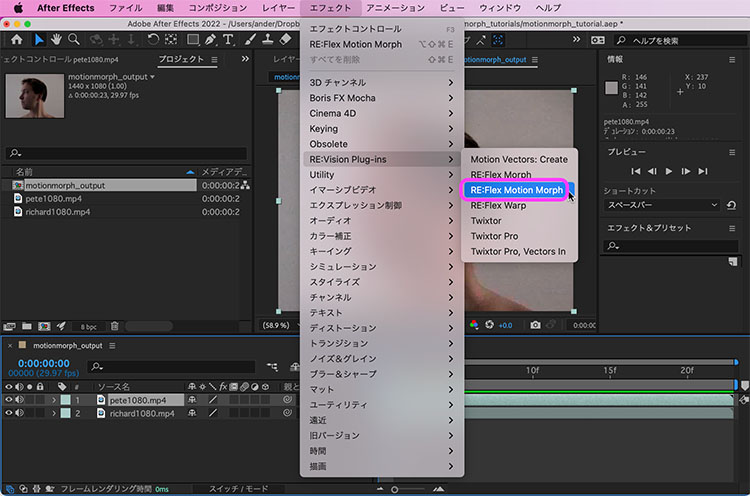
4.4 Configuring the RE:Flex Motion Morph Effect
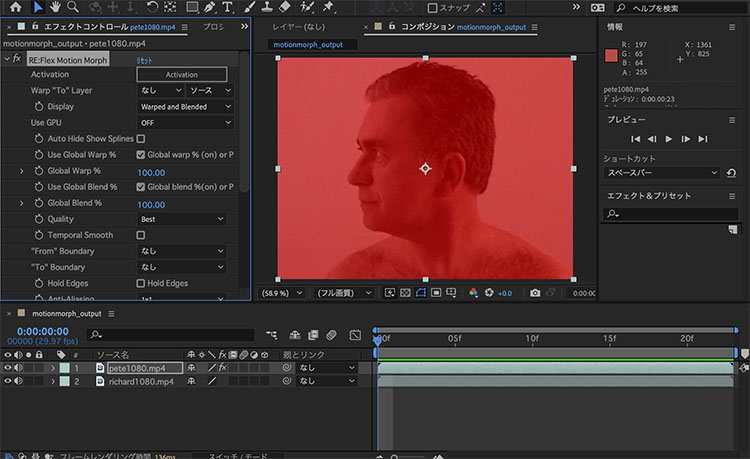
With “pete.mp4” (the footage at the start) selected in the timeline, click Effects Menu > RE:Vision Plug-ins > RE:Flex Motion Morph.
Immediately after applying Motion Morph, since no “To” layer has been specified, the image on the layer below is visible through the red transparency.
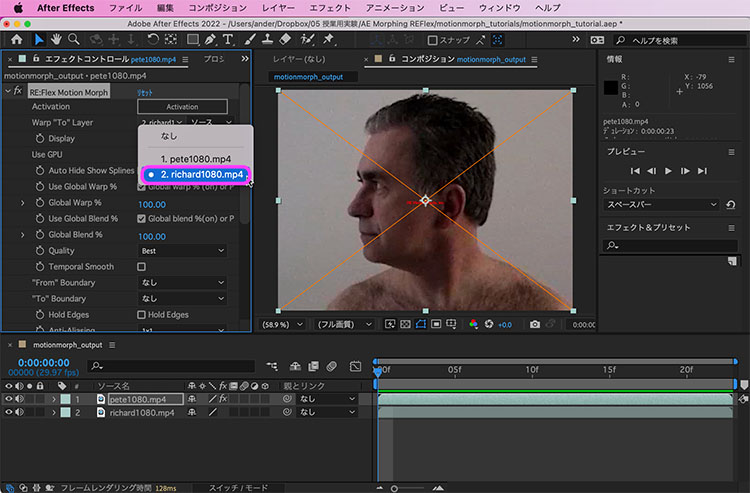
Set “rechard1080.mp4” as the Warp “To” Layer.
In the demo version, an “X” and the RE Vision Effects logo appear in the Composition panel.
4.5 Keyframe Settings for Global Warp and Global Blend
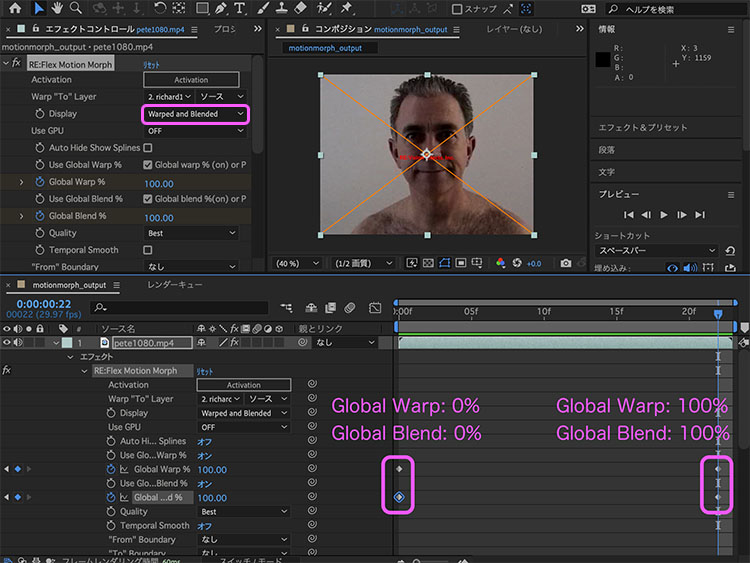
Add and configure keyframes for the RE:Flex Motion Morph effect as follows.
Global Warp: 0% Global Blend: 0% Global Warp: 100% Global Blend: 100%At this point, verify that the setting is “Display: Wrapped and Blended” (with transformation and blending). Play the preview to confirm that the transition behaves like a cross-dissolve.
4.6 Drawing a Mask Path Using UNwrapped “From”
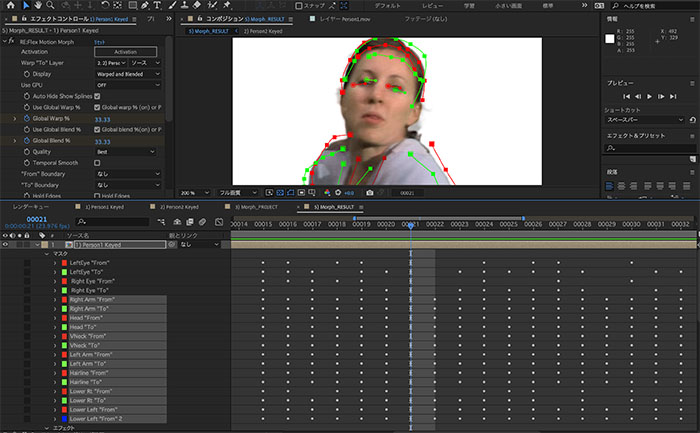
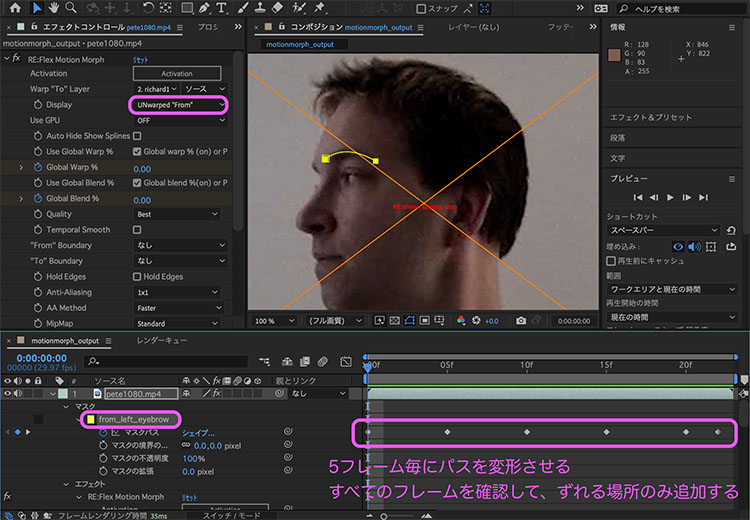
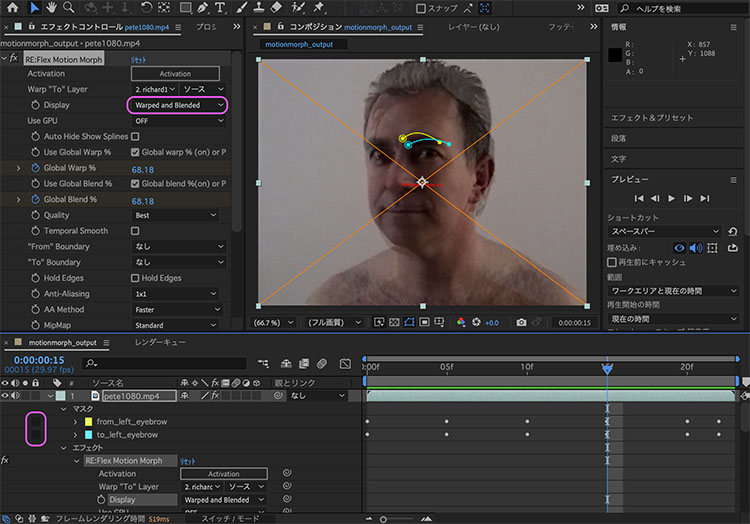
Display: With the view switched to “From” (unwrapped), draw the mask path.
The image below shows the path for the left eyebrow (renamed to “from_left_eyebrow” in the mask). Unlike still images, in video, the path must be animated so that it follows the subject throughout every frame. A useful tip is to draw the path based on the bone structure rather than trying to match the shape of the eyebrow itself.
Use the time indicator or timecode to shift and transform the animation in 5-frame increments. At the first frame (frame 0), turn on the stopwatch icon; from the next frame onward, simply moving the path will add keyframes.

4.7 Tips for Drawing Mask Paths
Note that while this works similarly to Illustrator’s Bézier curves, there are some differences. If you’re not familiar with Bézier curves, practice using the Bézier Curve Tutorial.
The following explains how to move and scale composition panels.
- Hand tool: Space bar + drag left
- Zoom tool: Scroll wheel
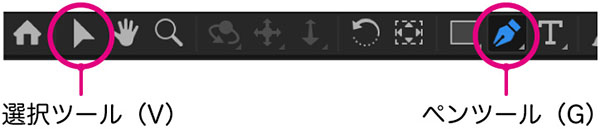
To draw and edit paths, switch between the Pen Tool and the Selection Tool as shown in the figure below.
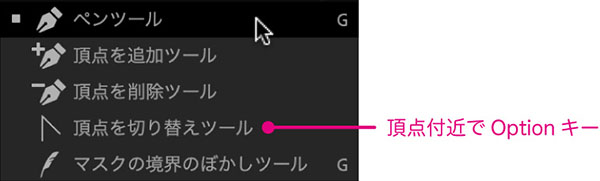
If you press and hold the Pen tool, you can switch between modes as shown below. In practice, the cursor automatically switches depending on the situation when adding or deleting vertices. Since you can also control the vertex selection tool using the Option key, you rarely need to use the menu to switch modes.
Once you’ve finished drawing a path, switch to the Selection tool. While you can move vertices using the Pen tool as long as you’re working around a selected vertex, since you may need to close the path, it’s safer to switch to the Selection tool to minimize mistakes.
When drawing mask paths, it’s easy to make mistakes until you get the hang of it. Unintentional clicks can create unwanted masks, and you might end up creating a shape layer with the Pen Tool while no layer is selected. You need to work carefully, keeping an eye on the timeline and using Cmd+Z to undo steps as needed.
4.8 Drawing a Mask Path with UNwrapped “To”
Display: Switch to “To” (unwrapped). The video switches to Richard.
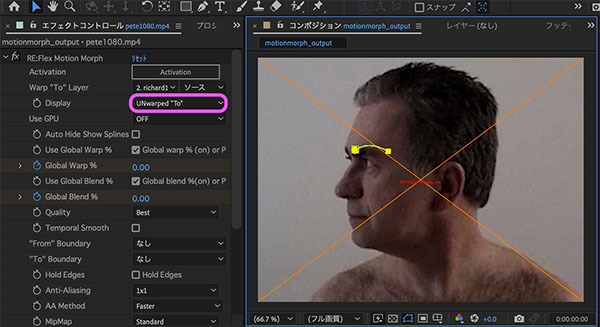
You can add a new mask path, but here we’ll copy the existing “from_left_eyebrow” path. You can copy and paste using Cmd+C and Cmd+V, but you can also do it all at once with Cmd+D (Duplicate).

Change the name of the mask path to “to_left_eyebrow.” Also, change the mask color to a high-saturation color that is different from “from_.”
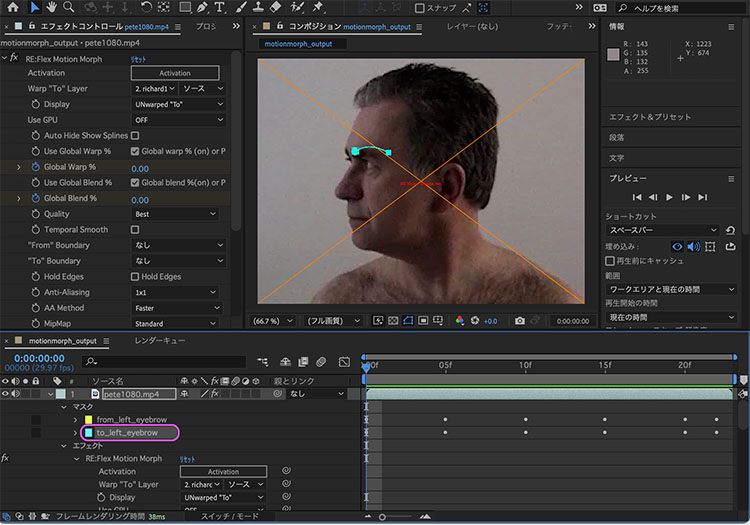
With the “from_left_eyebrow” point on the timeline locked, use the Selection Tool to adjust the “to_left_eyebrow” path to match Richard’s eyebrow (skeleton).

Move to the keyframes and adjust all the mask paths. If the motion in the “to_” sequence differs from that in the “from_” sequence, you may need to add keyframes that aren’t present in the “from_” sequence. The number of keyframes isn’t important; what matters is that the mask path animation is tailored to each subject.

4.9 Verifying “Wrapped” and “Blended”
Unlock the mask path so that both the from_ and to_ paths are visible. Switch to “Display: Wrapped and Blended” to check the morphing. Since only the eyebrows are visible so far, this is a work-in-progress.

4.10 Auto Hide/Show Splines
The “Auto Hide Show Splines” feature works in conjunction with the Display settings to toggle the lock status of the mask path (i.e., splines) layer. It is generally recommended to keep this feature turned on, as it makes it easier to edit the mask path.

When the power is on, the device operates as follows.
- Wrapped and Blended (with warping and blending): Hide all mask paths
- Unwrapped “From” (without warping): Show the “from_” mask path
- Wrapped “From” (with warping): Hide all mask paths
- Unwrapped “To” (without warping): Show the “to_” mask path
- Wrapped “To” (with warping): Hide all mask paths
“from_” and “to_” are determined solely by whether they are the first or second element in a pair of mask paths. The names are arbitrary.
4.11 Other Features
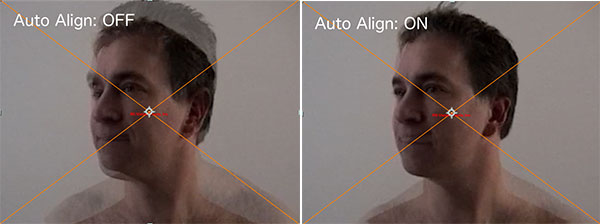
Auto Align
A feature that automatically analyzes and processes keypoints. It is turned off by default. While this may produce good results on its own for some footage, turning it on may cause distortion in other cases, so check whether it is on or off before making a decision.
(Reference) YouTube - RE:Flex for AE - Morph with Auto Align and Smart Blend
Hold Edges
A feature that prevents image edges from becoming distorted during morphing. This is turned off by default. You can leave it on if the subject is not too close to the frame, but if turning it on affects the morphing process too much, turn it off and handle edge processing using an image on a separate layer or similar method.
Match Vertices
A feature that allows you to control vertex positions using from_ and to_. Enabled by default. Turn this off if the changes in vertex positions differ between from_ and to_.
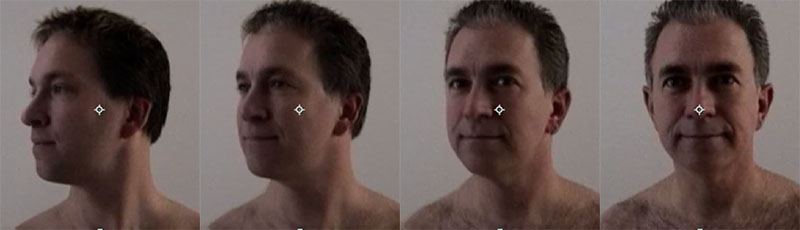
4.12 Final State
The final result is achieved through repeated creation and adjustment of mask paths. The figure below shows 20 mask paths, including the “from_” and “to_” paths. The process takes about 1 to 2 hours. Since the footage is less than a second long, it’s clear that this requires a significant amount of effort.
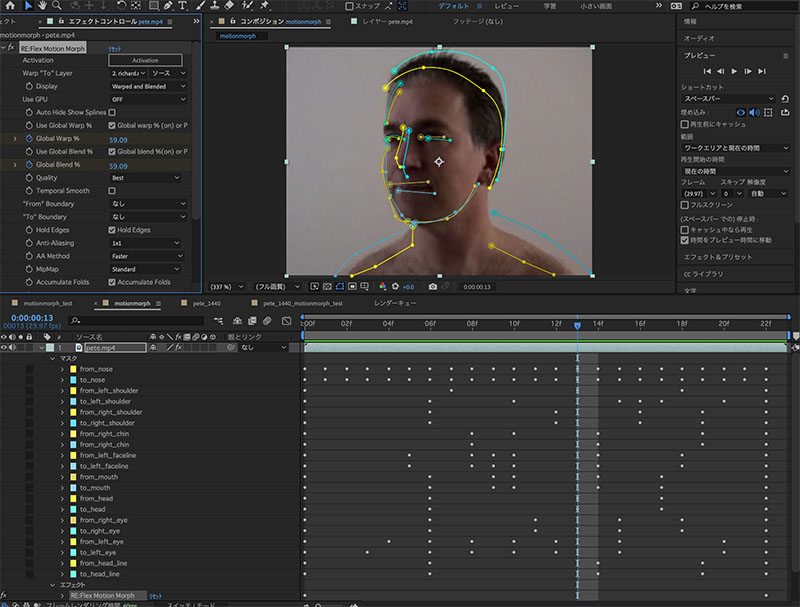
In this experiment, the image is slightly blurry because I skipped the detailed work on the eyes. If you add detailed mask paths to areas like the hairline, the morphing will look more natural.
5. Tutorial Videos
Sample data can be downloaded from the tutorial at https://help.revisionfx.com/album/24/#/tutorial-122.
In the video below, the subject is distorted using the Liquify Tool rather than RE:Flex. It serves as a useful reference for techniques such as hair rendering.
Morphing of intense full-body movements. Sample data can be downloaded from https://help.revisionfx.com/album/24/#/tutorial-194. When creating content like this, it is necessary to shoot at a high frame rate using a fast shutter speed. Processing the footage in slow motion and then converting it back to normal speed results in higher-quality video.