Media Encoder

1. The Role of Adobe Media Encoder
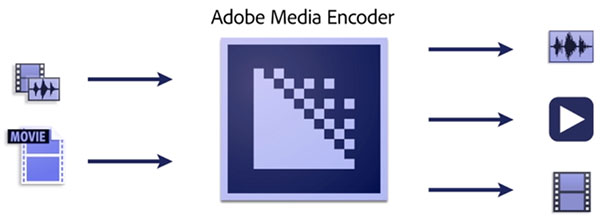
Although we often refer to it simply as “video data,” there are actually a wide variety of formats resulting from combinations of different standards, such as file formats (MPEG, AVI, QuickTime, etc.), resolutions (8K, 4K, 1080p, 720p, etc.), and frame rates (60 fps, 30 fps, etc.). Adobe Media Encoder is software that allows you to encode content into the appropriate format by adjusting various settings. It can convert not only video but also images and audio data.It is installed automatically when you install Adobe video software such as Adobe Premiere or Adobe After Effects.
2. Two Ways to Use It
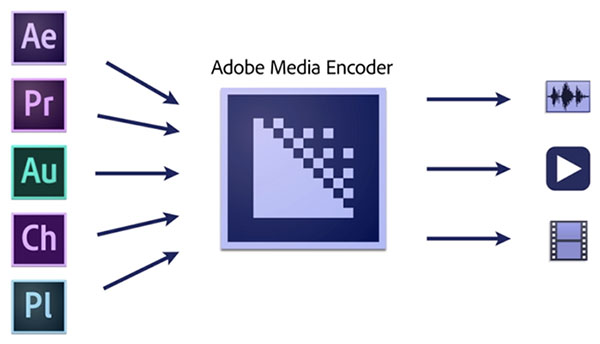
Adobe Media Encoder can be broadly categorized into two main uses: “media conversion” and “exporting from applications.”
2.1 Media Conversion
Convert existing media formats.
2.2 Exporting from the Application
While it is possible to export video directly from software such as Adobe Premiere or Adobe After Effects, Adobe Media Encoder is used when the software has limitations on exportable file formats or when batch processing is required.
(Reference) Overview of Adobe Media Encoder
3. Example MP4 Encoding Settings (Exporting from an Application)
Here, we’ll go over the settings for exporting to the commonly used MP4 format.
3.1 Selecting the Export Menu from the Application
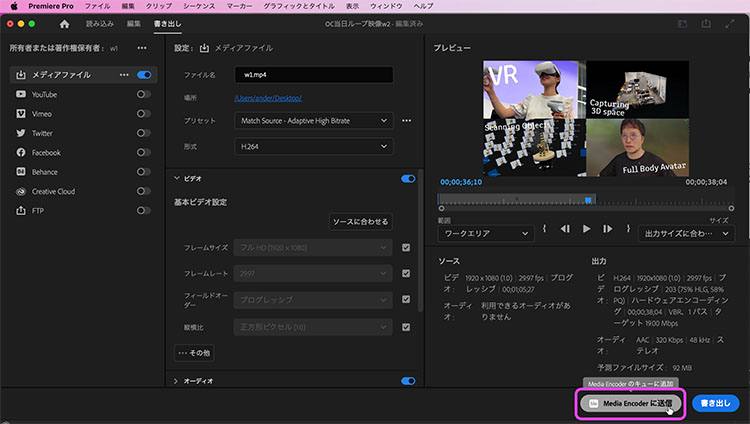
For Premiere Pro
The export screen was redesigned in an update released around April 2022. Selecting “File Menu > Export > Media” or clicking “Export” at the top of the UI will take you to the export screen.
While I often export video directly from Premiere, for longer clips or other projects that take a long time to encode, I let Media Encoder handle the process so I can move on to the next editing task.
Click “Send to Media Encoder” in the lower-right corner of the export screen shown below.
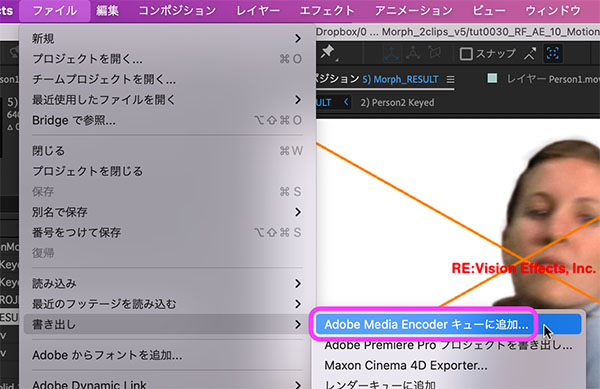
For Adobe After Effects
Click File Menu > Export > Add to Adobe Media Encoder Queue…
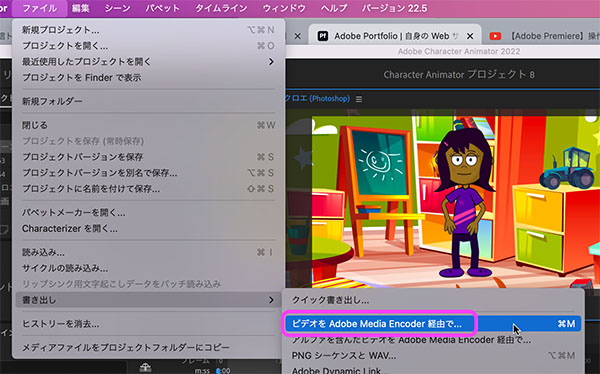
For Character Animator
Click File > Export > Export Video via Adobe Media Encoder…
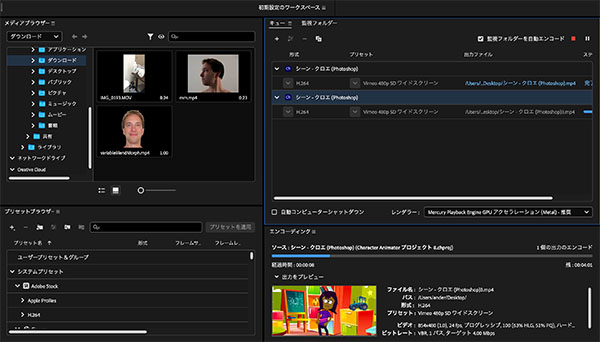
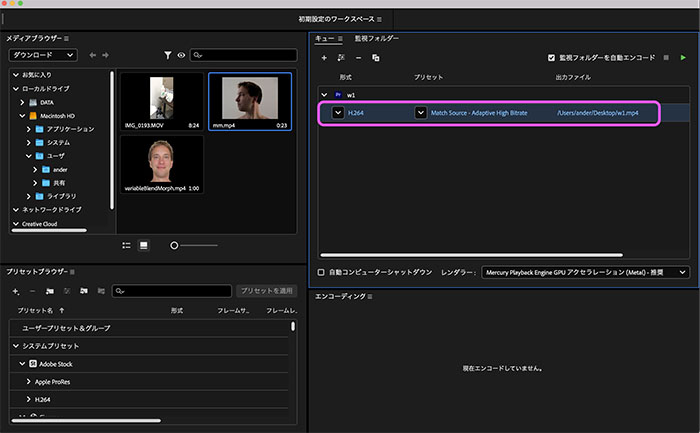
3.2 Open the Export Settings Screen from the Queue
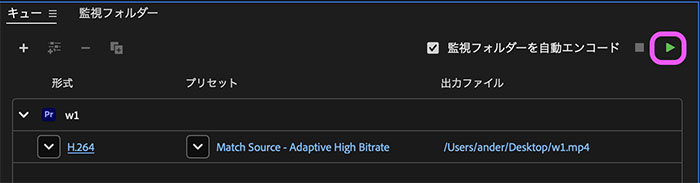
Media Encoder will launch, and a queue will appear in the Queue panel in the upper-right corner. Click the format name (H.264 in the figure below) or the preset name.
3.3 Export Settings
The export settings (see figure below) allow you to configure various options. Since video data formats vary widely, specialized knowledge is required to configure them in detail. While we won’t be making any changes here, we’ll cover the basics.
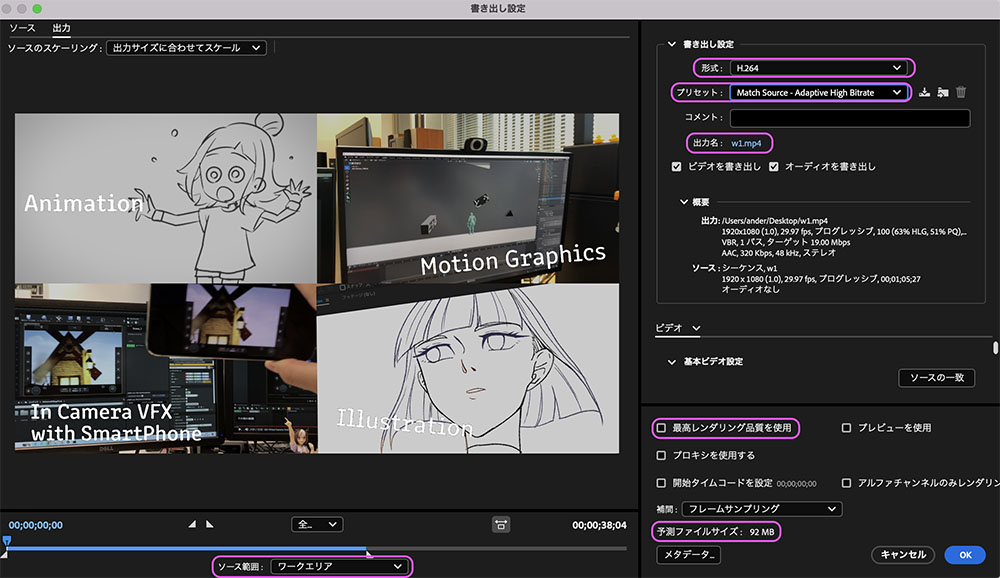
Format: H.264 (MP4 format). The current mainstream video compression format.
Presets: If you have already configured settings such as resolution within the application, you do not need to change them here; however, if you want to significantly alter the image quality, you can adjust the settings here.
Output Name: Setting the Save Location and File Name
Use highest rendering quality: Leave this checked. It doesn’t seem to improve image quality much, but just in case (needs further investigation).
Estimated file size: Since file size requirements may be specified when submitting work, be sure to check this field when configuring your settings.
Source range: Typically, you can leave this as the work area, but you can also change the export range here.
Once you’ve configured the necessary settings, click the OK button in the lower-right corner.
3.4 Encoding
Click the play icon on the right side of the queue panel. If there are multiple queues, they will be batch-encoded consecutively.
Progress is displayed on the encoding panel.
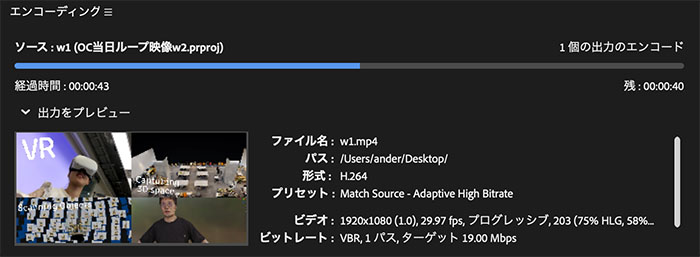
Once encoding is complete, the file will be created in the specified location.