Lightning Doodle
1. What is Lightning Doodle?
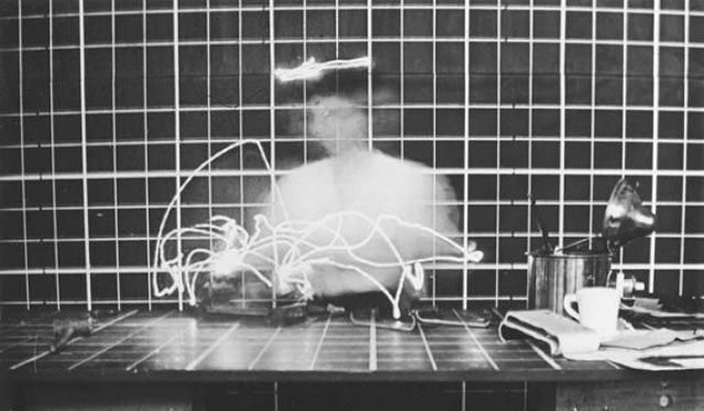
Light Doodle, also known as lightpainting or light drawing, refers to photographs created using the trails of light.This technique, which involves slowing the camera’s shutter speed to capture the trails of light, is said to have originated around 1914 when Frank Gilbreth, a pioneer of motion study, and his wife, Lillian Moller Gilbreth, used small lights to study the movements of workers while keeping the camera shutter open to take photographs. (See figure below)
Although artists created works using this technique even during the era of film photography, the advent of digital cameras and LED lights in recent years has brought it back into the spotlight, leading to the creation of highly expressive works.While advances in CG technology now make it possible to create such effects using only a computer, “Lightning Doodle”—which utilizes simple tools like digital cameras and flashlights along with gestures (physical expression)—allows both children and adults to create interesting effects relatively easily. As a result, it is widely used in various creative applications, such as artworks and wedding videos.
2. Various Works
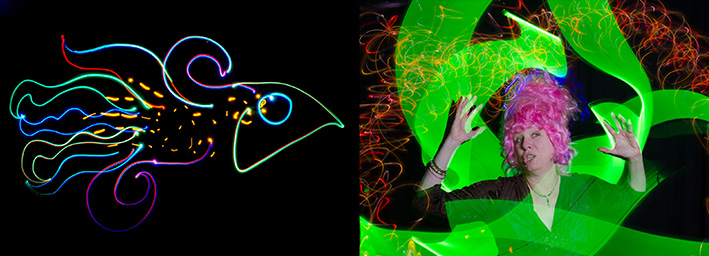
Japanese artist TOCHKA gained attention for creating a video work (PiKAPiKA) using this technique.
Works created during TOCHIKA’s workshop in Kanazawa.
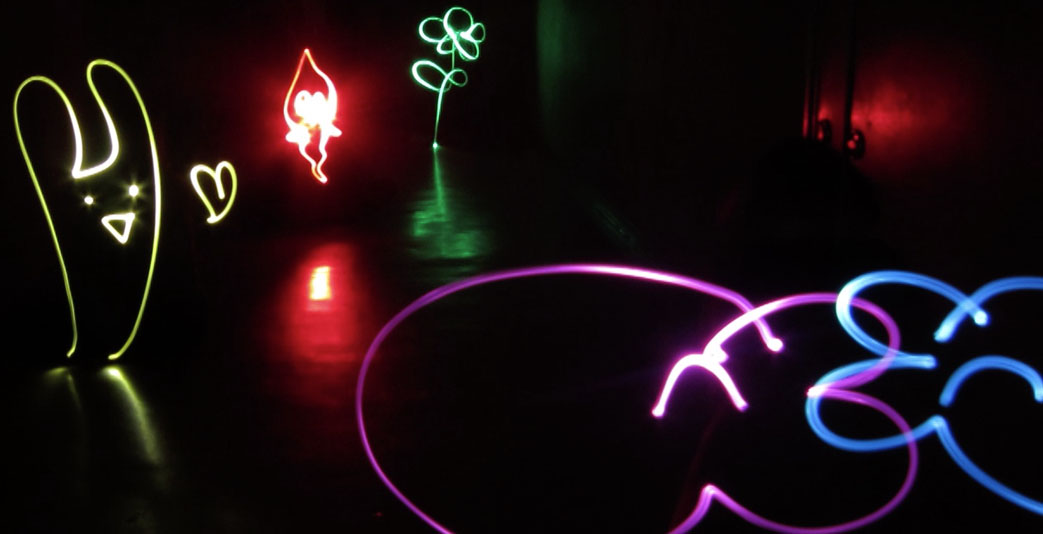
As this technique has spread around the world, a wide variety of works have been produced.
A behind-the-scenes video has also been released. Light Warfare - Behind the Scenes
Lightning Doodle by TOCHKA during the day.
3. Equipment Needed for Photography
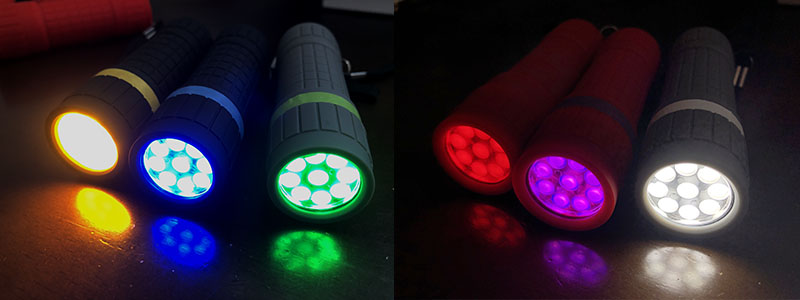
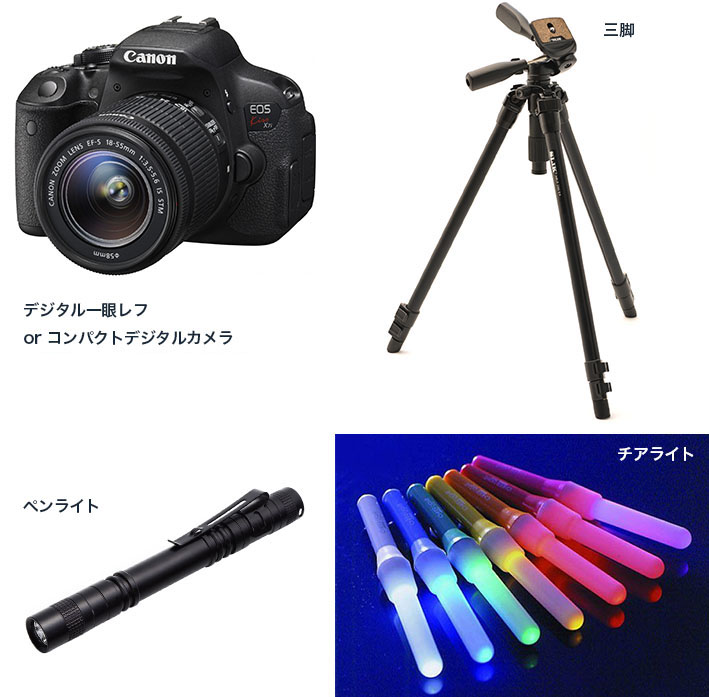
When shooting with a slow shutter speed, be sure to use a tripod, as handheld shots will be very blurry. A mirrorless or DSLR camera is best, but you can also use a compact digital camera as long as it allows for slow shutter speeds.
While penlights are ideal for drawing lines, you can also use the stick-shaped lights commonly found at concerts to create aurora-like patterns. Experimenting with different types of lights can produce some interesting effects.
4. Camera Basics
While there is other knowledge required to use a DSLR camera, this section will focus solely on topics related to shooting with a slow shutter speed.
- Shutter speed: https://www.sony.jp/support/ichigan/enjoy/photo/word9.html
- Aperture: https://www.sony.jp/support/ichigan/enjoy/photo/word6.html
- Exposure and exposure compensation: https://www.sony.jp/support/ichigan/enjoy/photo/word5.html
5. Camera Settings Overview (Nikon D90)
Here’s how to configure the settings on the Nikon D90. Although this is an older model, the process is similar for other Nikon cameras, so I’m including it here for reference. Instructions for the Canon EOS Kiss (X7i) are available on my old website.
This section assumes you already understand the basic operations of DSLR cameras and focuses solely on the settings required for shooting with a slow shutter speed.
5.1 Nikon D90 Manual (for reference)
https://www.nikon-image.com/support/manual/d_slr/D90_NT(10)02.pdf
5.2 Basic Settings
- Image Quality: M or S. If set too high, it will use up too much SD card space and put a strain on your computer during editing.
- Auto ISO: OFF
- ISO: 200. Adjust as needed between Lo0.3 (equivalent to ISO 80) and Lo1.0 (equivalent to ISO 50)
- White Balance: Fixed. Using a fixed setting rather than Auto results in more consistent color tones
- Flash: Off. Since we’re using Shutter Priority (S) or Manual (M) modes, you’ll need to operate the flash manually (using the button near the lens on the camera body), so no separate settings are required
- Focus: Manual (switch on the camera body). Unlike recent mirrorless cameras, it is difficult to focus using only the LCD display, so you will need to check through the viewfinder or adjust based on your intuition after reviewing the image. We do not recommend using Auto Focus for this shoot, as it is highly likely to result in blurry images.
- Lv: None. In Live View (Lv), it takes time to determine the exposure when the shutter is half-pressed, so you should generally check through the viewfinder. It is more difficult to use than recent mirrorless cameras.
After previewing the image on the monitor, you must half-press the shutter button to put the camera in shooting mode before you can change the shutter speed or aperture.
5.3 Shutter Priority Mode (Recommended)
- Turn the dial on the upper left of the camera body to set it to S (Shutter Priority)
- Use the dial on the lower right of the camera body to set the shutter speed to approximately 5–8 seconds
- Set the exposure compensation dial on the upper right of the camera body to approximately -5
- If the image is too bright, either move to a darker location or use an ND filter on the lens.
5.4 Manual Mode
- Turn the dial on the upper left of the camera body to switch to M (Manual) mode.
- Use the dial on the front right of the camera body to set the shutter speed to approximately 5–8 seconds.
- Use the dial on the back right of the camera body to set the aperture to approximately f/22.
- If the image is too bright, either move to a darker location or use an ND filter on the lens.
5.5 Handling the Lens
The Nikon D90 is equipped with an AF-S DX NIKKOR 18-200mm f/3.5-5.6G ED VR II lens.
- Focus: Manual. Although this is also available on the lens, it’s not a problem as long as you set the camera body to M mode.
- VR (Vibration Reduction): ON. Since I’m using a tripod, this isn’t really necessary.
- VR Mode: NORMAL
- LOCK: 18mm. This is optional, but since I often shoot in low light, locking it at 18mm is safer.
6. LED Light Rental
We have 6-color LED lights available for rent. We have 5 sets in stock. Each LED light requires 3 AA batteries.