Metashape
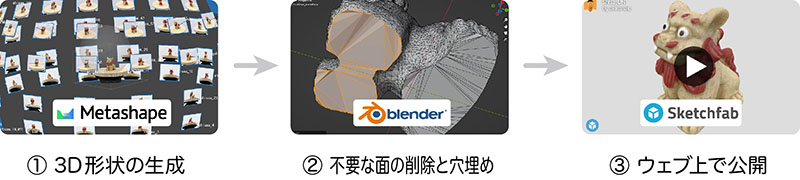
1. Workshop Flow
This exercise will proceed as follows.
2. What is Metashape?

Photogrammetry software developed and sold by Agisoft. It is available in Professional and Standard editions, and the Educational version is half price. Compatible with Windows, Mac, and Linux.
The distributor in Japan is Oak Co., Ltd. You can find detailed information, including usage instructions and techniques, in Japanese on Oak’s website. https://oakcorp.net/agisoft/
3. Comparison of Photogrammetry Software Accuracy
In addition to Metashape, other photogrammetry software options include RealityCapture, 3DF Zephyr, and Autodesk Recap. In professional settings, RealityCapture seems to be the most commonly used. However, RealityCapture is available only for Windows, and because it has high GPU requirements, it does not run on just any PC.
Since the Department of Industrial Art uses a mix of Mac and Windows computers, we conduct our practical exercises using Metashape, which is compatible with both platforms.
4. Installing Metashape and Launching the Trial Version
This section provides an overview of the Mac version.
4.1 Downloading the Installer
https://oakcorp.net/agisoft/standard/
Go to the URL above and download the installer for your operating system. As of December 2023, version 2.0.3 is the latest release. It is approximately 90 MB.
4.2 Installation Procedure
Double-click the downloaded DMG file.
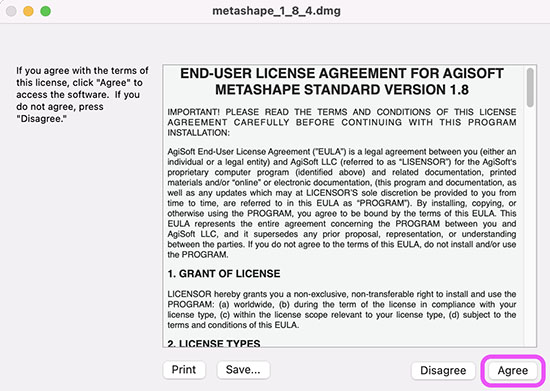
Click “Agree” on the license agreement screen.
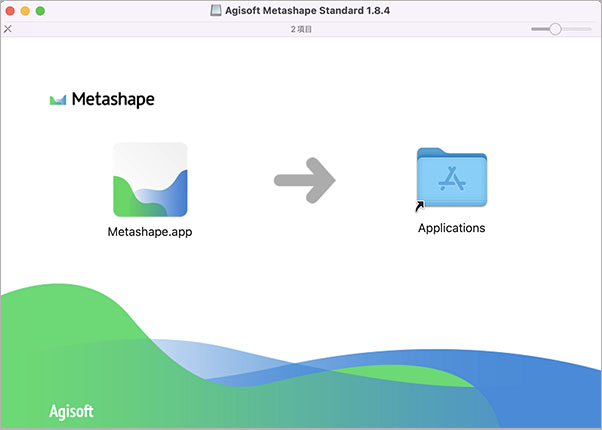
Agisoft Metashape Standard *** The drive will mount. At the same time, the window shown below will open. Drag the “Metashape.app” file on the left and drop it into the “Applications” folder on the right.
4.3 Launching the Trial Version
Launch Metashape.app in the Applications folder.
Metashape has three startup states.
- Purchased: Enter license key
- Trial version (30 days): Saving and exporting are allowed
- Demo mode: Saving and exporting are not allowed
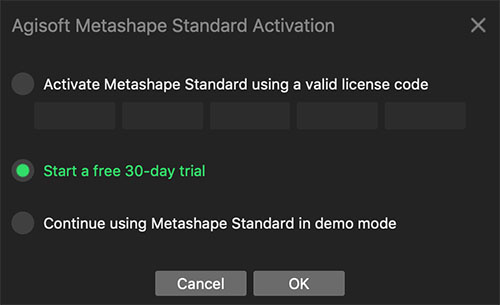
This time, I’ll use the 30-day trial version. Select “Start a free 30-day trial” as shown below, then click the OK button.
*You must create an assignment before the trial period ends.
To check your license again, go to the Help menu > Activate Product…
5. Preparing the Footage
5.1 Distribution Data (This Method)
We will distribute practice data captured in advance using a turntable-type 3D scanning system during class.
shiisaa_20220827.zip (USB flash drive or GigaFile)

5.2 Reference: Official oakcorp.net Tutorial Data
https://oakcorp.net/agisoft/try/
The URL above provides access to tutorials and sample data. It also covers topics such as masking, which will not be covered in this exercise.
6. Workflow
6.1 General Workflow
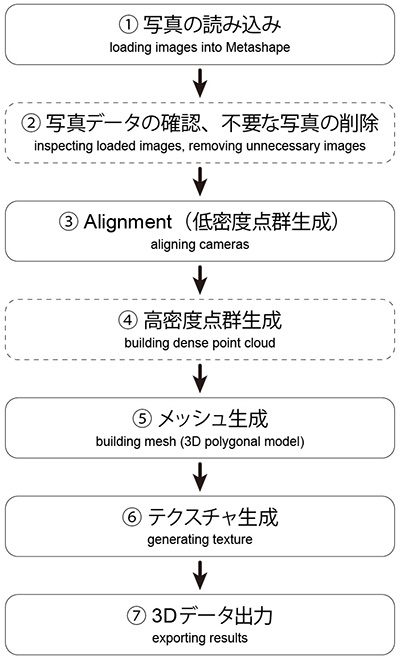
The figure below was created based on page 12 of Chapter 3, “General Workflow,” in the User Manual Standard Edition, Version 1.8.
Normally, we would often perform step ④ (Build Dense Cloud), but since high-resolution photos were captured during the shooting phase for this exercise, there are no issues with the region settings. To reduce processing time, we will proceed directly to step ⑤ (Mesh Generation) after step ③ (Alignment). As for step ②, we are distributing data that contains no unnecessary information, so we will not perform this step.
6.2 Understanding the Processing Process
Photogrammetry processing takes anywhere from several tens of minutes to several hours per step. Therefore, we often reduce the accuracy or quality of each step to shorten the processing time. It is also necessary to consider this in light of the final objective. For example, if the goal is to create human avatars for a video game, 3D scanning serves merely as a foundation for model creation; if retopology and mesh reconstruction are to be performed manually during post-processing, a simplified mesh generation is sufficient.
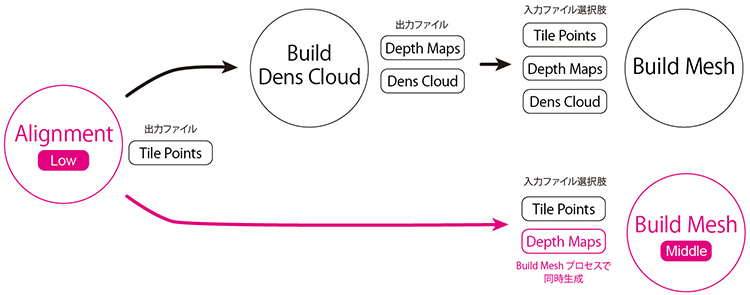
The figure below shows an analysis of the Metashape processing workflow. Each step offers multiple options, so it is necessary to consider the procedure that best suits the project’s objectives. The reddish-purple path indicates the workflow we will follow in this instance.
7. Loading Photos
7.1 Launching Metashape
Since Metashape’s UI isn’t particularly complicated, I’ll explain it as we go.
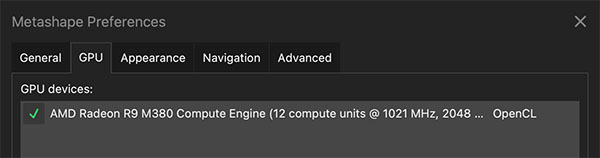
7.2 GPU Settings
If your computer has a GPU, configure the GPU settings.
In the Metashape menu, go to the GPU tab, check the box next to the GPU listed under “GPU devices,” and click the OK button.
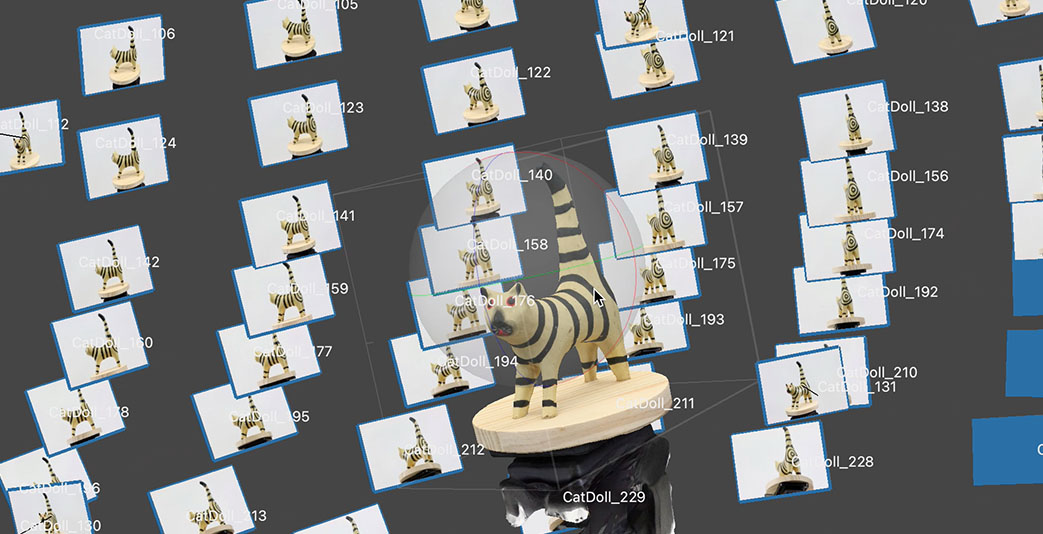
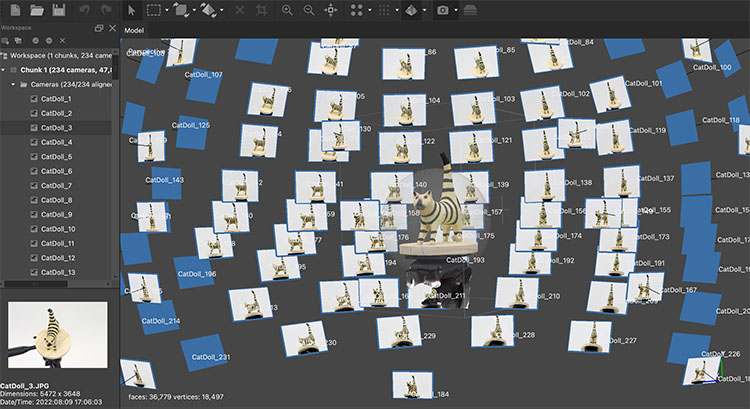
7.3 Loading Photos
Right-click “Chunk 1” in the Workspace panel on the left, then click Add > Add Folder. If you’re selecting individual photos, use “Add Photos,” but if you have hundreds of photos, it’s more efficient to import them by selecting “Add Folder” to import them in batches.
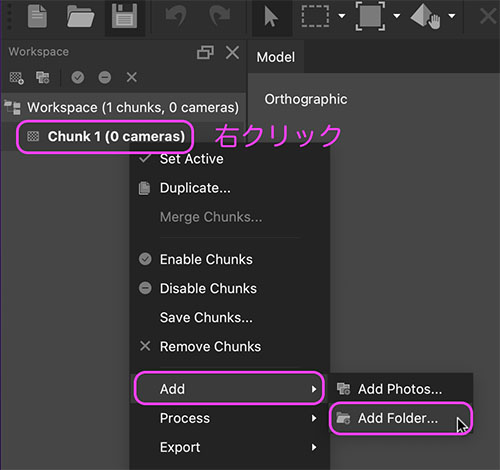
“Chunk” means “block” in Japanese. In Metashape, photo data is organized into chunks for processing. In this case, we will use only one chunk.
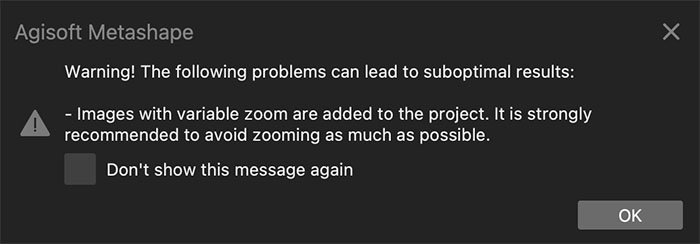
The warning shown below may appear when loading the image; simply click “OK.” We recommend avoiding the use of the lens zoom function when taking photos. This is because photos taken without using the zoom—i.e., those with the same field of view—tend to yield better analysis results.
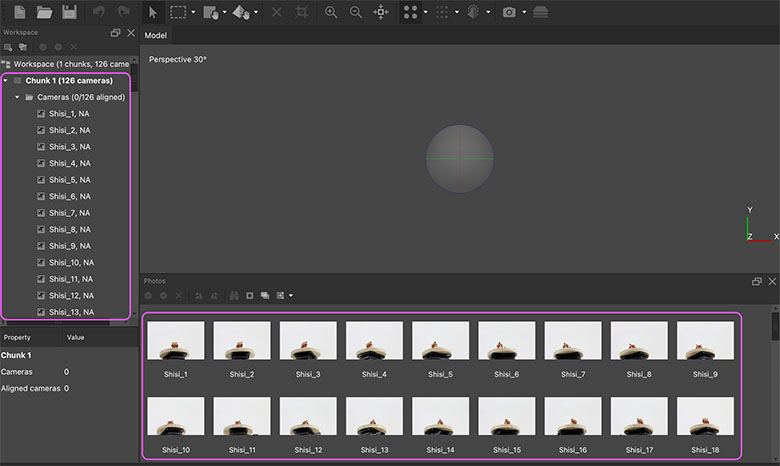
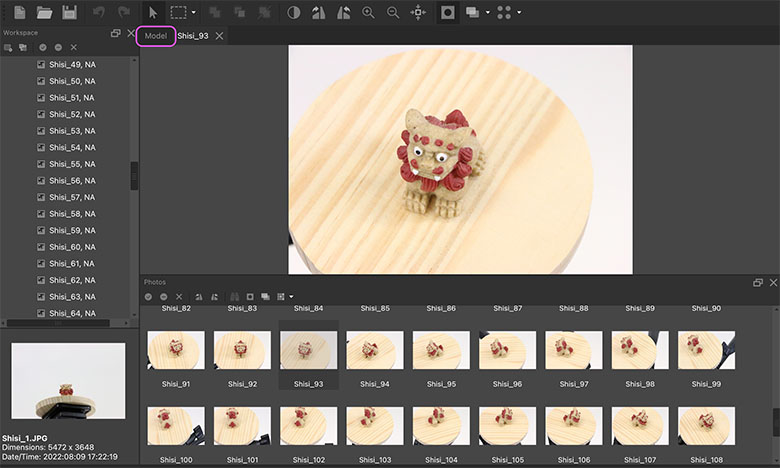
Once the import is complete, you can view the photo data in the Workspace panel and Photos panel, as shown below. After importing, you can delete unwanted photos or exclude them from processing. Since the practice data contains only usable photos, no action is required.
You can enter photo preview mode by double-clicking a thumbnail in the Workspace list or the Photos panel. The menu will also switch to photo editing mode. While you can adjust brightness and mask areas you don’t want to analyze, we won’t cover those features in this guide.
To return to the 3D view, click the Model tab (shown in purple below).
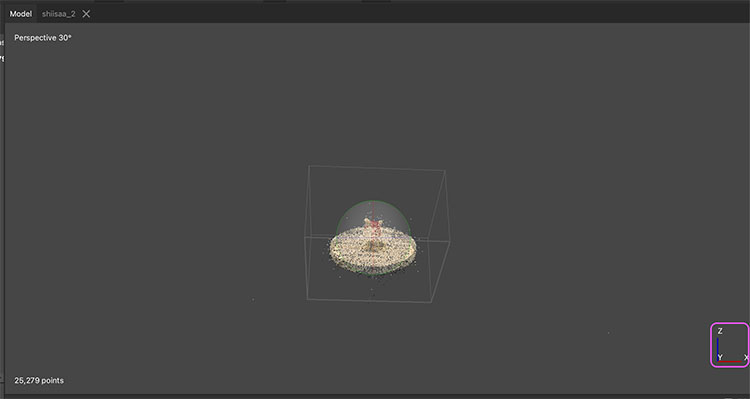
8. Alignment (Generation of Low-Density Point Clouds)
In photogrammetry analysis, feature points in multiple images are analyzed to determine the camera’s position and orientation. This process is called camera alignment.
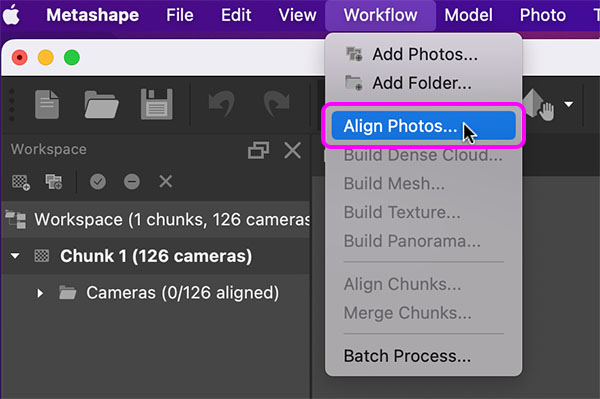
With the target chunk selected (indicated in bold; if there are multiple, double-click the target chunk), click Workflow Menu > Align Photos.
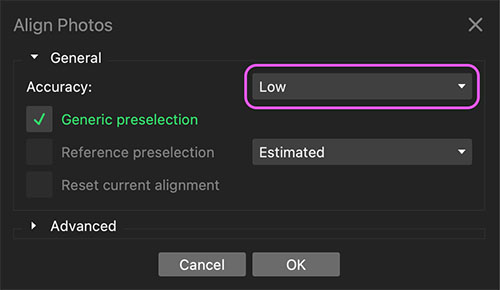
The Align Photos settings window appears. Since the Accuracy setting affects the density of the low-density point cloud, it is best to set it to a higher value if you want to fine-tune the Region Box. However, since we are using high-resolution image data in this case, which ensures a sufficient number of points, we will set it to “Low” to save time.
When you click OK in the figure above, the process will start and “Processing in progress” will be displayed.
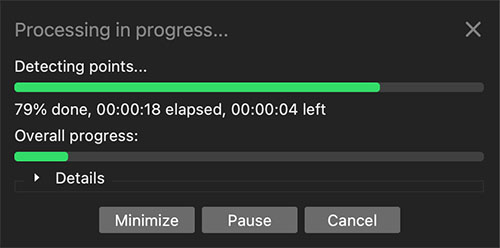
A low-density point cloud, which is a set of feature points, is generated simultaneously with the camera alignment.
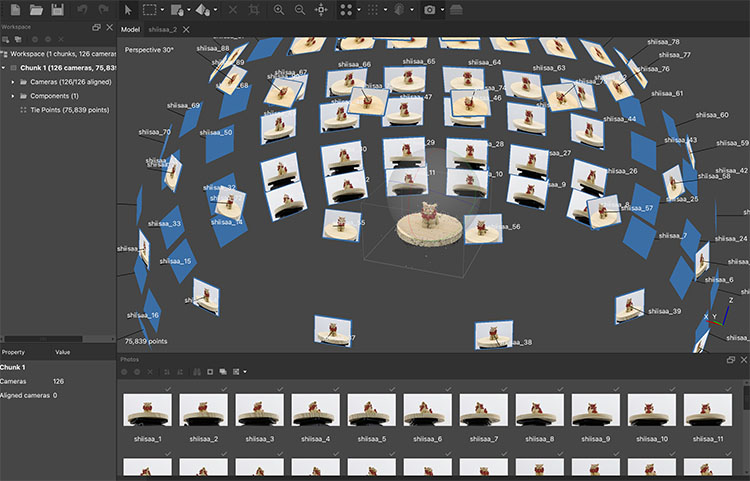
Toggle Camera Preview
Use the following methods to show or hide the camera preview and camera thumbnails.
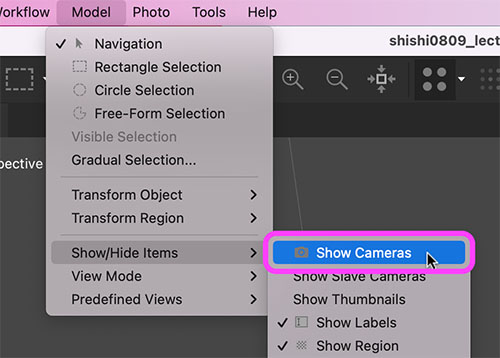
- Model menu > Show/Hide Items > Show Cameras
- Model menu > Show/Hide Items > Show Thumbnails
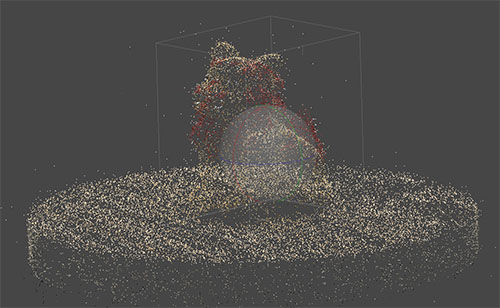
9. Adjusting the Region Box
Since we’ll remove the unnecessary parts during post-processing in Blender, a rough adjustment here is sufficient. Adjusting the Region Box in Metashape can be a bit confusing and takes some getting used to, so you can leave the adjustments to Blender. However, if you don’t set the Region Box, the entire area will be processed, which will take longer.
9.1 Hiding the Camera Preview
Go to the Model menu > Show/Hide Items > Show Thumbnails to hide the camera preview.
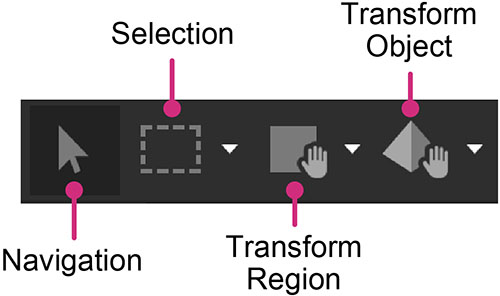
9.2 Switching Operation Modes
Tap the icon at the top of the UI to switch between operation modes. We won’t be using Selection mode this time. It takes some getting used to, especially since left-click dragging functions differently in each mode. To adjust the view, you must always return to Navigation mode.
9.3 Mouse Operations in Navigation Mode
- Left mouse button: Rotate view
- Right mouse button or middle mouse button: Move view (common to Navigation, Move Region, and Move Object modes)
- Mouse wheel: Zoom view (common to all modes)
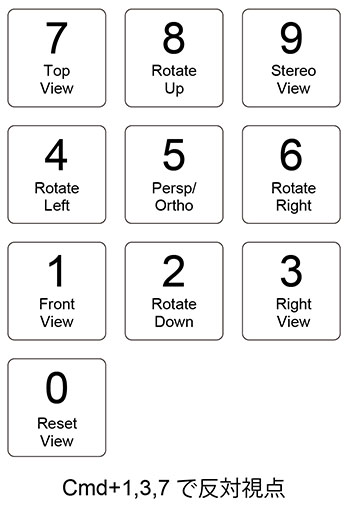
9.4 Switching Viewpoints (Shortcuts Only)
You can switch the view by pressing the number keys on the numpad or keyboard. While there are some differences, it’s quite similar to Blender.
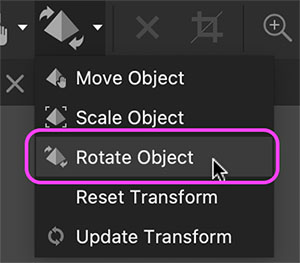
9.5 Transform Object > Rotate Object Note: This feature is somewhat difficult to use
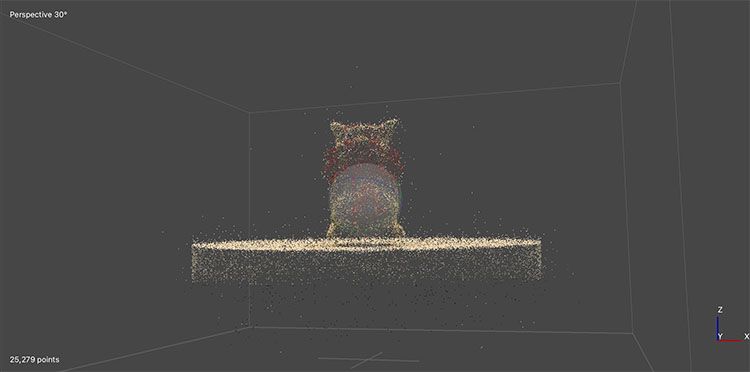
Switch to the front view (Num Pad 1).
Verify that the coordinate display looks like the one shown in the lower right. Metashape’s coordinate system is oriented the same way as Blender’s.
Select “Rotate Object” from the “Transform Object” menu.
Use a left-click drag to adjust the object’s orientation and level. You cannot rotate the view. To rotate the view, switch to Navigation mode.
Metashape doesn’t support grid display on the XYZ plane. Since you can’t manipulate the object and rotate the view simultaneously, it’s extremely difficult to align them perfectly. When using “Rotate Object,” avoid using the gizmo; instead, try dragging directly in the viewport—this seems to rotate the object parallel to the screen, which might make it easier to adjust. If it’s too difficult, leave it to Blender for post-processing.
9.6 Transform Region
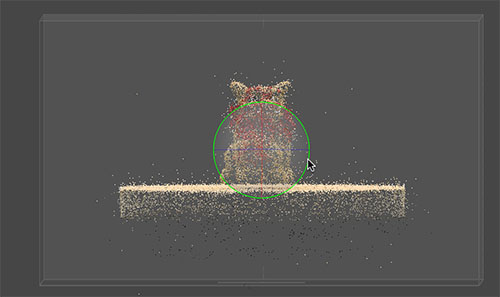
While in Navigation mode, press the Numpad 5 key to switch to Orthographic view.
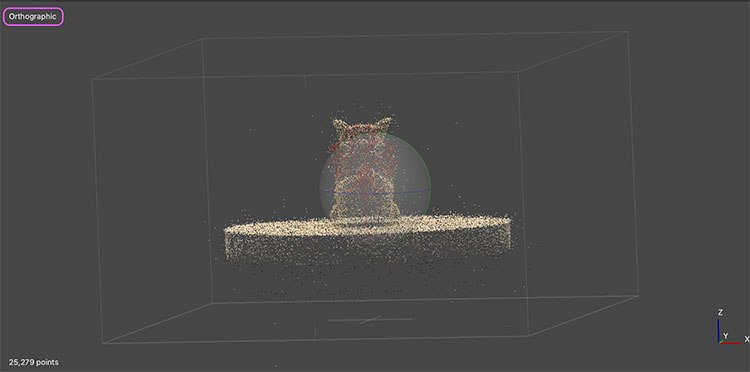
While rotating and resizing regions and switching viewpoints, adjust the selection to include only the parts necessary for mesh generation.
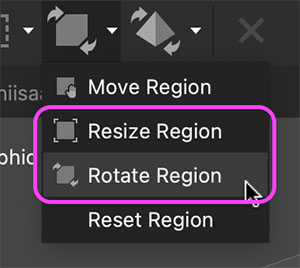
Working with “Rotate Region.” You can rotate the region perpendicular or parallel to the screen by dragging the gizmo.
Working on Resize Region.
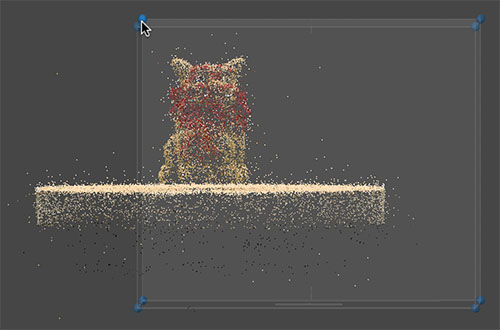
Set the region to exclude unnecessary parts.
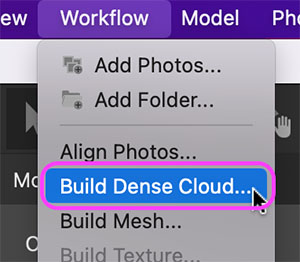
10. Build Dense Cloud (Generating a Dense Point Cloud)
Omitted from the exercise
Click Workflow > Build Dense Cloud. You can also skip this step and go directly to Build Mesh.
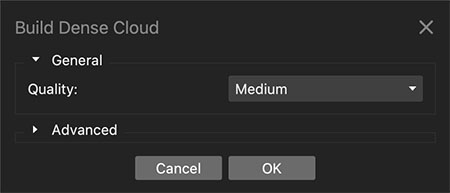
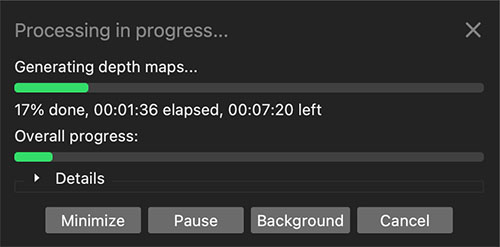
Generating a high-density point cloud takes anywhere from several tens of minutes to several hours. The time required depends on the capture resolution, quality settings, and the performance of the computer being used. Since this process takes too long during the practice phase, we will skip it.
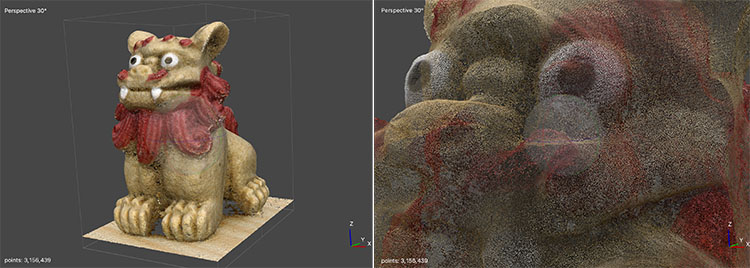
The figure below shows a high-density point cloud with the “High” setting. It contains over 3 million points. At first glance, it looks like a mesh, but it is actually a dense point cloud.
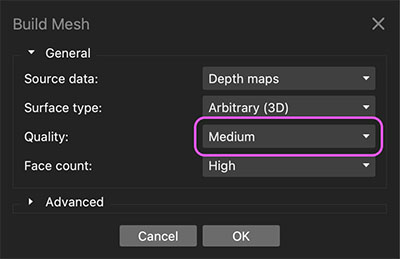
11. Mesh Generation
Click Workflow menu > Build Mesh.
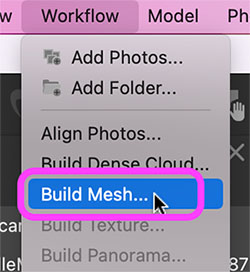
In the settings window, change the Quality setting to Medium. If you have time, try setting it to High or higher.
12. Texture Generation
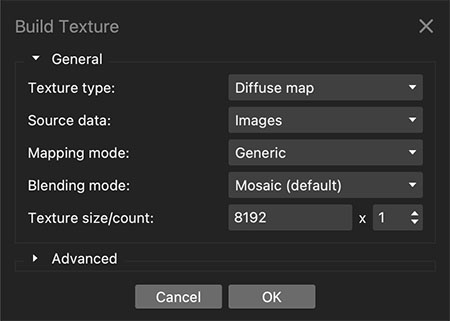
Click the “Workflow” menu > “Build Texture.”
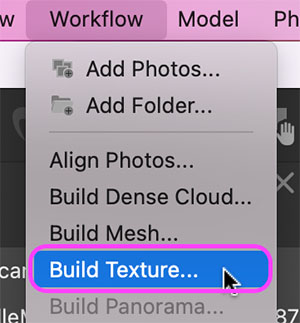
Click OK without changing the settings.
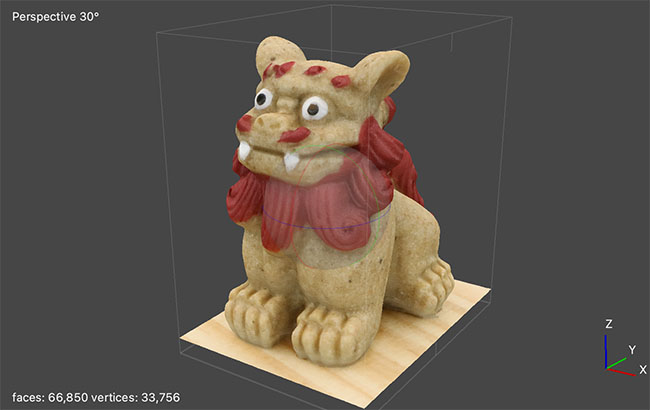
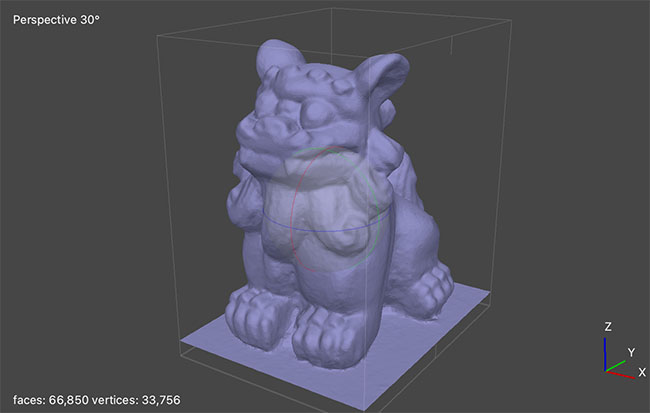
When viewed from below, you can see that the object is a thin shell with no interior and holes in it. Since Metashape does not have a feature to fill such holes like RealityCapture does (though it can handle small holes on the mesh surface), I fill the holes in Blender during post-processing.

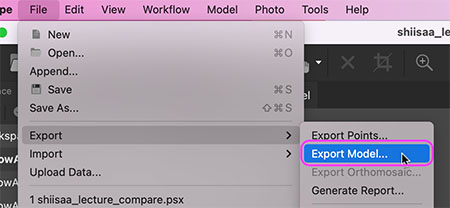
13. Exporting Mesh Data with Textures
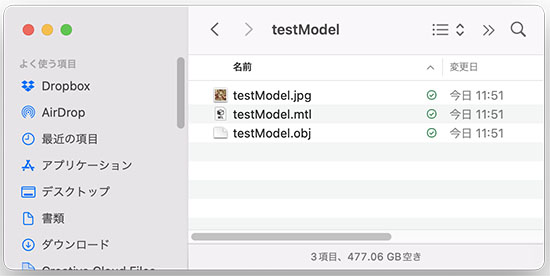
Three files will be generated, so create a new folder in advance to save them. Click File menu > Export Model.
Specify the save location, enter a filename, and click the Save button.
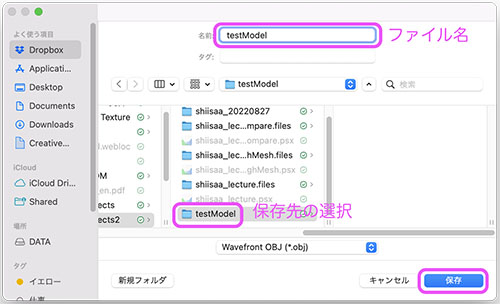
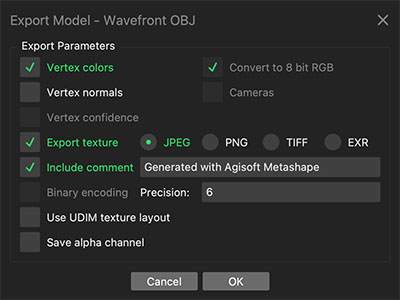
The “Export Model” settings window appears. Here, simply click “OK” to keep the default settings. The “Include comment” option is not strictly necessary, as it only adds a comment at the beginning of the OBJ file.
OBJ, MTL, and JPG files are generated.
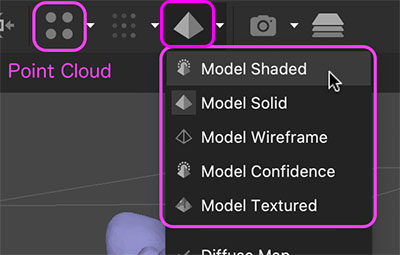
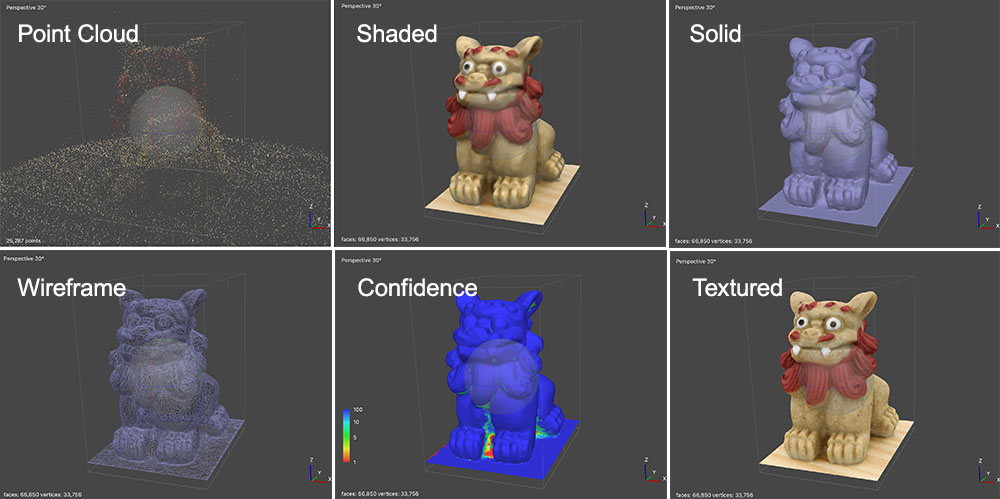
14. Switching Viewport Displays
You can switch the viewport display using the icon shown below at the top of the UI.