Audio Waveform Editing

1. Introduction
1.1 Waveform Editing for Non-Musicians
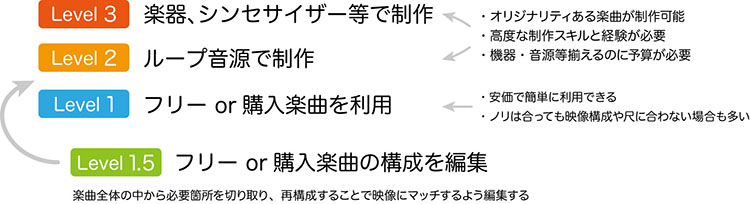
Creating music from scratch requires advanced production skills and experience. Since very few people are capable of handling both video and music production simultaneously, many opt to outsource the work or purchase royalty-free music tracks. Even if you find a track that matches your vision among existing options, it may not fit the video’s structure or runtime. In this section, we’ll explain how to adapt existing tracks to suit your video by editing them—even without musical knowledge (see Level 1.5 in the figure above).
1.2 Using Adobe Audition
Adobe Audition offers both “Waveform” mode (non-destructive editing) and “Multitrack” mode (destructive editing), which allows you to create music using looped audio and other sources. In this guide, we will focus solely on Waveform editing mode. In addition to the methods described here, the software also supports advanced editing features such as equalization, noise reduction, and normalization; however, using these features requires knowledge of audio data.
(Reference)
- Adobe Audition: A Beginner’s Guide
- [Audio Editing] What You Can Do with Adobe Audition and Useful Tips
1.3 Editing by Sample
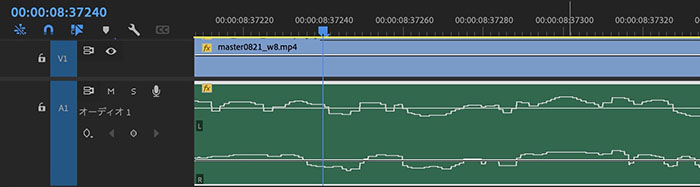
In Audition, you can edit audio data at the sample level based on the sample rate (e.g., 1/44,100 of a second at 44.1 kHz). As described later, you can also edit at the sample level in Premiere by changing the settings, but since it is difficult to examine the waveform in detail within Premiere’s UI, we will perform the editing in Audition here.
(For reference)
1.4 Editing by Sample in Premiere
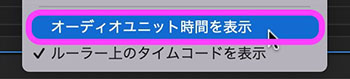
By default in Premiere, the timeline displays frames as the smallest unit, based on the sequence’s frame rate (such as 30 fps). However, you can enable editing at the sample level by right-clicking on the ruler in the Timeline panel and selecting “Show Audio Unit Time” from the menu that appears. Since this makes video editing more difficult, you should revert to the default setting.
(Reference) Tips for Mastering Premiere Pro’s Audio Features: Displaying Audio Units
2. Preparing the Music Data
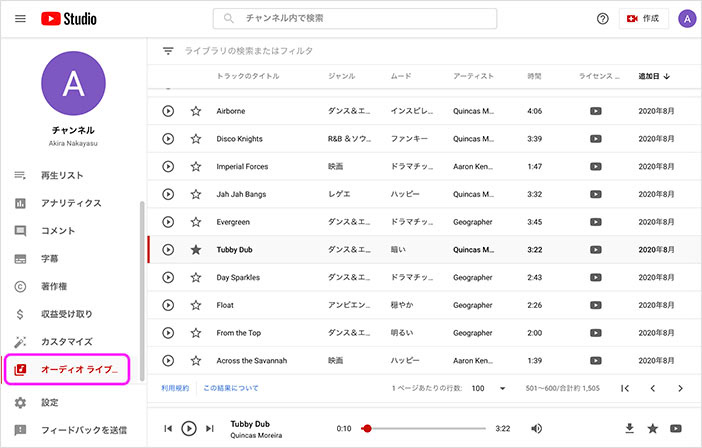
2.1 YouTube Studio Audio Library
Use the YouTube Studio audio library, which offers royalty-free music.
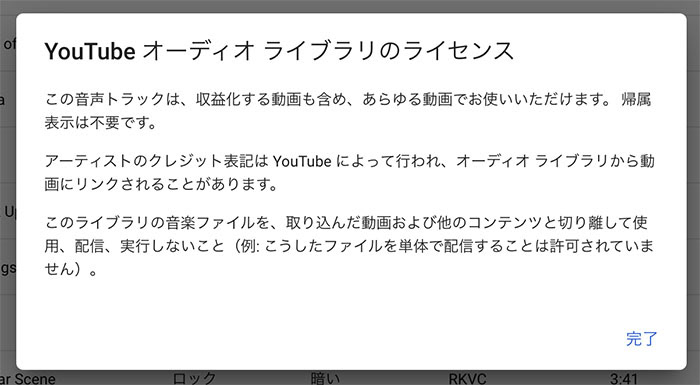
2.2 Important Notes Regarding Licenses
Various stock media sites offer not only music tracks but also a wide range of libraries containing still images and videos. Each piece of content is subject to specific licensing terms, and the conditions regarding usage, distribution, and credit attribution vary depending on the content, so be sure to review them carefully before use.
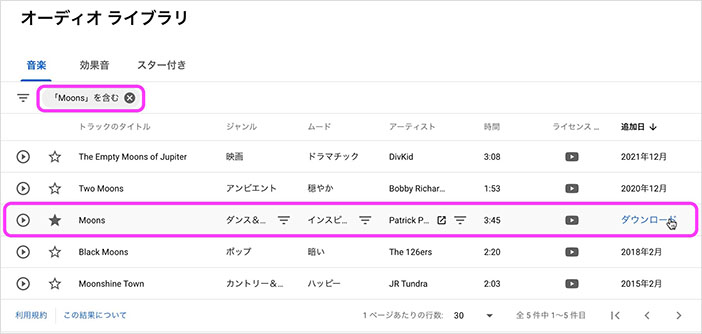
2.3 Downloading Audio Data
Search for “Moons,” then click the download button to the right of “Moons” by artist Patrick Patrikios.
3. Importing Music Files into Audition
3.1 Launching Audition
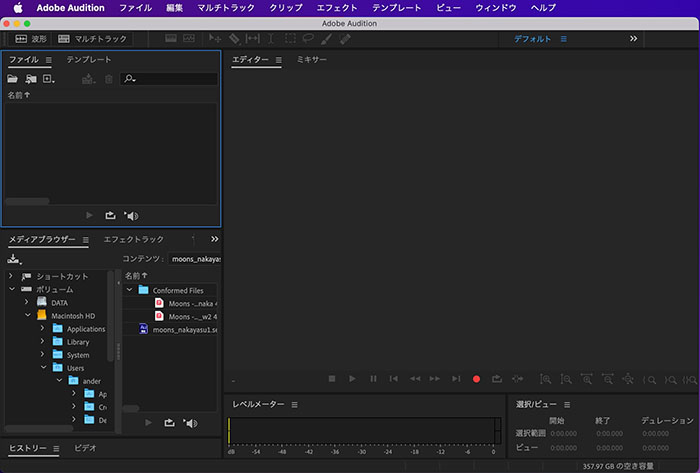
Audition offers both Waveform Edit mode and Multitrack mode, but in this case, we will use only Waveform Edit mode.

3.2 Loading Audio Data
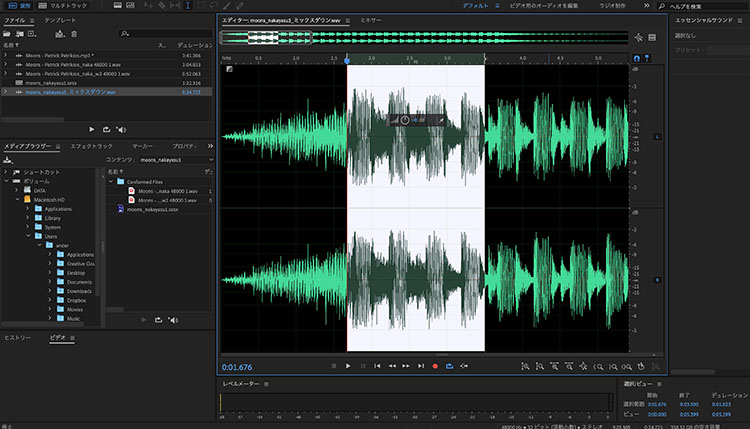
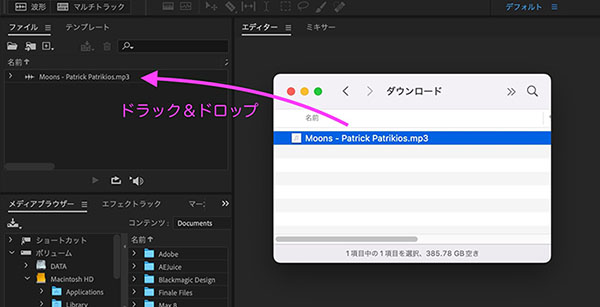
Select “File Menu > Open > File” or drag and drop “Moons - Patrick Patrikios.mp3” into the file panel.
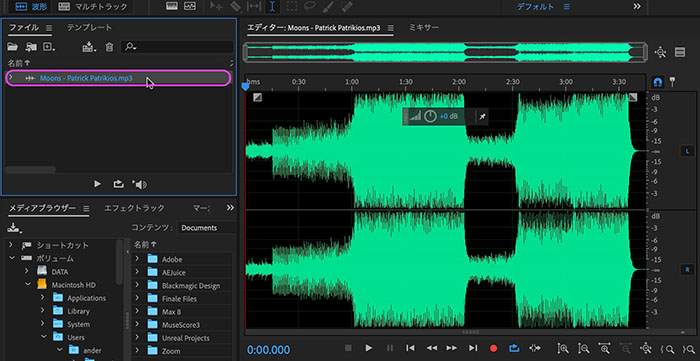
Double-click “Moons - Patrick Patrikios.mp3” in the File panel. The waveform will appear in the Editor panel.
4. Saving to WAV files (.wav)
Since MP3 is a compressed format, if you need to save your work repeatedly during editing, it’s best to first save it in the uncompressed WAVE format before continuing to prevent audio quality degradation.
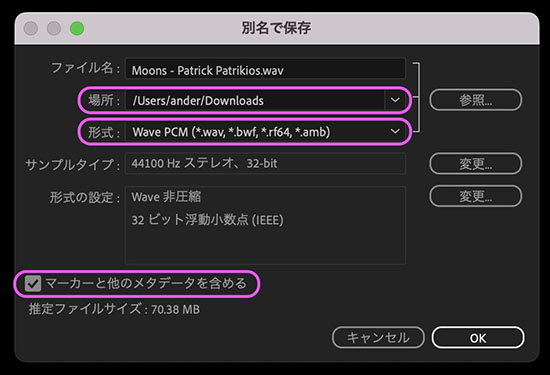
Click File > Save As.
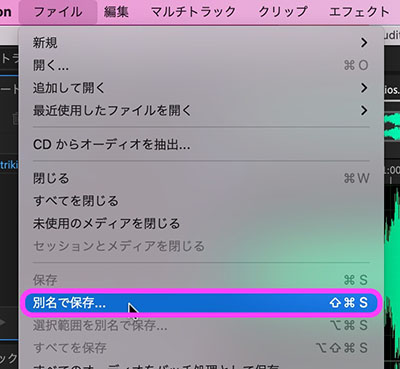
In the figure below, configure the following settings and click OK.
- Specify the save location
- Change the format to Wave PCM
- Check “Include markers and other metadata” (default)
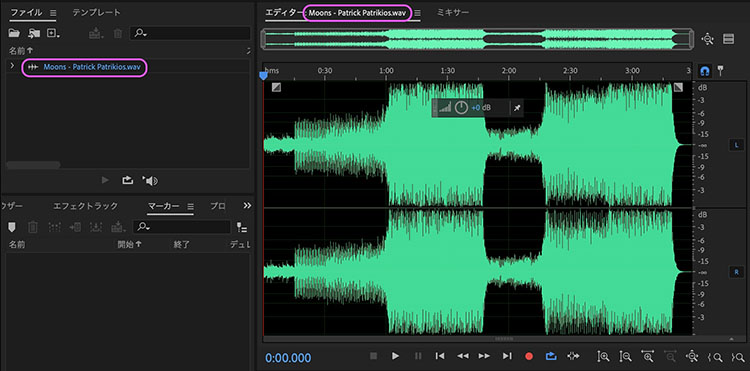
In the File Panel and Editor tab, verify that the WAV file “Moons - Patrick Patrikios.wav” is loaded, not the original MP3.
5. Scaling and Moving the Timeline
5.1 Zooming and Panning with the Mouse Wheel
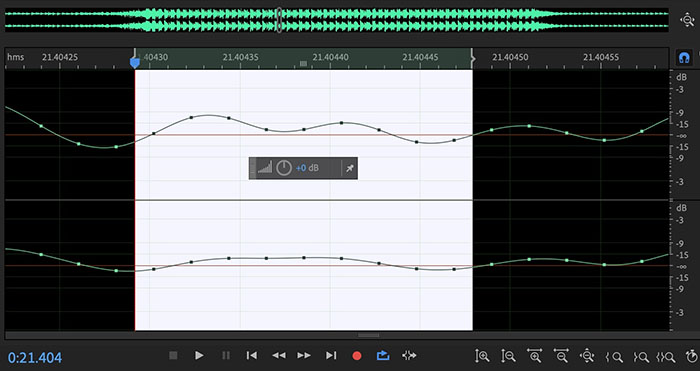
Hover your cursor over the editor panel and scroll the mouse wheel. This will scale the view with the cursor as the center. Alternatively, click the icon shown below in the lower-right corner of the panel. Other icons allow you to scale in the amplitude direction and more.

Pressing Shift + the mouse wheel moves the zoomed-in timeline horizontally.
5.2 Zooming and Panning with the Zoom Navigator
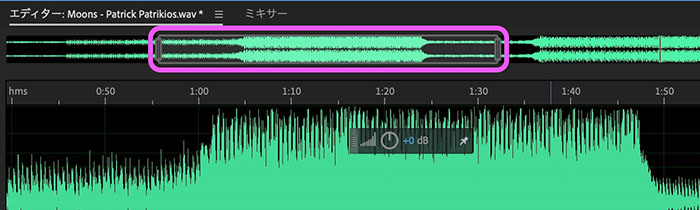
At the top of the Editor panel is a zoom navigator that displays the entire waveform at all times. You can drag the ends of the purple frame shown below to adjust the scale, and drag the middle section to pan the view.
6. Multiple Playback Methods
6.1 Play/Pause
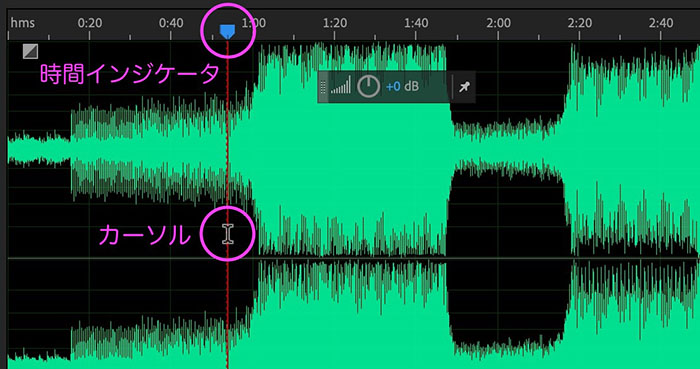
Click on the waveform to move the time indicator to the cursor’s position. Press the spacebar to play or pause.
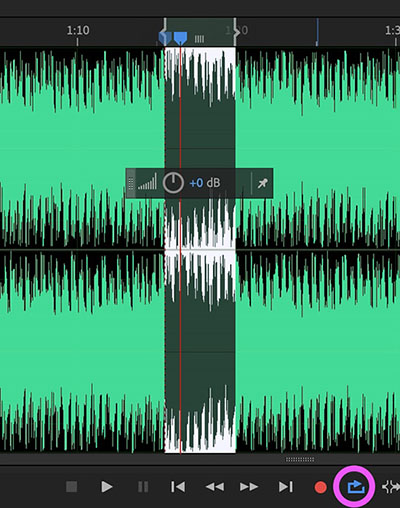
6.2 Loop Playback
Click the loop playback icon in the lower-right corner of the figure below to enable it. Drag the cursor to select a range, then press the spacebar to loop playback of that range.
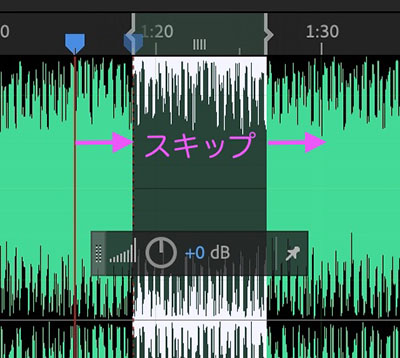
6.3 Skipping Playback of a Selection
Click the “Skip Selection” icon shown below.

Pressing the spacebar skips the selected range and plays the sections before and after it. You can preview how the sections will connect after the selected range is removed.
(Reference) YouTube - [Learn Audition] 03 Advanced Waveform Editing
7. Using Markers
You need to use markers to specify specific positions or ranges on the waveform. Since Audition’s waveform editing does not save project files, make sure to check the “Include markers and other metadata” option when saving the file, as described above, to save the marker positions directly within the WAV or MP3 file itself.
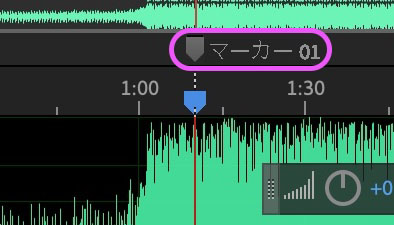
7.1 Marking at Specific Locations
Move the time indicator and click the M key. A marker will be added as shown below. You can move the marker by dragging it left or right while holding the mouse button.
7.2 Marking a Range
You can mark a range by clicking the M key while a selection is made on the waveform.
7.3 Deleting Markers
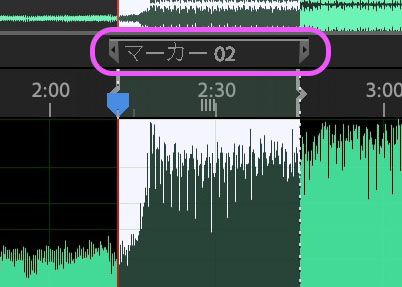
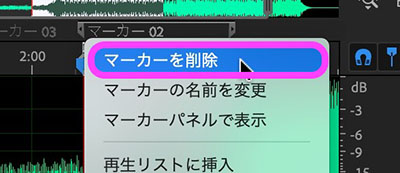
You can delete or rename markers using the context menu that appears when you right-click a marker icon. Note that with range markers, you can only right-click on the end icons.
7.4 Moving to a Marker
Use Option + the left/right arrow keys to move to a marker, or double-click the marker name in the Marker Panel (described below).
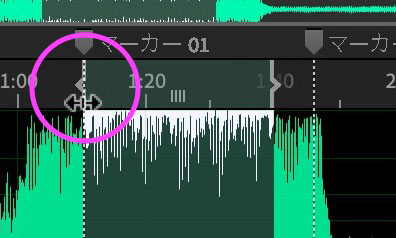
7.5 Selecting a Marker Range
After selecting a range of the waveform, drag it on the ruler to snap it to a marker. Alternatively, after setting a range marker, double-click the marker name in the Marker Panel (described later). (The method of selecting by double-clicking the waveform, as in Sound Forge, is not implemented.)
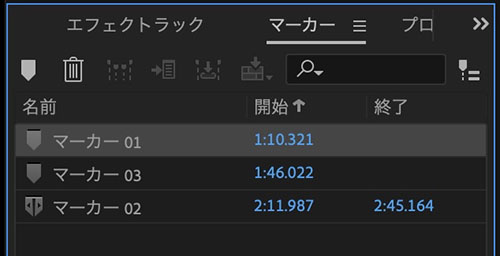
7.6 Marker Panel
Switch the Media Browser panel (located at the bottom left of the UI), which is displayed by default, to the Marker panel. Alternatively, go to the Window menu > Marker.
When you add a marker, it is automatically listed in the Marker Panel. In the Marker Panel, you can double-click a marker name to navigate to the marker point, select the marker range, delete the marker, or convert between point and range modes.
8. Editing “Moons - Patrick Patrikios.mp3”
8.1 Objectives for This Session
Edit “Moons - Patrick Patrikios.mp3” (3 minutes 45 seconds) down to about 40 seconds as shown below. Remove the intro so the chorus starts immediately, and leave a slight fade-out at the end. If you cut sections ② and ③ in half, you can also create a version that’s about 25 seconds long.
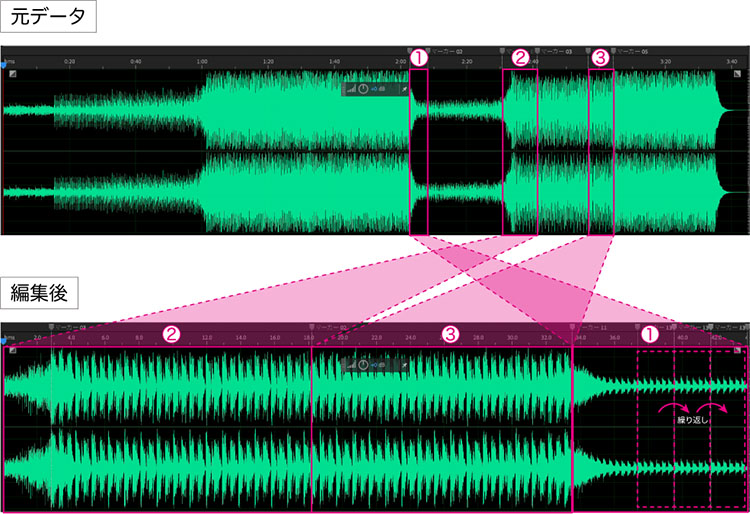
8.2 Setting the marker in Step 1
Normally, you would set marker positions based on how you plan to structure the music yourself, but for this example, follow the steps below. Enter a timecode in the editor to move the time indicator, then press the M key. Alternatively, enter the timecode directly in the Marker panel.
Below is a 23-second version of the marker from YouTube
Marker Name: Timecode 1-a: 2:02.945 1-b: (Omitted this time) 1-c: 2:08.325
8.3 Setting Markers in Step 2
2-a: 2:30.881 2-b: 2:41.349
8.4 Setting markers for ③ as well
3-a: 2:56.697 3-b: 3:04.390
The figure below shows the state with all markers (①–③) set.

8.5 Swap parts ①, ②, and ③ and connect them
Follow the steps below to edit. Note that the pasted content will appear after the time indicator.
- Delete the section from 2-b to 3-a (between ② and ③) and everything after 3-b.
- Copy the section from 1-a to 1-c and paste it at the 3-b position.
- (Omitted this time) Copy and paste the section from 1-b to 1-c twice to repeat it (these notes don’t naturally form a loop, but since they fade out, it’s not noticeable).
- Delete any other unnecessary sections.

8.6 Fade-in/Fade-out (Adobe Premiere Pro)
Since the required length of the transitions may vary depending on the video project, these adjustments should be made within the video editing software. In Premiere, setting the fade-in to “Constant Power” and the fade-out to “Constant Gain” will result in a fade-out that leaves a slight lingering effect.

9. (Reference) Audition’s AI automatically adjusts any audio clip to a one-minute length
10. (Reference) Soundraw
Soundraw is a service known as an AI Sound Generator (AI music composition tool). You can specify your preferred music genre and style, and the AI will automatically generate tracks. You can then easily customize the length of the intro and chorus, as well as the tempo, right in your browser. Since you can also adjust the rhythm and reverb, you can create music that perfectly matches your video. Plugins for Premiere Pro and After Effects are also available, allowing you to compose music with Soundraw while editing your video.
(For reference) YouTube Channel - SOUNDRAW Japan