3D Body Scan
1. Introduction
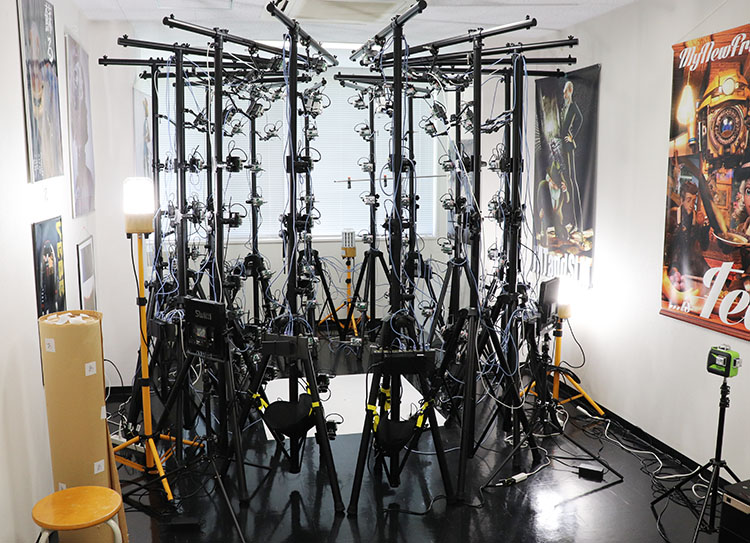
In this exercise, you will learn how to create 3D models using RealityCapture based on photo data captured with a human body scanner (120 units of Raspberry Pi + Pi Camera v2).
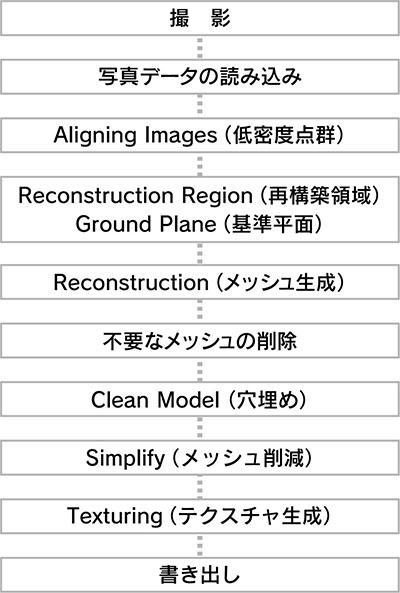
2. Workflow
3. Preparing Photo Data
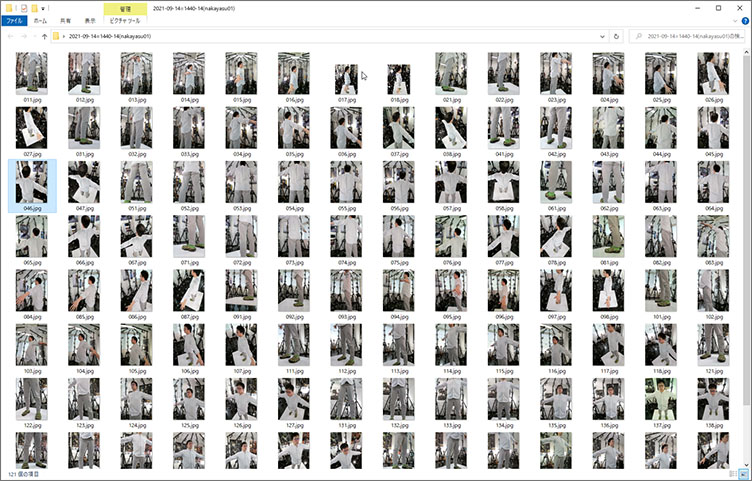
Prepare 120 image files captured by a body scanner.
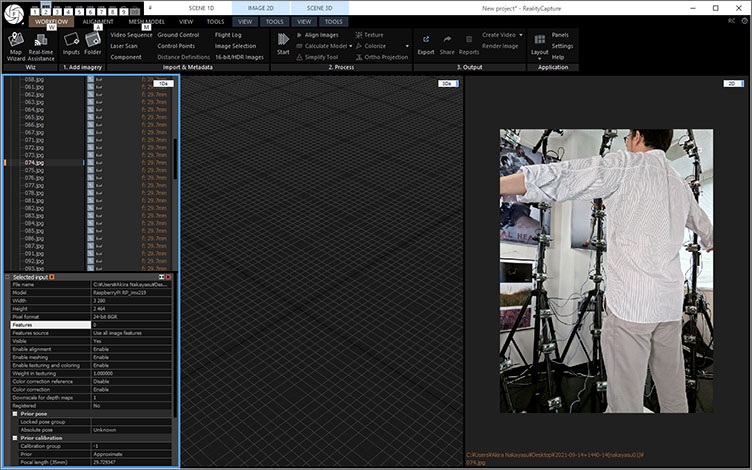
4. Importing Photo Data
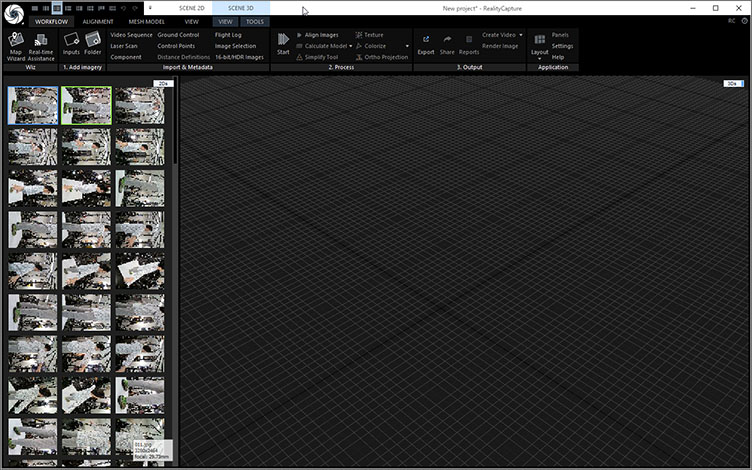
Work in a 1+1 layout, with 2D in the left panel and 3D in the right panel.
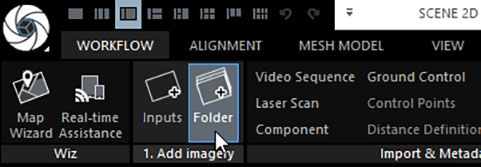
WORKFLOW > 1. Click “Add imagery” > “Folder”.
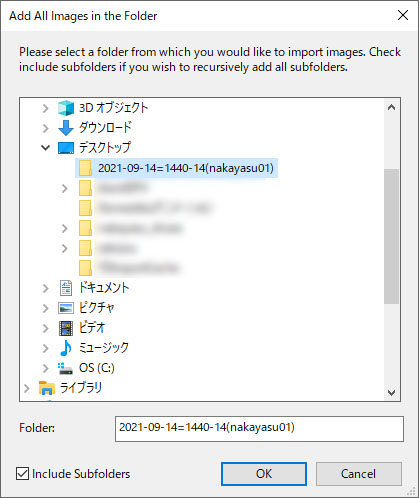
Select a folder and click OK.
Thumbnails appear on the 2DS screen.
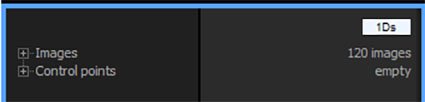
Switch from 2Ds to 1Ds and verify that 120 images are registered in “Images.” In 1Ds, you can view the tree view of registered images and generated 3D meshes.
Open “Images” and double-click a specific image to switch to the 1+1+1 layout; the image will then be displayed in the right panel. Although it isn’t necessary in this case, you may sometimes need to manually set feature points. For now, you can switch back to the 1+1 layout.
5. Aligning Images (Low-Density Point Clouds)
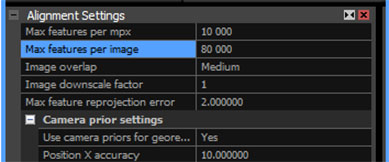
This body scanner system utilizes the Raspberry Pi’s Pi Camera v2. The captured image data has a resolution of 2464 x 3280, which is lower than that of the iPhone 8 (4032 x 3024). Therefore, it is necessary to improve the accuracy of the alignment process during analysis.
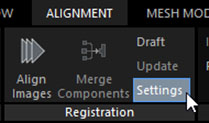
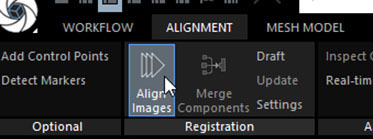
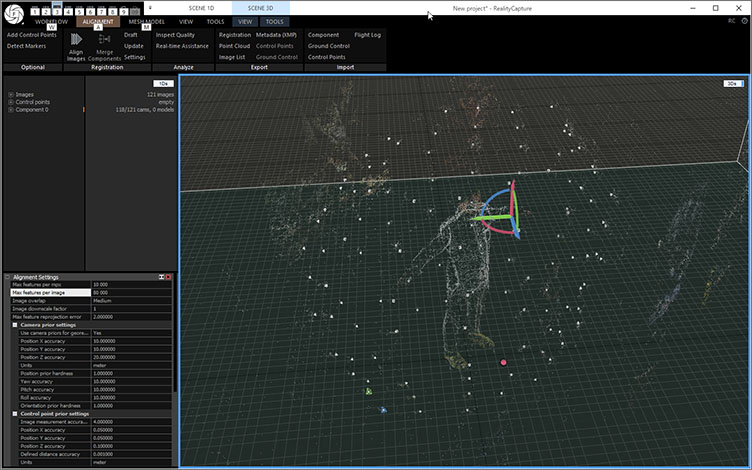
Click ALIGNMENT > Registration > Settings.
Change the “Max features per image” setting in Alignment Settings to 80,000 (default is 40,000).
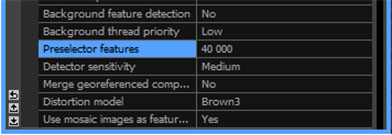
Scroll down and change the “Preselector features” setting to 40,000 (default is 10,000).
Click ALIGNMENT > Registration > Align Images.

Display 1Ds and check Component 0. In the figure below, the value is 118/121, indicating that only image 118 was successfully aligned.
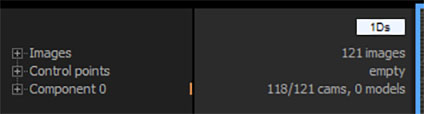
The body scanner we are using this time has not yet been fully calibrated, so the probability of all scans being successful is low. However, as long as we can obtain about 110 successful scans, there should be no problem with creating a 3D model of the body.
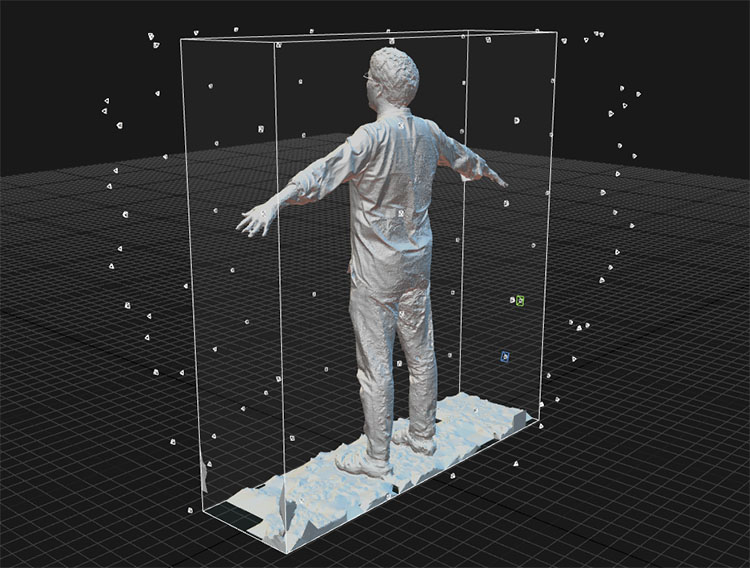
6. Reconstruction Region / Ground Plane
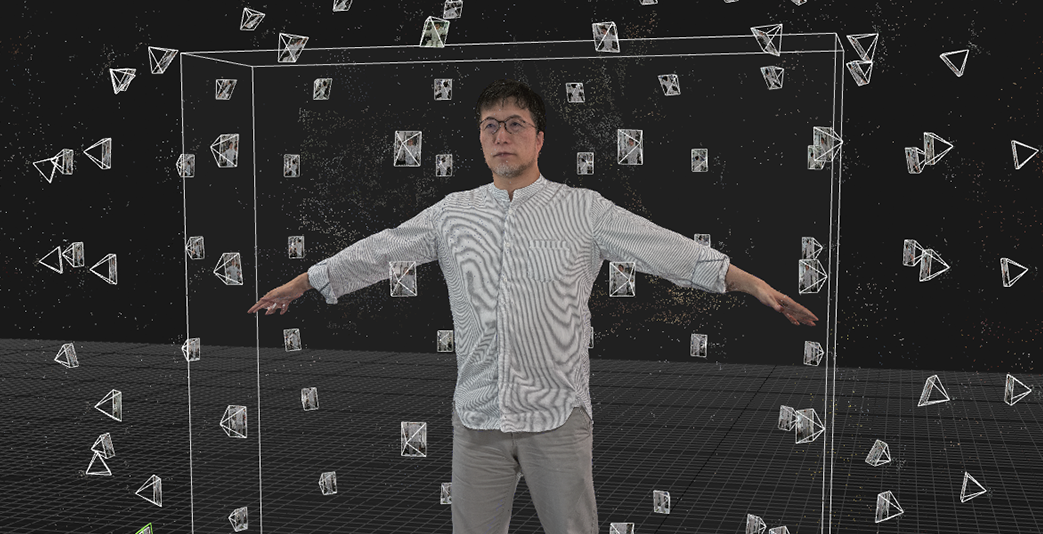
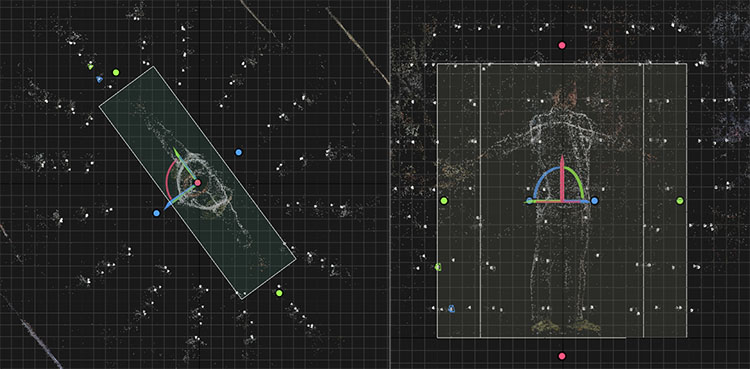
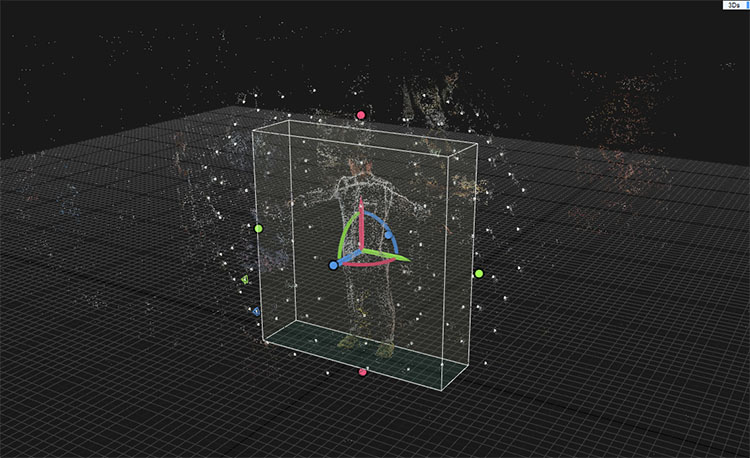
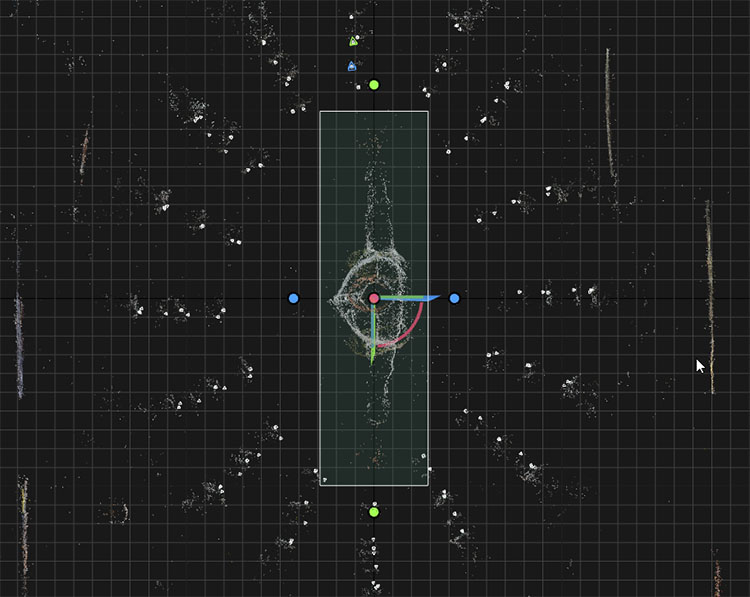
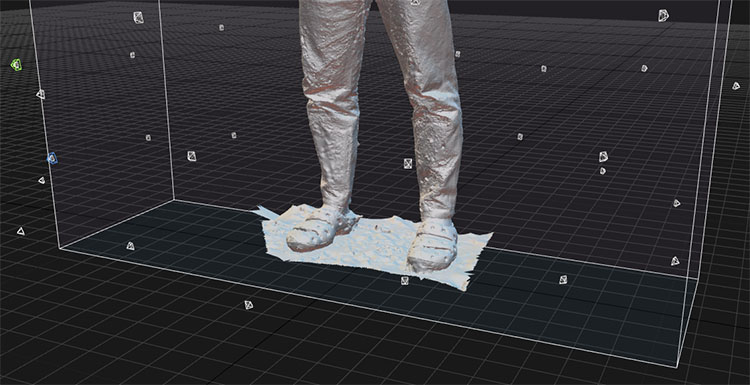
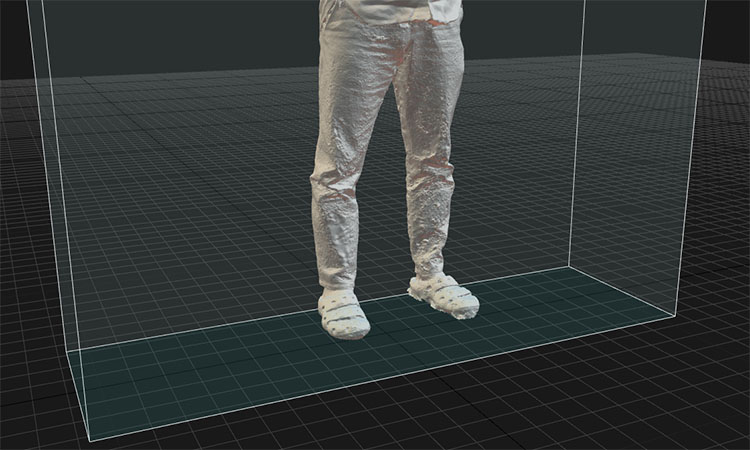
Set the Reconstruction Region. In particular, switch to a top-down view and rotate the view so that the human body aligns with the Reconstruction Region’s cuboid.
Since the ground will be removed later, you can leave a little extra space when defining the boundary between the shoes and the ground.
Once you have aligned the scene to a certain extent, click SCENE 3D > TOOLS > Scene Alignment > Set Ground by Reconstruction Region.
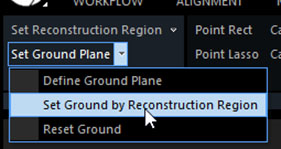
The Reconstruction Region is aligned with the origin of the grid.
Check again from a top-down view to ensure that the human figure is aligned horizontally or vertically with the grid. If there is a significant misalignment, make further adjustments.
In this exercise, you will ultimately upload your work to Mixamo. Since Mixamo only allows adjustments in 90-degree increments, you need to make sure everything is precisely aligned here.
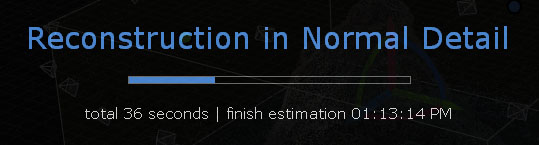
7. Reconstruction (Mesh Generation)
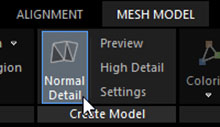
Click MESH MODEL > Create Model > Normal Detail.
8. Removing Unnecessary Meshes
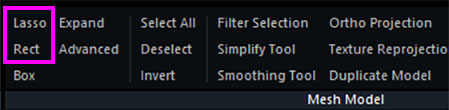
SCENE 3D > TOOLS > Mesh Model > Select a mesh using the Lasso or Rect tool.
Since the selection extends all the way to the back of the area outlined by the tool, rotate the view to check as you go.
- Left-click and drag: Select a mesh
- Ctrl + left-click and drag: Add to a continuous selection
- Shift + left-click and drag: Subtract from a selection
- Deselect all: Deselect
Please note that you cannot move the camera view at this time. Since the Lasso and Rect tools use a toggle mechanism, you must click again to deselect them before moving the camera view.
If the camera preview is getting in the way, turn off “SCENE 3D > VIEW > Alignment Cameras > Enables.”

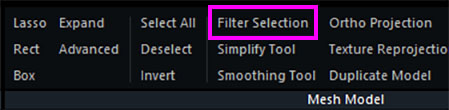
Delete the mesh in Filter Selection.
I switch perspectives and delete the unnecessary parts.
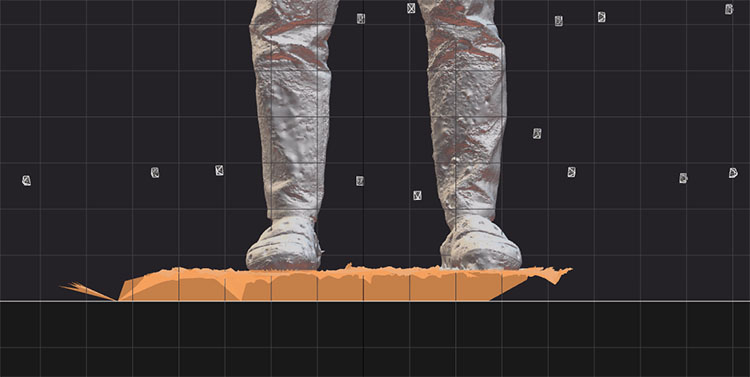
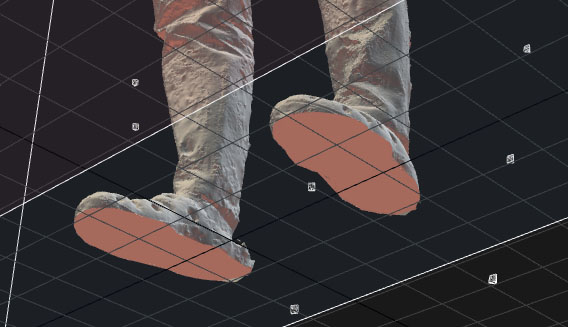
The figure below shows a front view. If the shoes are not level at this point, fine-tune the ground plane.
Change your perspective and delete the rest.
Once the mesh has been deleted, click the Lasso or Rect tool again to deselect it.
9. Clean Model
*Note: In “Close Holes,” multiple holes may not be closed. (I don’t fully understand this yet.)
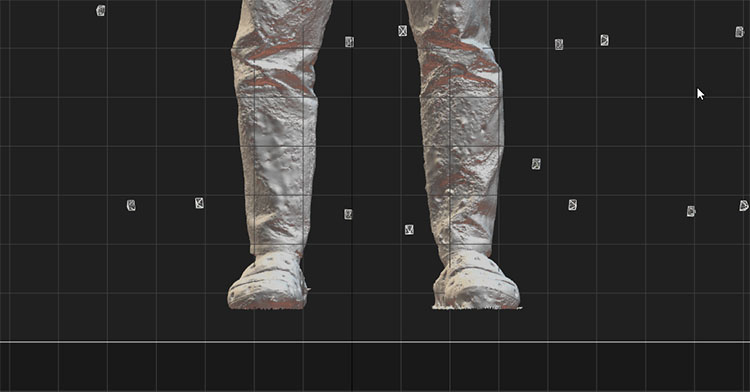
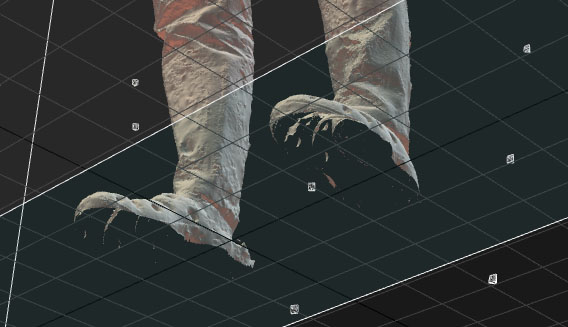
As shown in the figure below, start with the mesh on the sole of the foot removed.
Before performing a Clean Model, inspect the current state of the mesh.
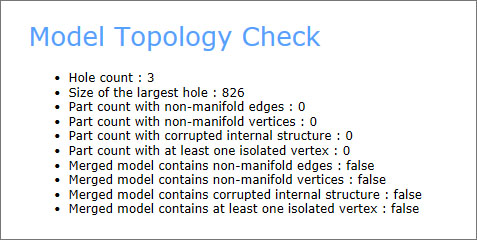
Click MESH MODEL > Analyze > Check Topology.

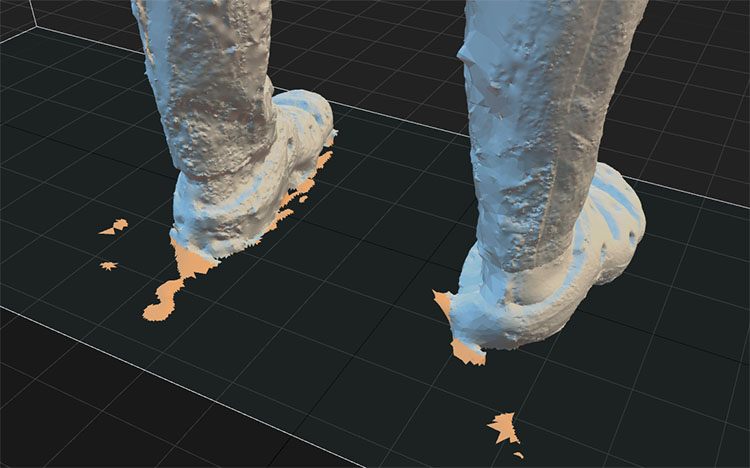
The hole count is 3, indicating that there are holes or mesh areas in places other than the soles of the feet. Even small pieces of mesh may be floating around, so look for them and remove them.
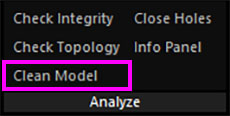
Click MESH MODEL > Analyze > Clean Model.
Mesh panels have been added to the soles of both feet.
Click MESH MODEL > Analyze > Check Topology again.
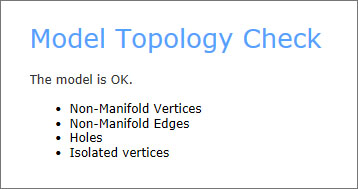
It is clear that the holes have been plugged.
10. Simplify (Mesh Reduction)
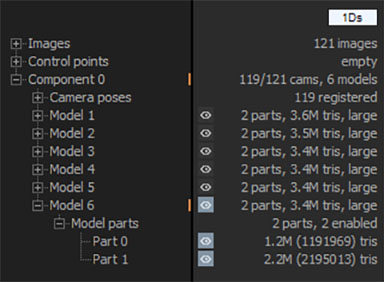
Check the current number of mesh (polygon) vertices in the 1Ds panel. If there are multiple models within Component 0, the one at the bottom is the latest model. The “3.4 M tris” on the right indicates the number of vertices in the mesh. If you drill down further, you’ll see that it’s split into two parts. This is irrelevant here.
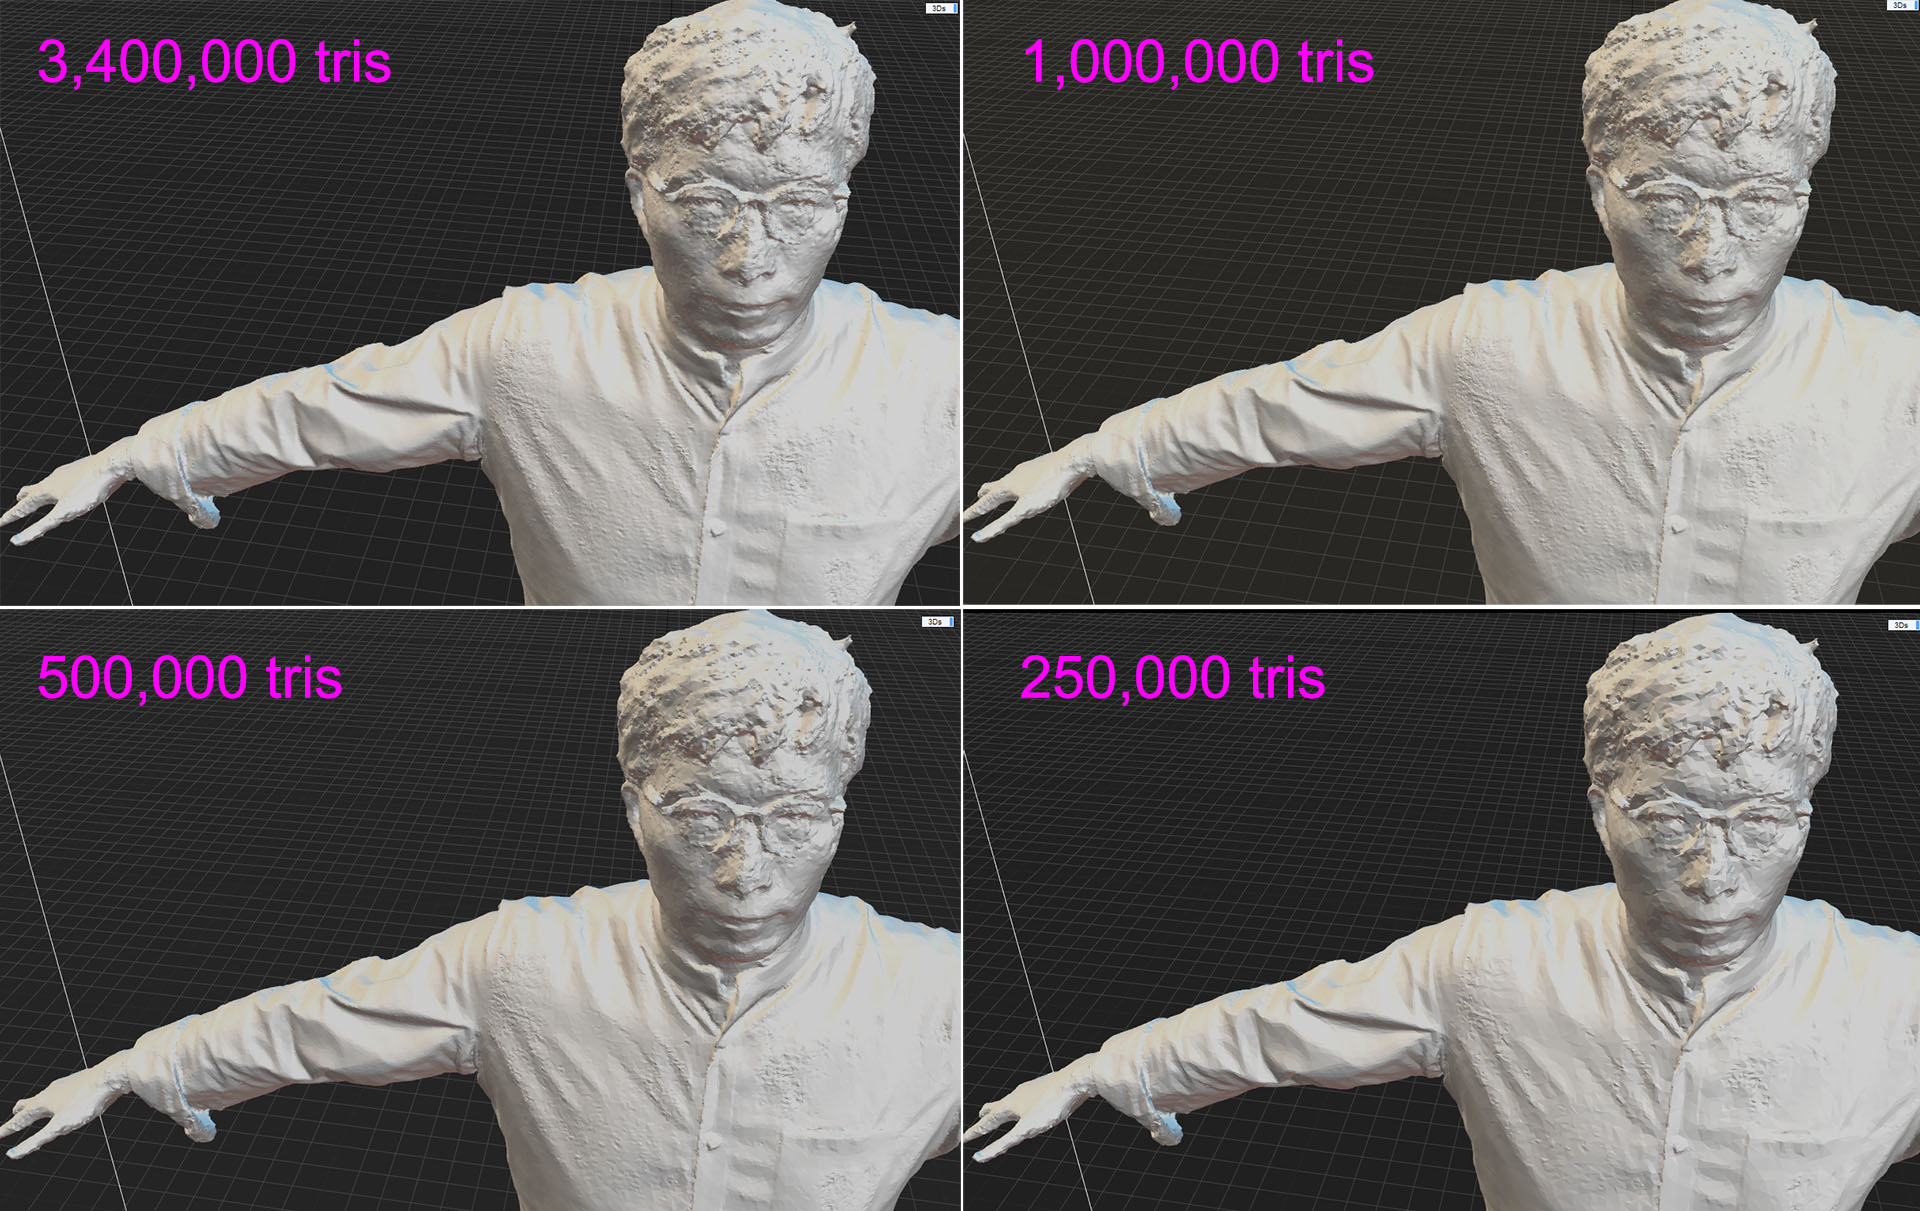
Reducing the mesh count all at once will significantly compromise the surface detail. Since 3.4 million tris equals 3,400,000 tris, we will reduce the count gradually, as follows: 3,400,000 → 1,000,000 → 500,000 → 250,000.
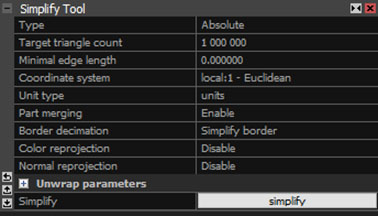
Use the Simplify Tool to reduce the mesh (toggle button). SCENE 3D > TOOL > Mesh Model > Simplify Tool

Change the “Target triangle count” (default value: 1,000,000) shown below, and then click the “Simplify” button.
Ultimately, I’ll reduce it to 250,000 triangles. I’ll make sure it doesn’t take too long to load when I upload it to Mixamo.
*If you’re downloading from Mixamo and previewing the model in Blender, it’s best to reduce the polygon count to around 10,000. Alternatively, retopologizing the model is the best option.
The figure below compares the results based on differences in the number of mesh elements.
When you’re finished, click the Simplify Tool again to deselect it.
11. Texturing
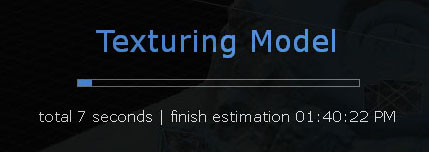
Click MESH MODE > Mesh Color & Texture > Texture.

The texturing process begins.
Since the clothes I was wearing this time had a striped pattern, there’s some moiré pattern showing up.

12. Export
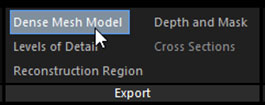
MESH MODEL > Export > Mesh and Point Cloud
Since four files will be created, make sure to create a new folder in the destination directory beforehand.
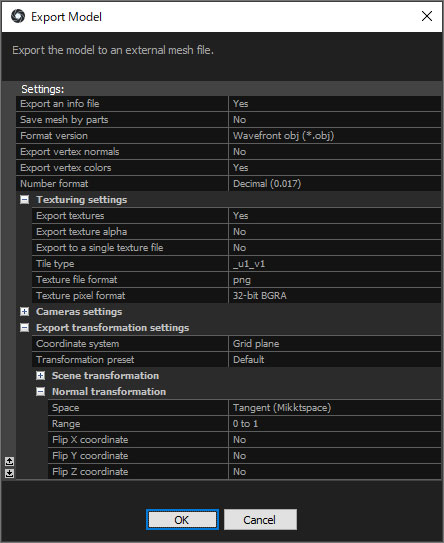
The “Settings” screen shown below will appear, but for now, click OK without making any changes.
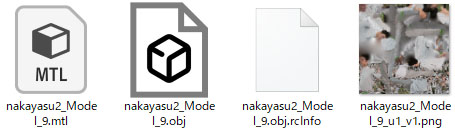
The following four files will be created. Since rcinfo is a log file, it is not needed outside of RealityCapture.
13. (Introduction only) Adjusting Poses in Blender
Adjust the pose using Blender’s Sculpt tools or similar features as needed.
Introduced in class.
14. Application: Uploading to Mixamo (Assignment)
Further instructions will be provided during class.
- Compress the three files (OBJ, MTL, and PNG) into a ZIP archive. *Do not include the rcinfo file.
- Upload the files via Mixamo’s “Upload Character” feature.
- Orient the object to face forward.
- Configure Auto Rigging settings (enable Fingers, disable Symmetry).
- Set up animations for the character.
To submit your assignment, simply share your screen to show the animation status on Mixamo.
15. (Introduction only) Download from Mixamo and import into Blender
I will introduce it in class.
*This time, I’ll be experimenting with a different Mixamo standard character.
- (Not covered here) Check the model in RealityCapture’s 1Ds, then delete the previous model (with textures). Reduce the mesh to 10,000 triangles, apply texturing, and export.
- (Not covered here) Upload to Mixamo, perform the same steps, and download as FBX 7.4.
- In Blender, go to File > Import > FBX (using the FBX 7.4 file downloaded from Mixamo).
- Switch to Shading view.
- Hide the Bones in the Overlays panel.
- Go to Collection > Armature > select “default,” then uncheck “Show Backface” in the Material Properties.
- Move the object and reload the FBX file several times.
- Play the animation loop (matching the number of animation frames from Mixamo).