Feedback
1. Introduction
In this section, you will learn the basics of Feedback in TouchDesigner. The Feedback effect allows you to create “afterimages” and “blurring” effects. It is often used in combination with other effects rather than on its own, and mastering it as a fundamental technique will expand your creative possibilities.
1.1 Reference Tutorials
In this exercise, follow the instructions in the tutorial videos below.
References)
- YouTube - [TouchDesigner Beginner’s Course] Simple Image Processing and Feedback #02
- YouTube - What is feedback? Feedback in TouchDesigner
2. Preparation
After launching TouchDesigner, delete the Startup Operator and close the Palette.
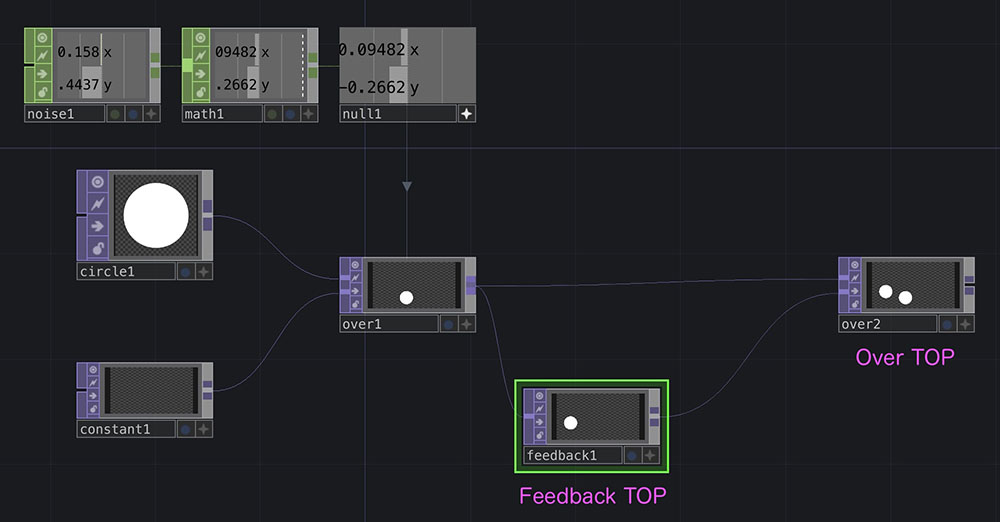
3. A Circle That Moves Randomly
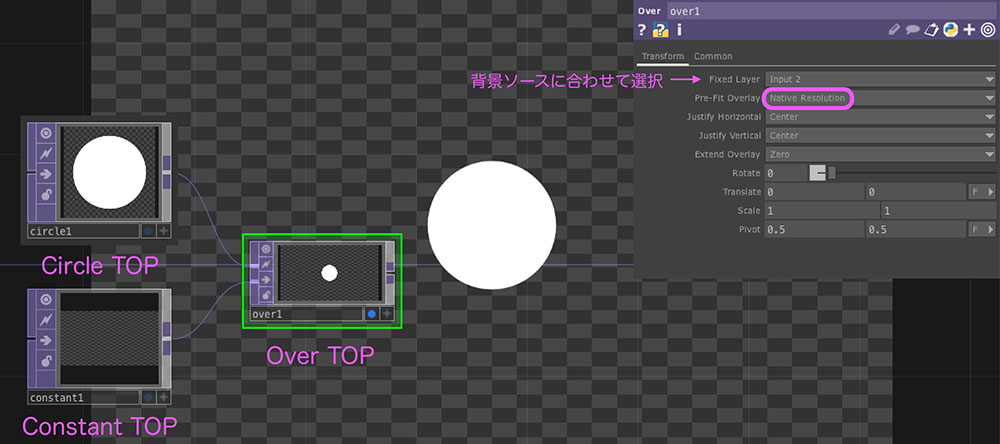
3.1 Drawing a circle in a specified area
Connect the following operators as shown in the figure below and configure the parameters.
-
Circle TOP
-
Constant TOP
- Alpha: 0
- Resolution: 1280 x 720
-
Over TOP
- Fixed Layer: Matches the input connected to Constant TOP
- Pre-Fit Overlay: Native Resolution
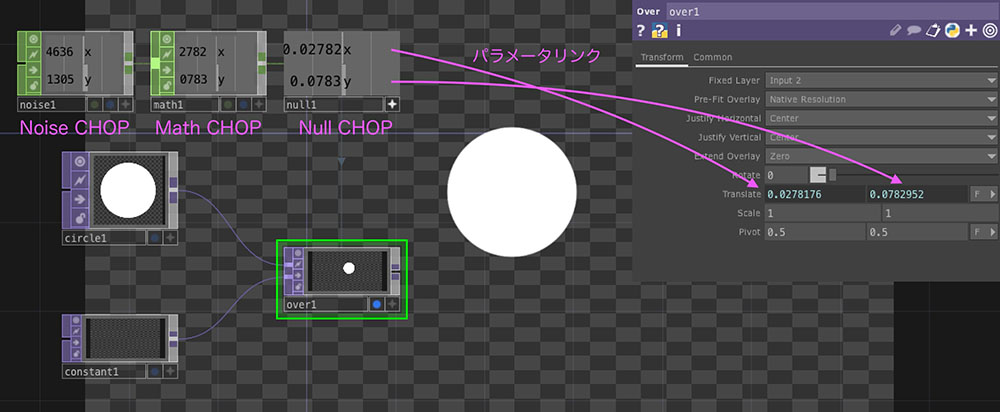
3.2 Generating Random Motion
-
Noise CHOP
- Channel tab - Channel Names: x y (separated by spaces)
- Common tab - Time Slice: ON
-
Math CHOP
- From Range: -1 to 1
- To Range: -0.6 to 0.6
-
Null CHOP
- Parameter links to the Translate X and Y parameters of the Over TOP
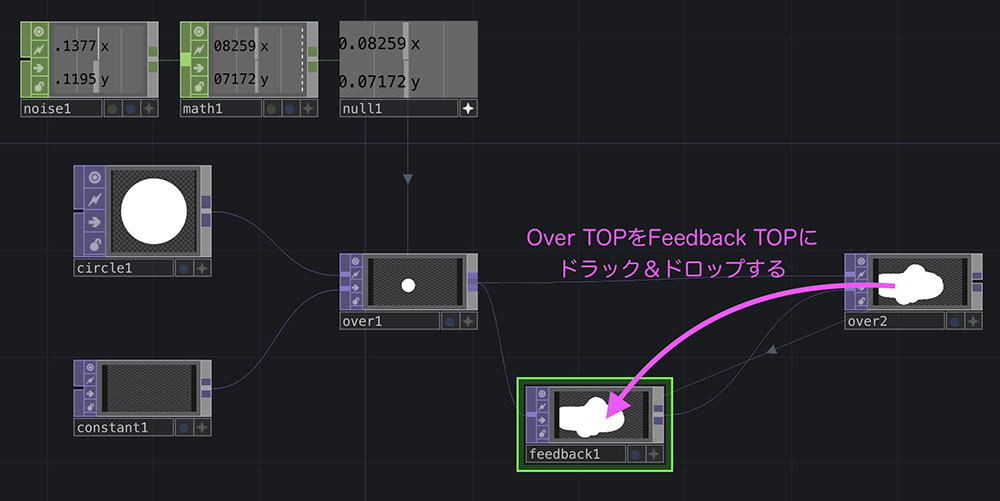
4. The Effect of Feedback
4.1 Basic Structure of Feedback
Add the “Feedback TOP” and the second “Over TOP” and connect them as shown in the figure below.
Drag and drop Over TOP (over2) onto Feedback TOP. This will initiate feedback loop processing between Over TOP and Feedback TOP.
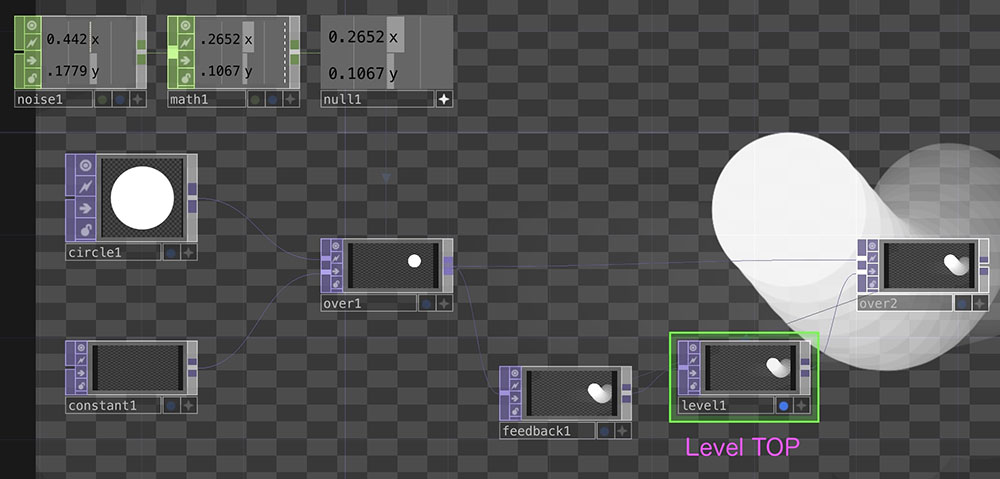
4.2 Adjusting the Level of Feedback
As it stands, the circle’s path is preserved 100%, so it will gradually fill the entire area over time.
Add “Level TOP” between “Feedback TOP” and “Over TOP” (over2).
- Level TOP
- Post tab - Opacity: Approximately 0.9
To make the background black, add “RGB Key TOP” after “Over TOP” (over2).
5. Blur Effect
5.1 Blur TOP
Add a Blur TOP layer between the Level TOP and Over TOP (over2) layers.
- Blur TOP
- Set the Filter Size to 20 or higher

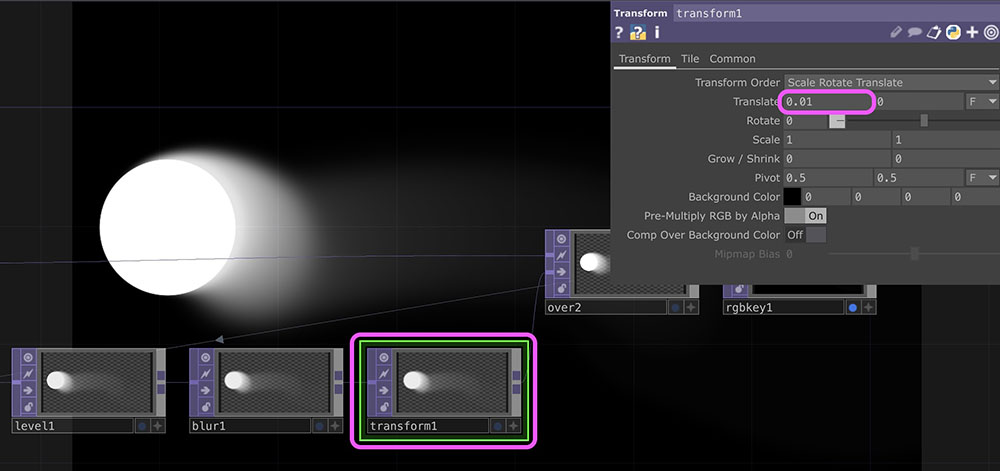
5.2 Fake Wind
By gradually shifting the afterimage using feedback, we can create the illusion of a breeze.
Add a Transform TOP layer between the Blur TOP and Over TOP (over2) layers.
- Transform TOP
- Translate X: 0.01
5.3 Scale
Changing the Scale of the Transform TOP added in 5.2 allows you to vary the size of the motion blur over time.
When the scale is 1.1
When the scale is 0.95
6. Emboss
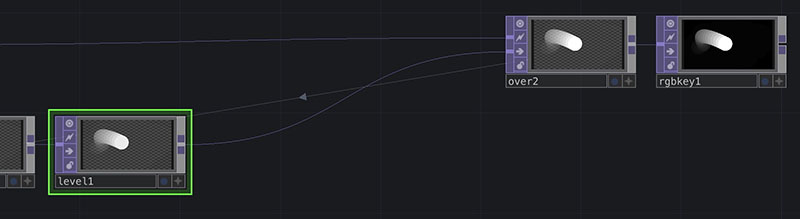
Delete the operators added in step 5 (Blur TOP and Transform TOP).
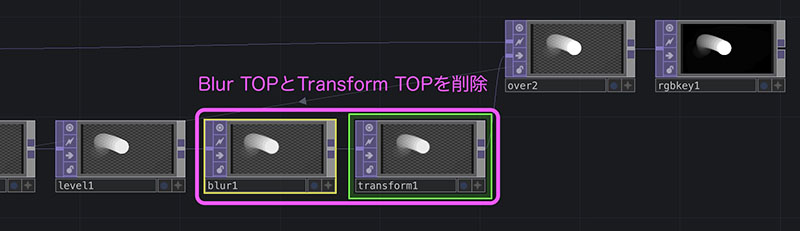
Proceed from the state shown below.
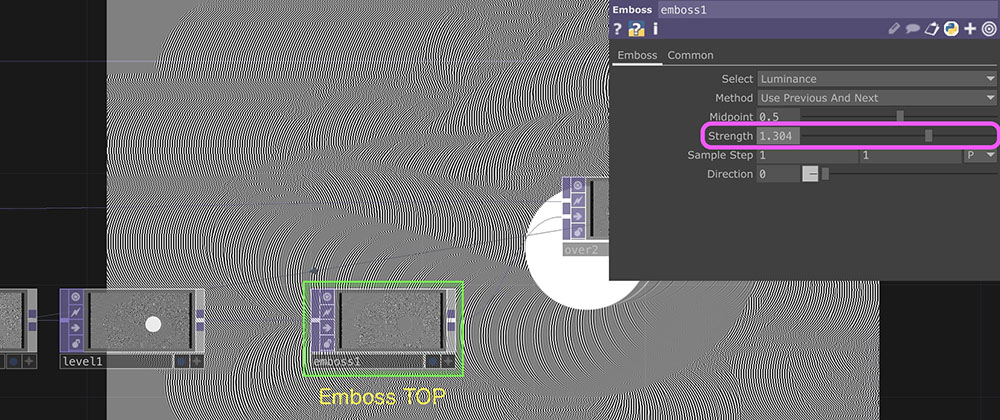
Add an “Emboss TOP” layer between “Level TOP” and “Over TOP” (over2). Increasing the “Strength” setting produces the effect shown in the image below.
7. Edge
Delete the “Emboss TOP” at position 6 and add an “Edge TOP” in the same location.
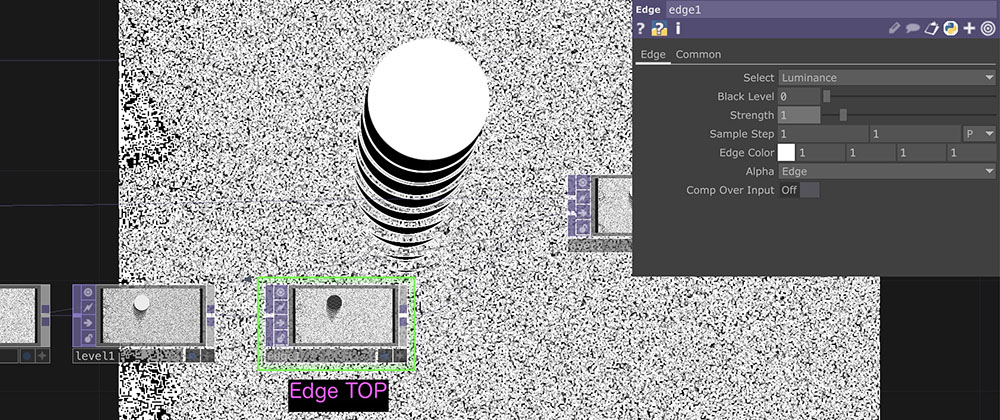
Strength: The degree of feedback changes significantly in the range of approximately 0.06 to 0.09.