Audio Reactive ver.2 - Part2

1. Preparation
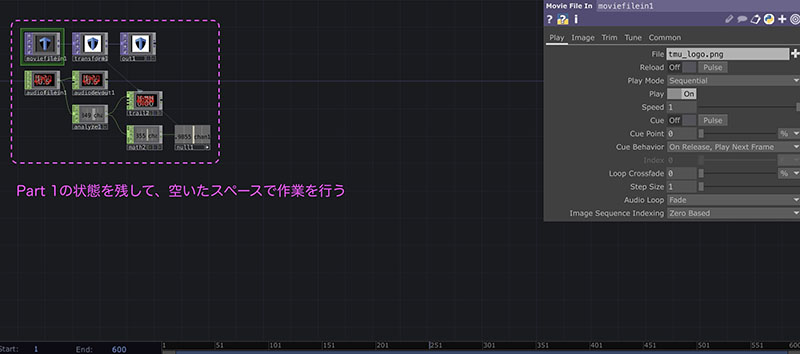
Keep the operators created in Part 1 as they are and continue working in the remaining space. Toggle the backdrop on and off as needed.
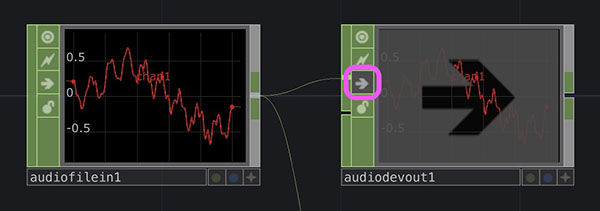
To mute the audio, click the Bypass icon on the Audio Device Out CHOP (see below) to turn it ON (mute). You can also mute the audio using the Bypass on the Audio File In CHOP, but this will stop the audio analysis and the animation itself; therefore, if you want to stop only the audio, turn the Bypass on the Audio Device Out CHOP ON.
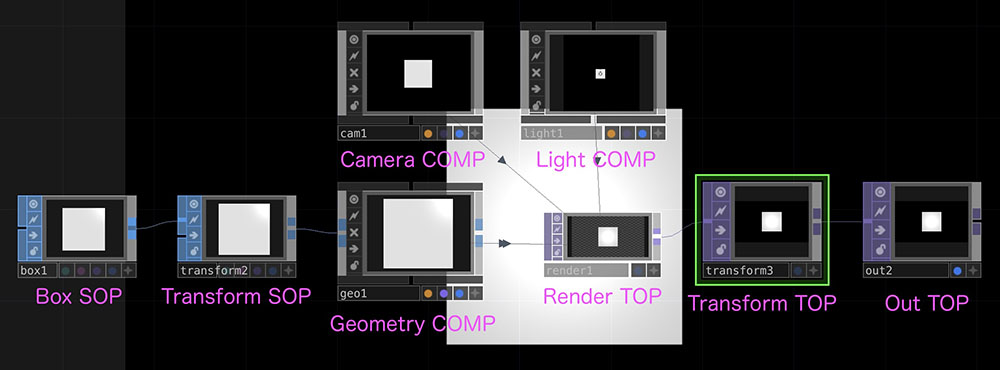
2. Preparing 3D Operators
- Box SOP
- Transform SOP
- Geometry COMP
- Right-click the output of the Transform SOP to add an operator
- Camera COMP
- Light COMP
- Render TOP
- Transform TOP
- Change the Background Color to black (0, 0, 0, 1)
- Turn on “Comp Over Background Color”
- Out TOP
- Turn on the “Display” button if necessary
3. Rotating a Box
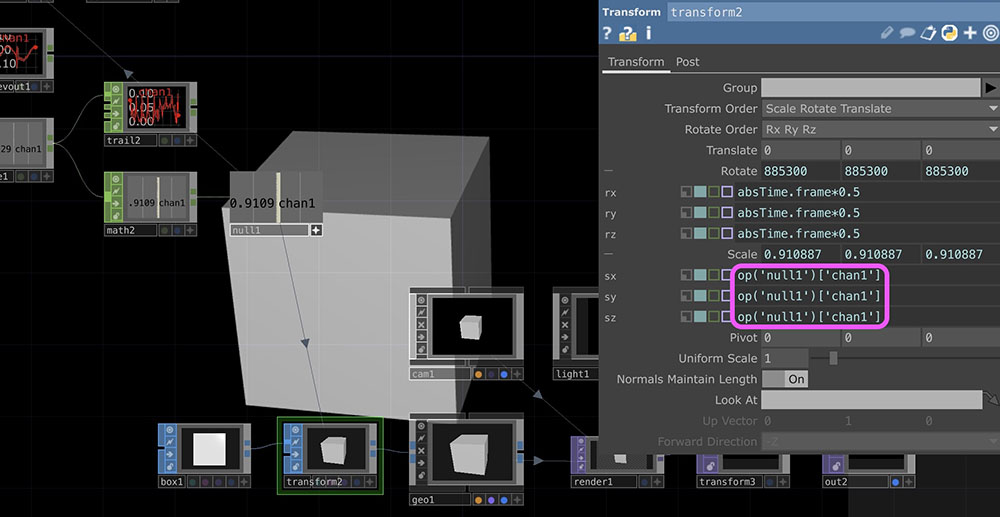
- Enter the following in the rx, ry, and rx fields of the Transform SOP’s Rotate node:
- absTime.frame*0.5
Changing the 0.5 value above will alter the rotation speed.
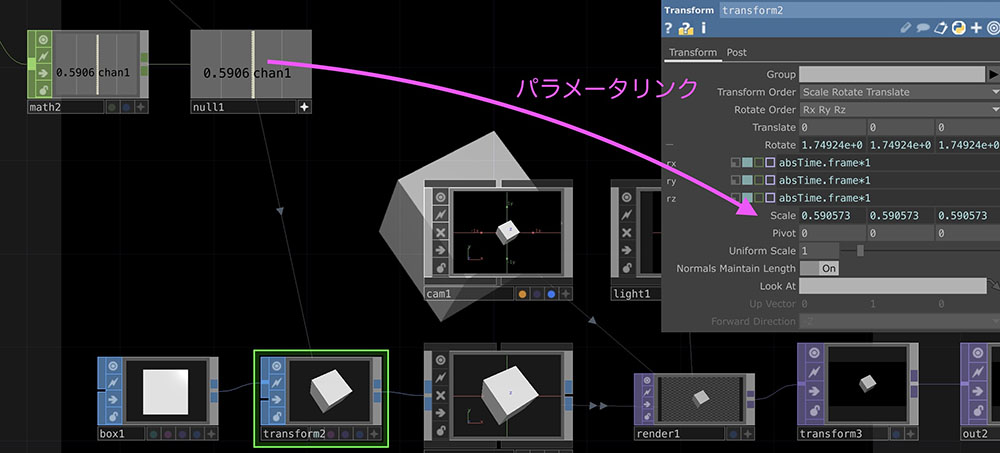
4. Reflect the volume in the box size
- Null CHOP *Created in Part 1
- Link a parameter to the Scale of the Transform SOP.
- Math CHOP *Created in Part 1
- Change the “To Range” setting to 0.5–3 (or any value).
5. Reset the Reflection on the Sound Scale
To prepare for the next step, delete the script for the sx, sy, and sx parameters of the Transform SOP’s Scale (the area outlined in pink in the figure below). Alternatively, you can press Cmd+Z to undo the action.
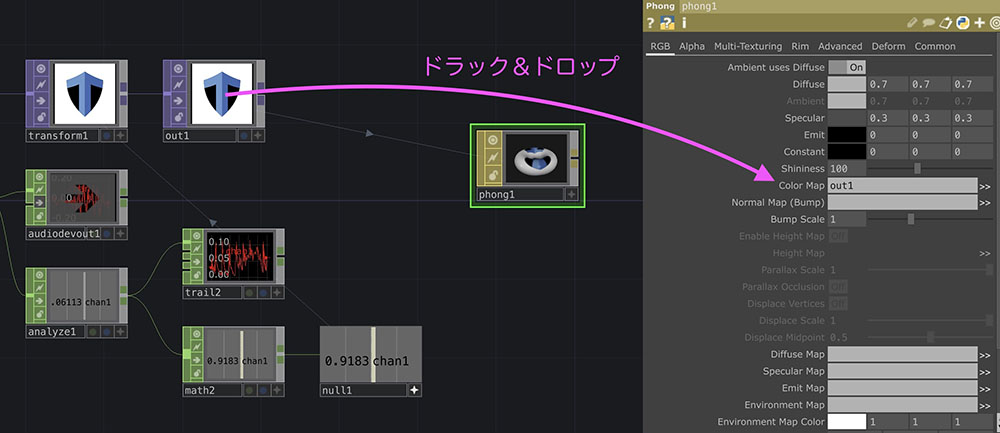
6. Apply the Toritsu University logo to the side of the box
Add a Phong MAT layer and assign the “Out TOP” property of the logo to the Phong MAT’s Color Map.
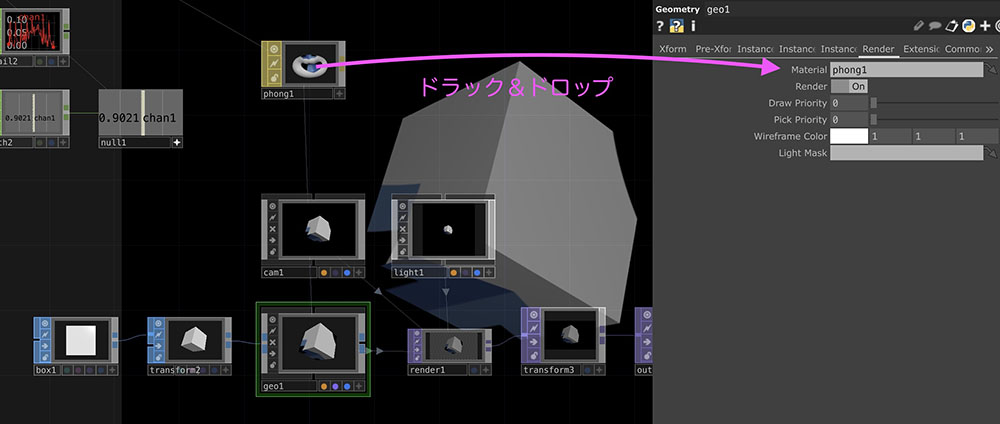
Link the Phong MAT to the Material in the Render tab of Geometry COMP.
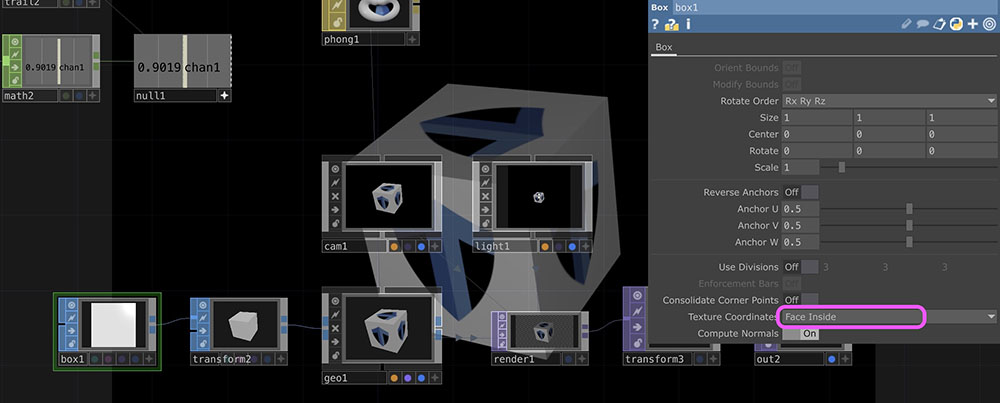
Since the image is projected onto the entire surface in this state, change the “Texture Coordinates” setting in the Box SOP to “Face Inside” so that the texture is applied to each face of the box.
The video below shows Math CHOP with the “To Range” set to 0.8–2.5.