Jumping Grasshopper
1. Goals for This Session
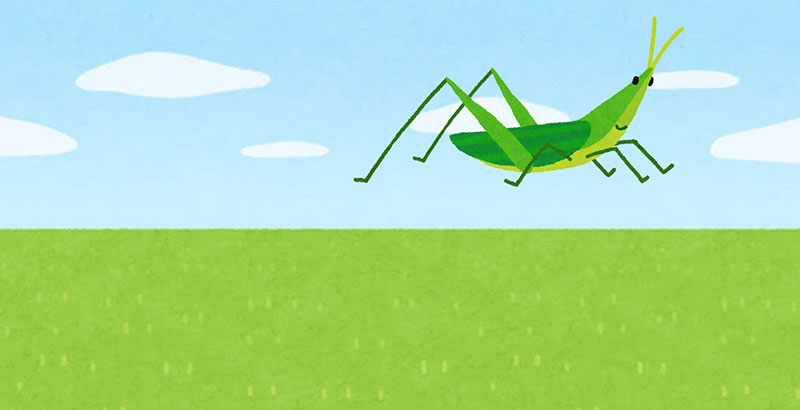
Using materials from Irasutoya, I created an animation of a grasshopper jumping. Strictly speaking, the grasshopper in the video below doesn’t jump exactly like a real grasshopper, but I adjusted the leg movements so they aren’t too unsettling.
2. Preparing the Materials
2.1 Background Image
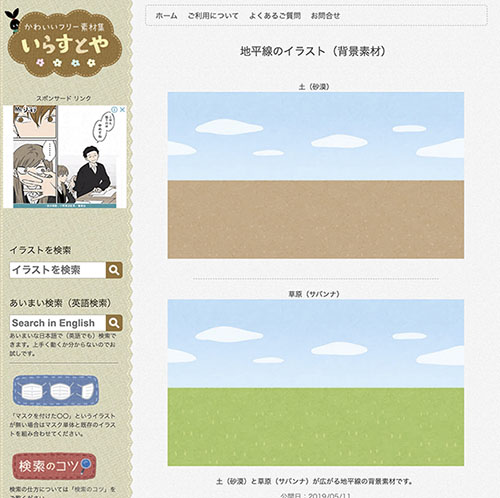
Go to the page at the URL below on Irasutoya and download the images of “Soil (Desert)” and “Grassland (Savanna)” using drag-and-drop. On that page, click on the image once, then download the enlarged version. Please note that the image size differs from the original page; the correct size is 800x450.
https://www.irasutoya.com/2019/05/blog-post_64.html
2.2 Locust Images: Still
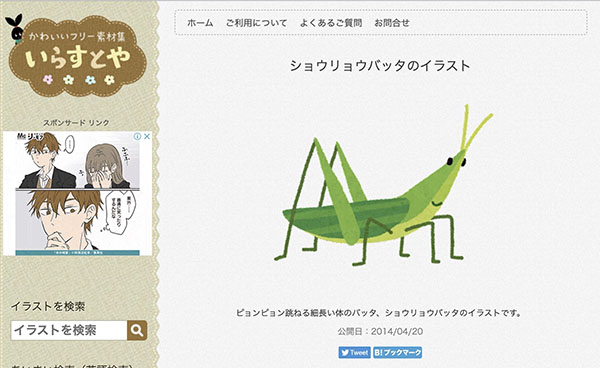
Go to the page at the URL below on Irasutoya and download the locust illustration using drag-and-drop. On that page, click the image once, then download the enlarged version. Please note that the image size differs from the original page; the correct dimensions are 796x690.
https://www.irasutoya.com/2014/04/blog-post_1192.html
2.3 Locust Images and Videos
Using an illustration of a locust as a reference, I will create an image of a locust in flight using Photoshop.

2.4 Sound Effects
Download the sound effects for Jump 6 at the URL below.
https://fc.sitefactory.info/se.html

3. Preparing for the Project
3.1 Folder Structure and Organizing Assets
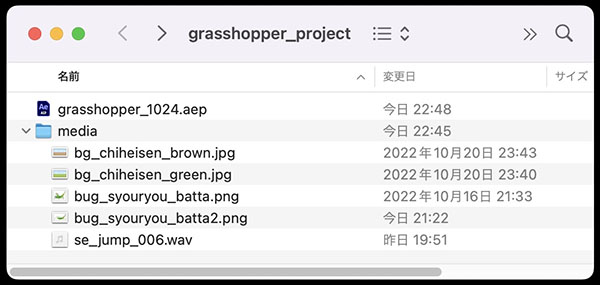
Create a root folder named “grasshopper_project” (or any name of your choice). Save the After Effects project file inside it. In the figure below, the file is named “grasshopper_**** (date).aep.” Additionally, create a “media” folder and prepare four image assets and sound effects.
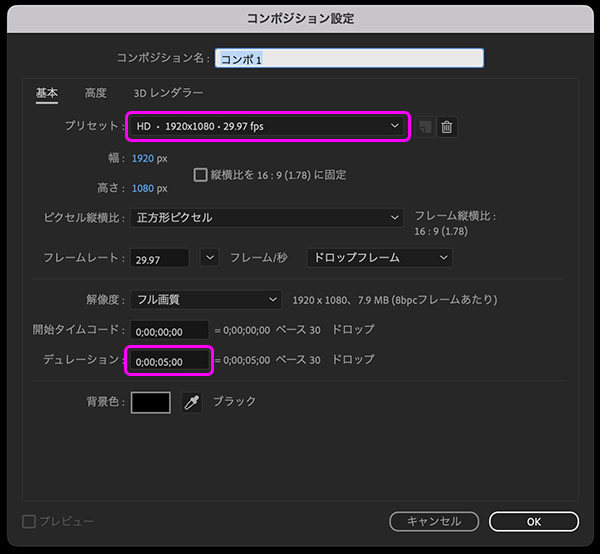
Create a Full HD (1920 x 1080) composition. Although the image quality will be lower because the background image is 800 x 450, we are using this widely adopted video format here.
Select the “HD, 1920x1080, 29.97 fps” preset. Leave the duration set to the default value of 5 seconds.
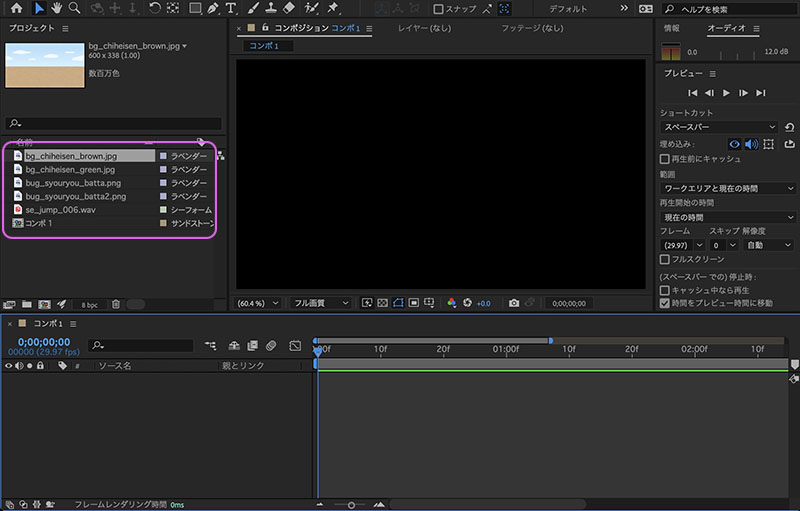
Load all the assets into the Project Panel.
4. Positioning Background Images
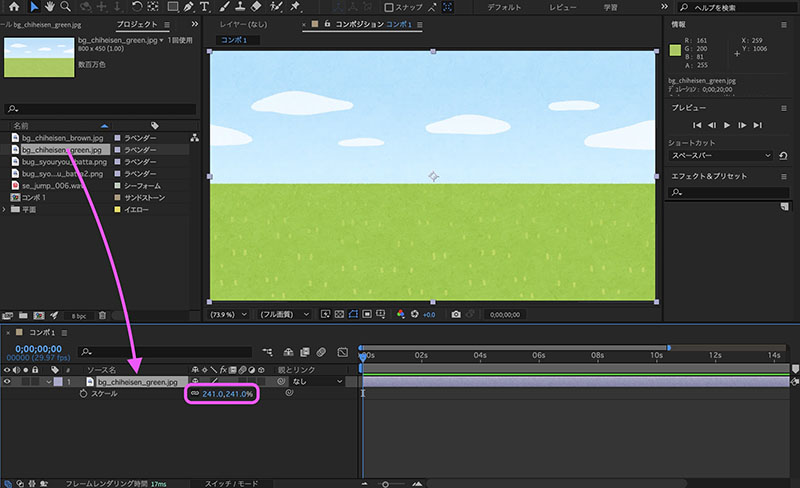
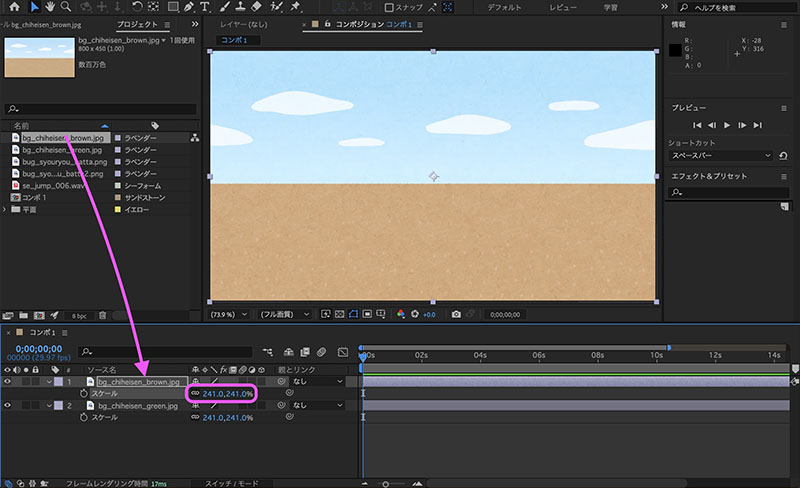
Drag and drop the grassland image (bg_chiheisen_green.jpg) onto the timeline. Scale it up to 241%. I’m using 241% because at 240%, the edges of the image become slightly blurred.
Place the soil image (bg_chiheisen_brown.jpg) on the timeline as well and scale it to 241%. Since we won’t be using it right away, keep it hidden for now.
5. Placement of Locust Images
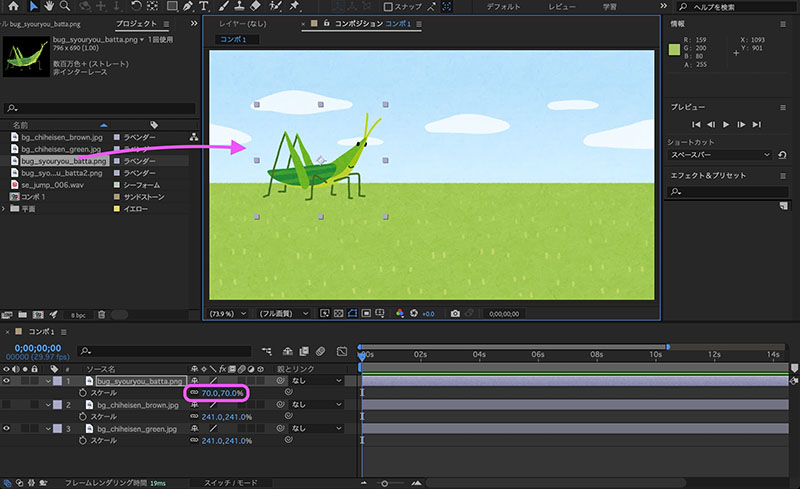
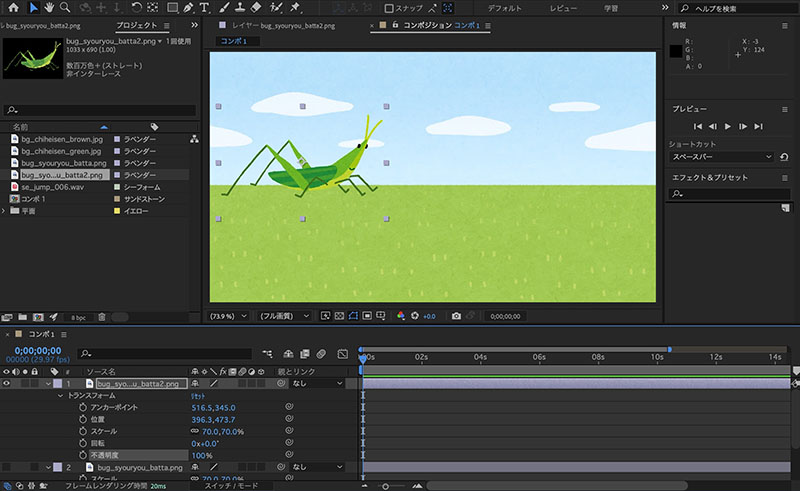
Drag and drop the grasshopper image (bug_syouryou_batta.png) into the Composition panel and position it as shown below. Change the scale to 70%.
Drag and drop the grasshopper image (bug_syouryou_batta2.png) into the Composition panel. Change the scale to 70%.
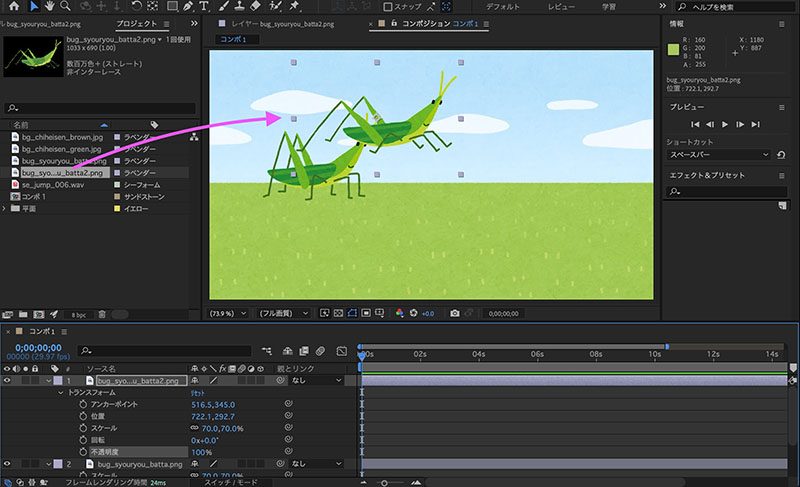
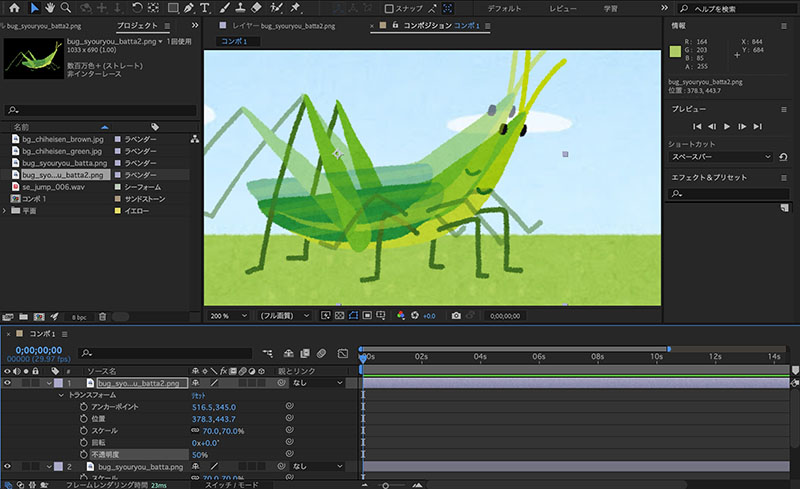
Set the opacity of the “Locust Image (Animated)” layer to 50% and align it pixel-by-pixel with the “Locust Image (Static)” layer. Zoom in on the Composition panel and use the arrow keys to align the areas around the eyes and mouth. Make adjustments while toggling the visibility of the “Locust Image (Animated)” layer on and off.
Hide the “Locust Image - Static” layer and set the opacity of the “Locust Image - Animated” layer back to 100%.
6. Creating a Jump Animation
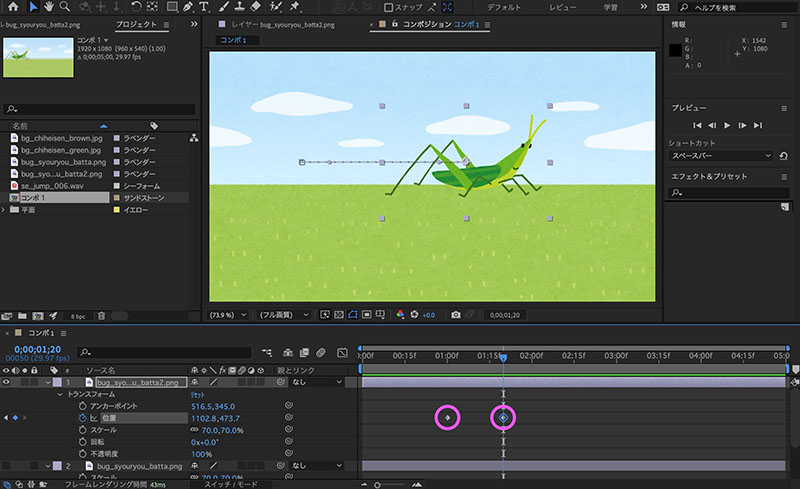
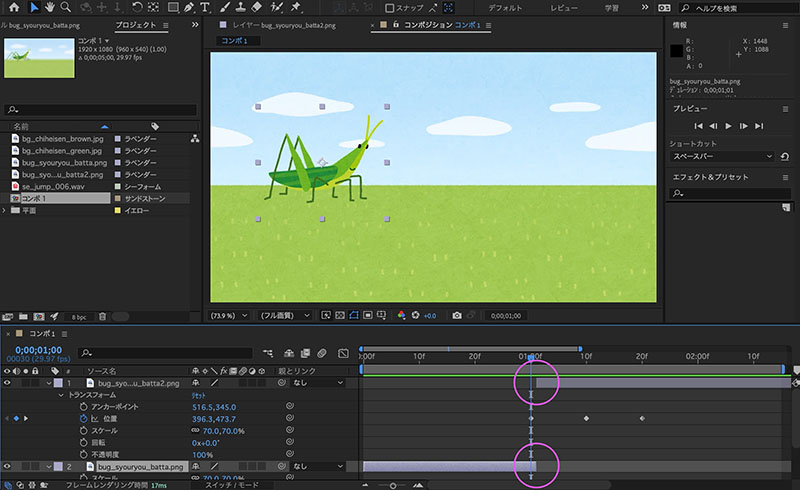
Add keyframes at 1.00 seconds and 1.20 seconds to the Position property of the “Grasshopper Image (Animated)” layer. At 1.20 seconds, hold down the SHIFT key and drag the “Grasshopper Image (Animated)” layer to move it horizontally, as shown in the figure below.
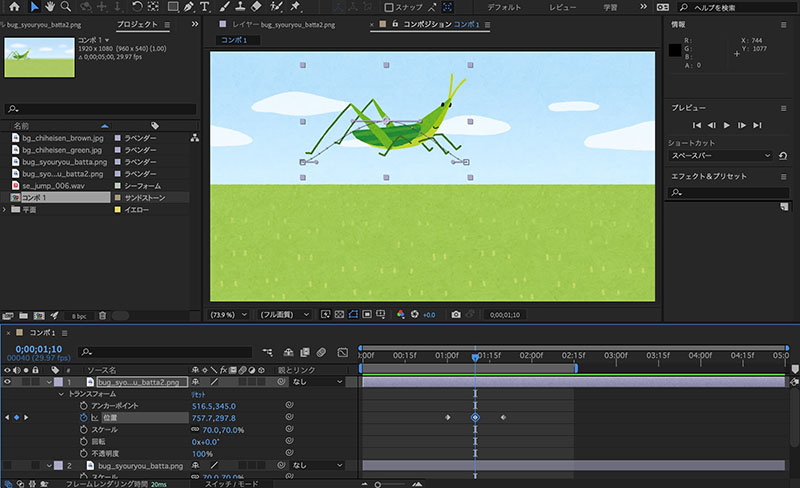
Next, add a keyframe for the position property at 10 frames per second. Drag the “Grasshopper Image - Motion” layer in the Composition panel slightly upward.
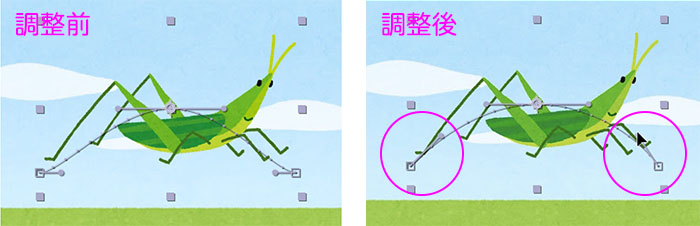
As shown in the video above, since the movement during the jump and landing has a curve (see the left side of the figure below), drag the handle to adjust it as shown on the right side of the figure below.
Display the “Grasshopper Image (Static)” and adjust the layer’s visibility range as shown in the timeline below. Display the “Grasshopper Image (Static)” until frame 0 at 1 second, and then display the “Grasshopper Image (Animated)” starting from frame 1 at 1 second.
Duplicate the “Grasshopper Image - Static” (bug_syouryou_batta.png) layer on the timeline (Cmd+D), then move it horizontally so that it overlaps the “Grasshopper Image - Animated” at the 1-second, 20-frame mark.
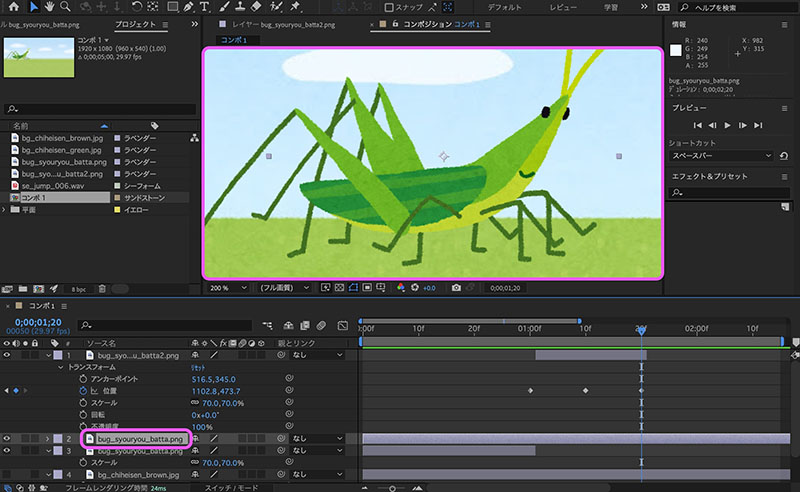
As shown in the figure below, display the moving grasshopper image at 19 frames per second, and start the still grasshopper image at 20 frames per second.

7. Adding Jump Sound Effects
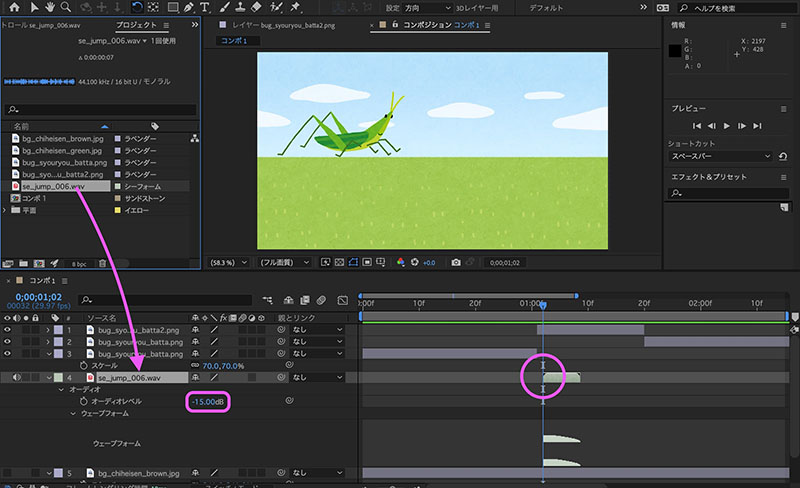
Add the sound effect (se_jump_006.wav) to the timeline. Lower the audio level by about -15 dB. Move it to the 1-second, 2-frame mark. Since the sound seems to be ahead of the start of the grasshopper animation, delay it by about one frame.
With an audio layer selected, press the L key to display only the audio level properties.

Press L twice to display only the waveform.

8. Pre-composition
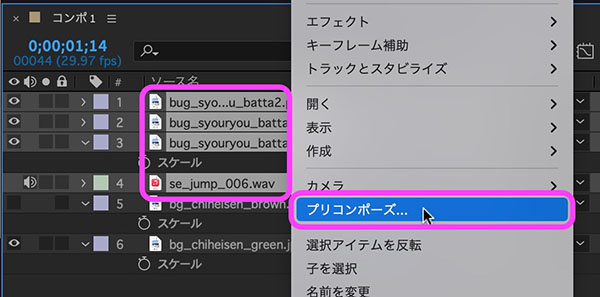
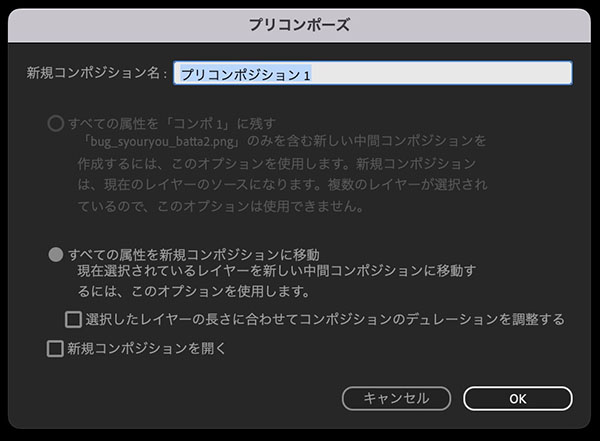
Select multiple layers, excluding the two background images (grassland and soil), and right-click. From the menu that appears, click “Pre-compose.”
In the settings shown below, click OK without making any changes.
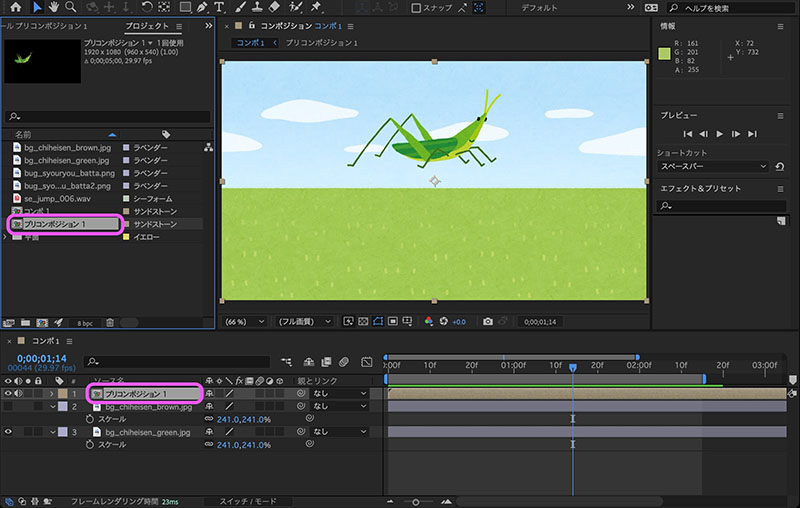
All of the original layers have been moved into “Pre-composition 1,” and the “Pre-composition 1” layer has been added to the timeline. If you play the clip in this state, the same animation will play.
Double-click “Pre-composition 1” in the Layers or Projects panel. “Pre-composition 1” will open in the Timeline, and a new tab will be added. The contents of “Pre-composition 1” will also be displayed in the Composition panel.
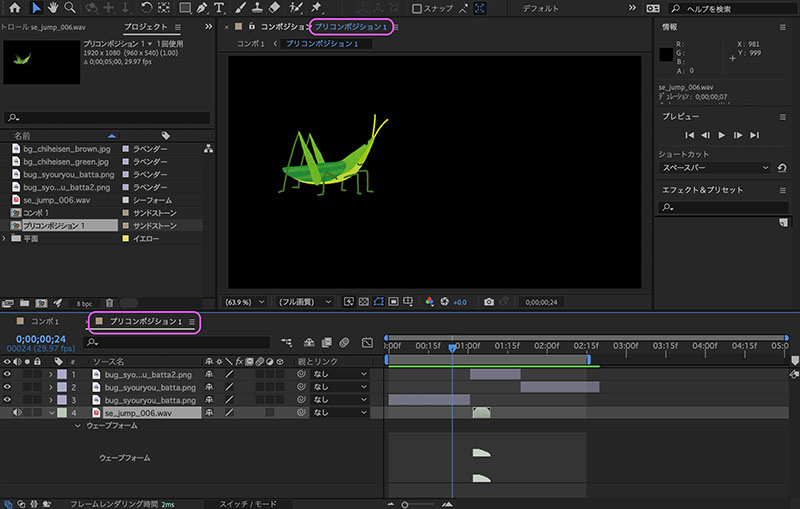
When you play it, you’ll see that it plays with a black (i.e., transparent) background, just like the previous animation.
9. Adding Markers
To make it easier to follow when editing in “Comp 1,” add markers at the 1:00 and 1:20 time stamps.
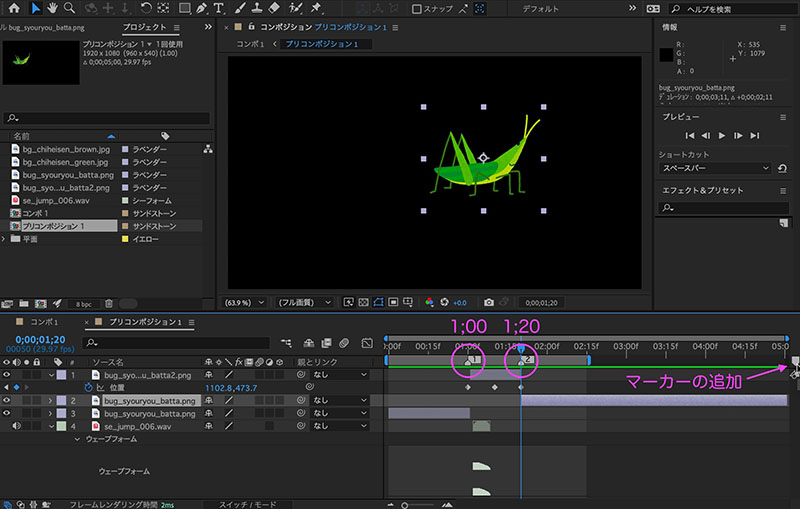
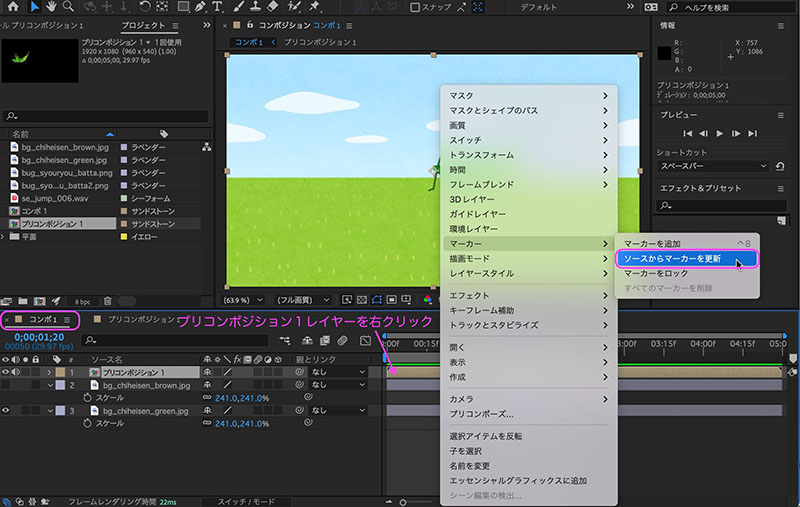
Display the timeline for Comp 1. Since the markers haven’t been applied yet, right-click the Pre-Composition 1 layer, then select Markers > Update Markers from the menu that appears.
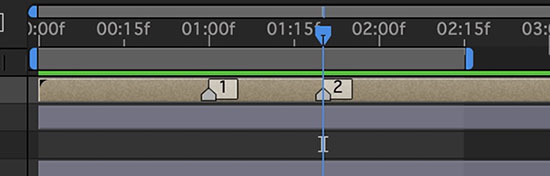
The markers are displayed as shown in the figure below. “1” indicates the moment before the jump, and “2” indicates the moment of landing.
10. Multiple Jumps
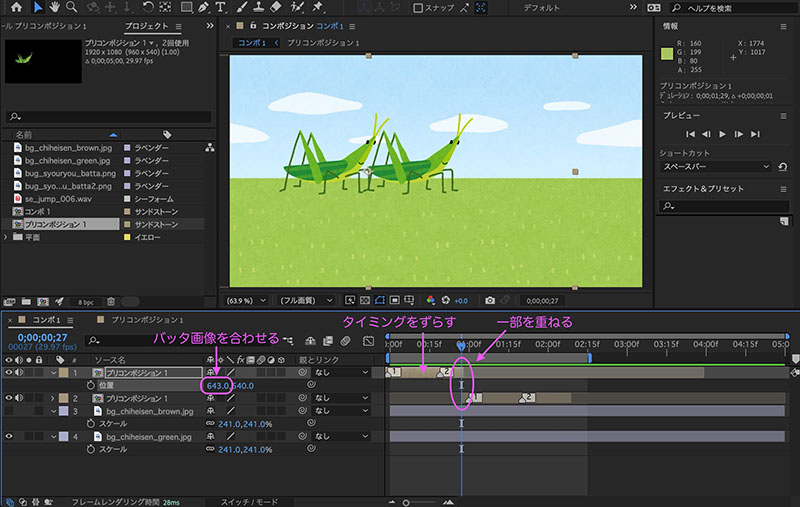
Duplicate Precomposition 1, then drag the layers horizontally to offset their timing. With some parts overlapping, adjust the position properties to align the image of the grasshopper at rest after landing with the image of the grasshopper at rest before the jump.
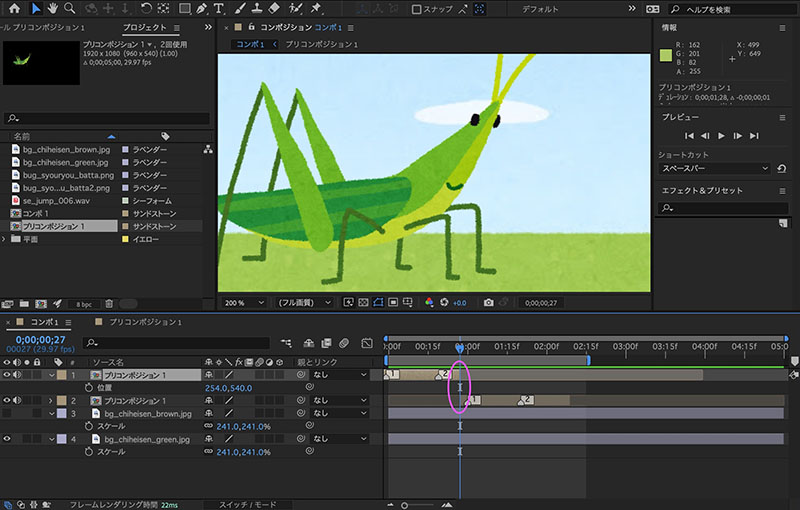
After aligning the two images of the grasshopper, adjust the length of the layers so that they no longer overlap.
Play it back to check the transitions and timing of the jumps. Readjust if necessary.
Repeat this process to create an animation consisting of four jumps.
11. Changing the Background Image (Optional)
Switch the “Soil Image” (bg_chiheisen_brown.jpg) layer to “Visible.”
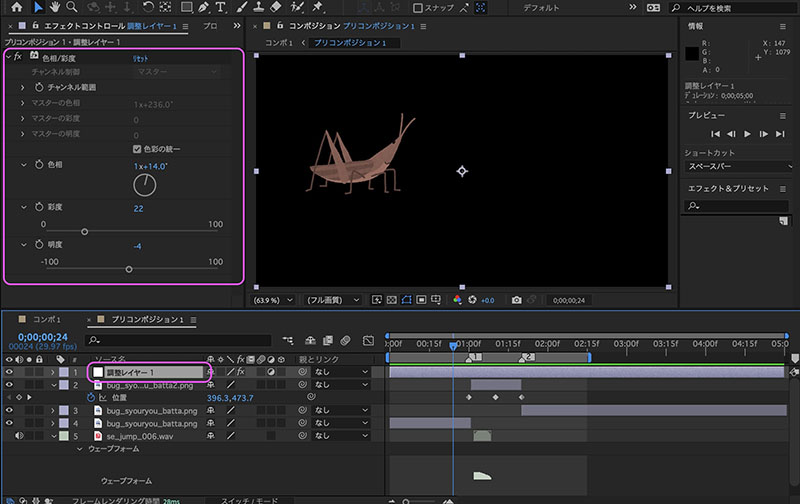
Open Precomposition 1 and add an adjustment layer to the top. Apply color adjustments using the Hue/Saturation effect with the “Unify Hue” option checked. Since the original illustration lacks contrast, you can’t make very precise color adjustments, but you can create a brown grasshopper with just a few simple steps.
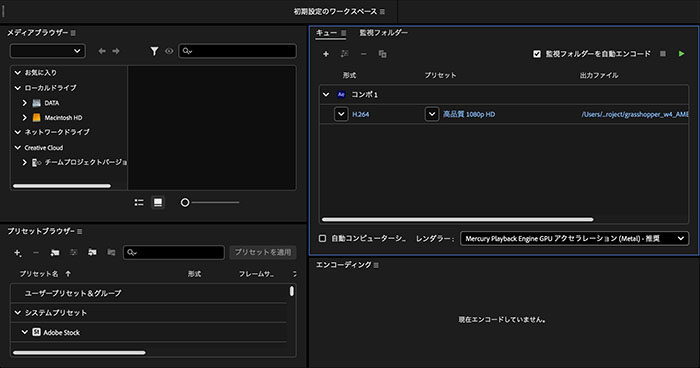
12. Export
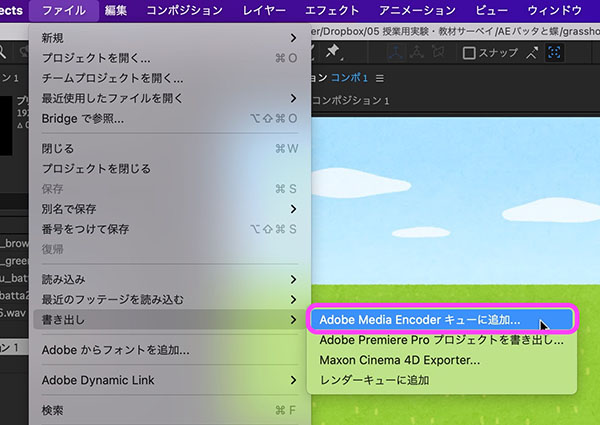
Click File > Export > Add to Adobe Media Encoder Queue. Note that the export range reflects the work area.
If necessary, specify the save format, preset, and save location before encoding. For instructions on how to use Media Encoder, see here.