Premiere Pro Part 3
1. Cut Editing
1.1 Selecting a Clip
Make sure the Selection tool is selected in the toolbar on the left. The shortcut is V.

Click to select. If the clip contains audio, the audio track will be selected as well.
You can select multiple clips by dragging to create a selection area starting from a location outside the clips.
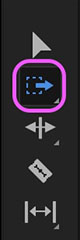
The Track Selection Tool (shortcut: A) allows you to select all clips to the right of the cursor. While you can use the Area Selection tool as an alternative, this tool is particularly useful for editing long clips.
1.2 Deleting Clips/Blank Spaces
With the clip selected, press the Backspace or Delete key. You can also select and delete spaces.
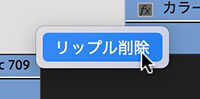
1.3 Removing Ripple
To delete a clip and fill the space with a blank at the same time, select the clip and press Shift + Delete (the Backspace key does not work). You can also do this from the context menu that appears when you right-click a clip or a blank space.
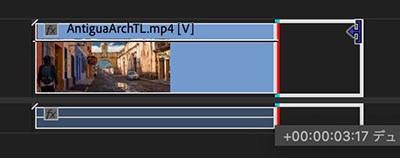
1.4 Changing the IN and OUT Points of a Clip
You can change the IN and OUT points by dragging the ends of the clip.
1.5 Splitting Clips (Adding Edit Points)
Click on the clip with the laser tool to split it. You can also split it by moving the time indicator to the desired position and pressing Cmd+K (Add Edit Point).

1.6 Trimming the Beginning and End of a Clip (Q, W)
Q: Cut before the time indicator W: Cut after the time indicator
Be careful, as the track target will be affected if there are clips on multiple tracks. Personally, I find it less confusing to use this feature only when there is a single clip.
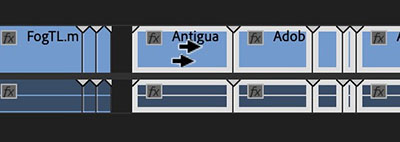
1.7 Moving Clips (Overlay Editing)
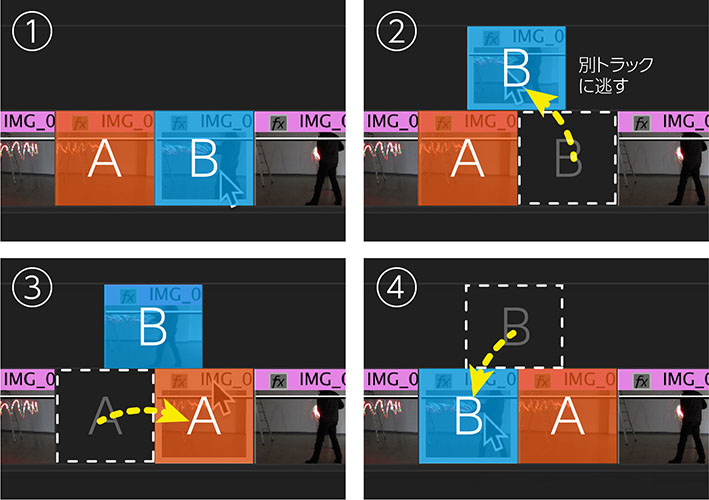
Move clips by dragging and dropping them. Since Premiere uses an overlay editing system, be careful: if you place a clip on top of another clip, the clip underneath will be deleted.
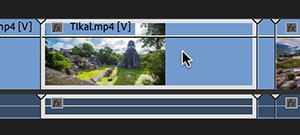
To swap the positions of two clips, move them to different tracks (see figure below).
1.8 Moving Clips (Insert Editing) Not for Beginners
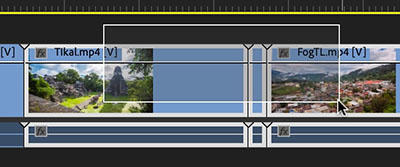
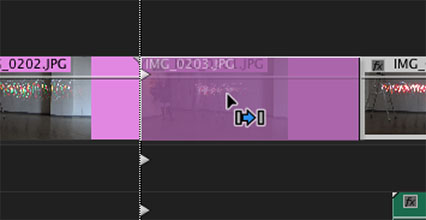
If you drag and drop a clip while holding down the Command key, the clip below it will be split, and the split portion will be pushed to the back.
1.9 Copying and Pasting Clips
Just like in other applications, use Cmd+C to copy and Cmd+V to paste. The content will be pasted onto the same track as the source at the current time indicator position.
(Note) Starting with Version 2022, the behavior has changed, and the track target no longer affects the paste destination. By default, Cmd+V pastes the content onto the same track as the source.If you go to Keyboard Shortcuts > Commands > Panels > Timeline Panel and remove “Paste to Same Track,” the behavior will revert to that of previous versions. However, we do not recommend changing the default settings. You can also work around this by moving the source track before pasting. This change is likely intended to prevent confusion for beginners who might accidentally change the track target and end up pasting to an unintended track.
1.10 Snap
Clips will stick together if they are close to each other. You can turn this feature on or off using the icon in the upper-left corner of the Timeline panel. It’s usually fine to leave it turned on.

1.11 Linked Selections
By default, clips containing audio have their video and audio tracks linked, so they are selected simultaneously. If you turn off the “Linked Selection” icon, you can select and move them separately. However, since they remain linked, if you turn the “Linked Selection” icon back on, they will move while still misaligned.

1.12 Unlinking
To unlink the video and audio, right-click the clip and select “Unlink” from the menu that appears.

1.13 Inserting or Overwriting Sequences as Nests or Individual Clips (Introduction Only)
A setting that determines whether nested sequences are treated as a single clip or as a collection of original footage. You need to understand the concept of nesting (this will be explained in class).

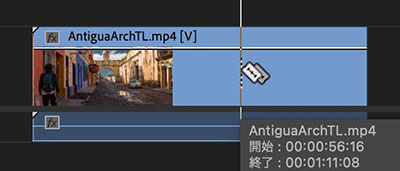
1.14 Duplicate (Option+Drag)
You can duplicate a clip by holding down the Option key and dragging it. You can also duplicate individual clips by dragging them on the video or audio track while they are deselected. This can be more useful than unlinking them.
2. Video Transitions
Video transitions create visual effects that connect clips.
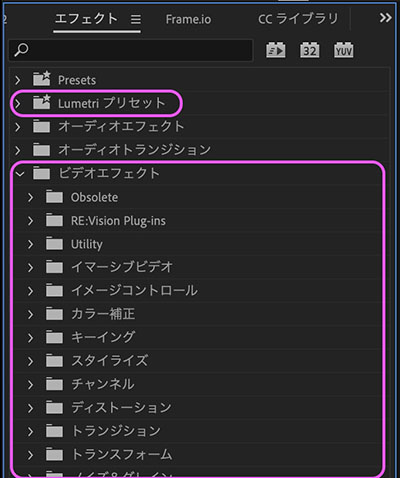
The Effects panel (located within the Project panels in the default workspace) offers a wide variety of video transition presets.
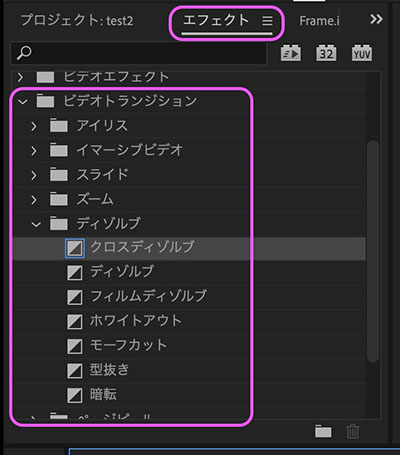
To apply a video transition, simply drag and drop it between two clips. For video clips, you’ll need a buffer of half the transition’s duration before and after the clip, so trim the clip accordingly before applying the transition.
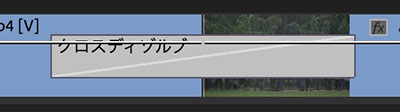
You can change the transition duration by dragging the ends of the transition box or by right-clicking and selecting “Select Transition Duration” from the context menu.

(Reference) [Premiere Pro Tips] Differences Between and How to Use the 3 Types of Dissolves
3. Video Effects (Introduction Only)
Video effects are applied directly to the footage itself. They serve a variety of purposes, such as color correction and distortion. In particular, effects specifically designed for color grading—such as Lumetri (including those in DaVinci Resolve)—are considered crucial in film and other production projects, as they significantly influence the final look and feel of the work.
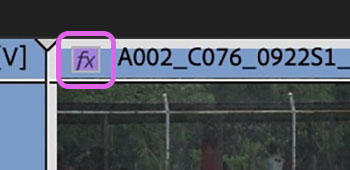
Apply by dragging and dropping onto the clip. The fx background of the applied clip will turn purple.
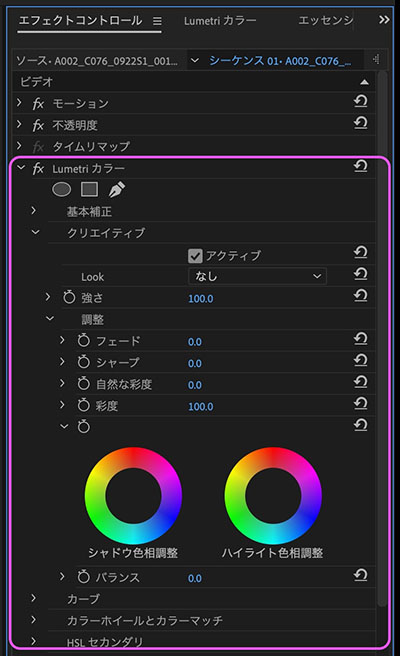
Video effects are controlled via the Elect Control Panel. Each parameter can also be animated over time using keyframes.
4. Fade-in/Fade-out Settings
4.1 Method 1: Video Transitions
You can achieve this by placing a cross-dissolve or dissolve before or after the clip. With other transition effects as well, if there is nothing on the track below, the transition will be to black.

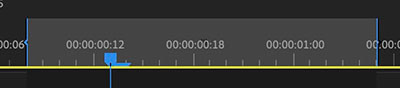
4.2 Method 2: Keyframe Animation of Opacity
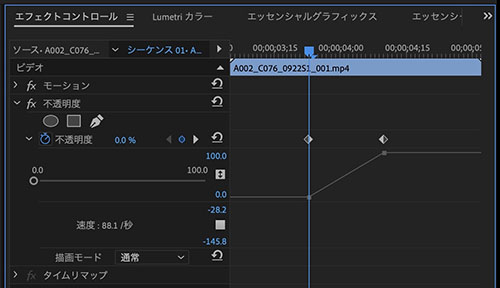
Double-click the area shown below, or hover over it and press Shift + scroll wheel to expand the track height, and you can add an opacity keyframe.

By adding two keyframes and dragging them, you can set up a fade-in (0–100%) as shown in the figure below.

By default, clip keyframes support opacity, but this can be changed to motion or time remapping.

You can also adjust opacity and other keyframes in the Effects panel.
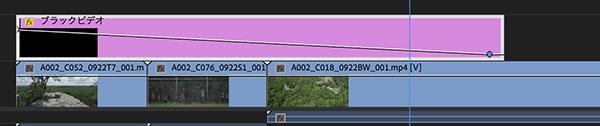
4.3 Method 3: Fading Multiple Clips In and Out
To create a fade-in or fade-out that spans multiple clips, create a black video or color matte and add it to the track above. For example, if you fade out the black video using opacity keyframes, the footage on the track below will fade in.
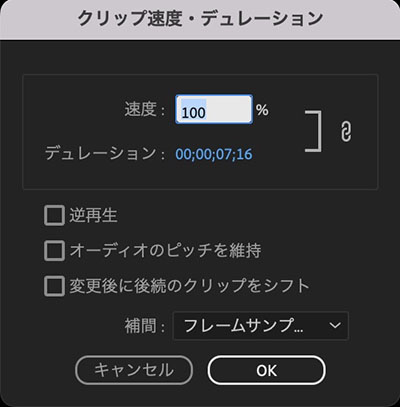
5. Changing the playback speed (for reference only)

Adjusting the playback speed allows you to play back footage in slow motion or fast forward. The smoothness of the slow-motion playback depends on the frame rate at which the footage was recorded. For high-quality slow motion, you need to shoot at a high frame rate or use RE:Vision Effects’ Twixtor.
6. Editing Audio Clips (Covered in the Introduction and Part 4)
6.1 Cut Editing
Editing audio tracks is basically the same as editing video tracks: you change the duration or add edit points.
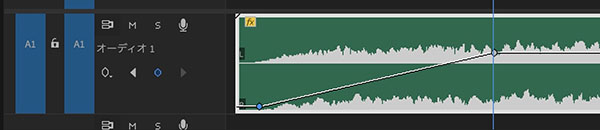
6.2 Adjusting Volume and Guidelines
To adjust the volume, drag the rubber band on the clip (the keyframe line) up or down. There are other ways to adjust the volume, so please refer to the URL below.
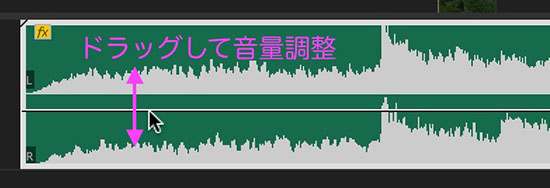
Adjust the volume while monitoring the movement of the audio meter. The unit of the value on the right is dB (decibels).
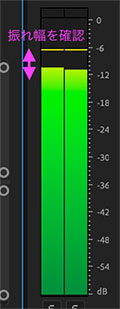
According to the reference URL below, the volume range is approximately as follows.
Overall mix level: -3 to -6 dB
Voice: -6 to -10 dB Sound Effects: -8 to -15 dB Background Music: -30 to -35 dB
The above describes the balance for scenes where dialogue is the primary focus; however, for scenes where background music takes center stage, we may need to increase the sound effect level (–8 to –15 dB) or the dialogue level (–6 to –10 dB). Just as the dynamic range of sound differs between TV programs and movies, it is necessary to adjust the overall balance based on the intended playback environment.
(Reference)
- [Concepts and Tips] for Volume Adjustment Learned from Audio Professionals
- Guidelines for Adjusting Audio Levels During Video Editing
- How to Adjust Volume! A Guide to Adjusting Background Music in Premiere Pro and Recommended Levels
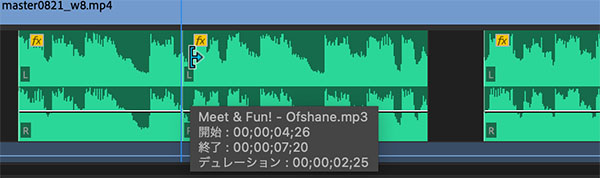
6.3. Audio Transitions
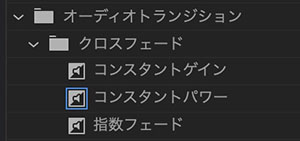
There are fewer audio transitions than video transitions; there are only three: constant power, constant gain, and exponential fade.
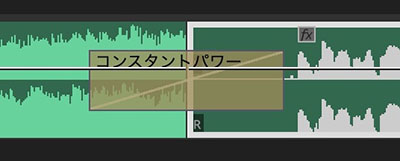
With constant gain (proportional change), the sound level drops slightly around the middle of the transition, so constant power is often used for simple audio transitions. Compare the results and choose the best option. Just like with video transitions, apply it by dragging and dropping between clips.
(Reference) [Premiere Pro] Audio Fades: Constant Power, Constant Gain, and Exponential Fade—Which One Should You Use?
6.4 Fading Volume In/Out
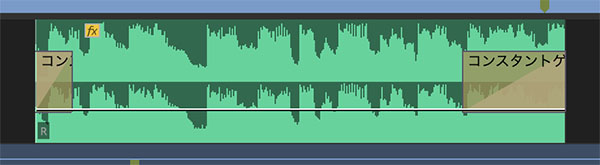
You can drag and drop audio transitions before and after clips. Since Constant Power, Constant Gain, and Exponential Fade result in different ways for the volume to rise or fade out, listen to them side by side to choose the right setting. In the order of Exponential Fade, Constant Gain, and Constant Power, the degree of volume change ranges from a “gradual change” to an “abrupt change.”
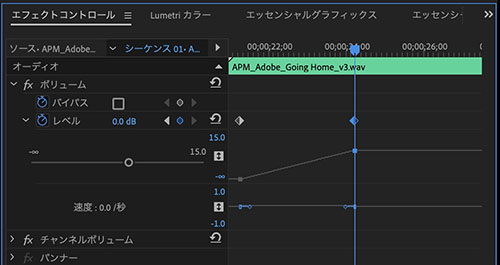
6.5 Volume Over Time (Keyframes)
Just like with video clips, you can use keyframes to adjust the volume over time in audio clips as well. Using keyframes allows you to adjust the volume even in the middle of a clip.
You can make fine adjustments using the volume control in the Effects panel.
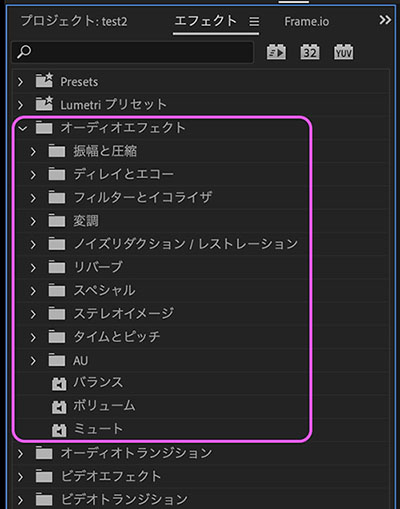
6.6 Audio Effects (Introduction Only)
Just like video effects, you can apply effects to audio clips. Adjusting the parameters of audio effects requires a certain level of technical expertise.
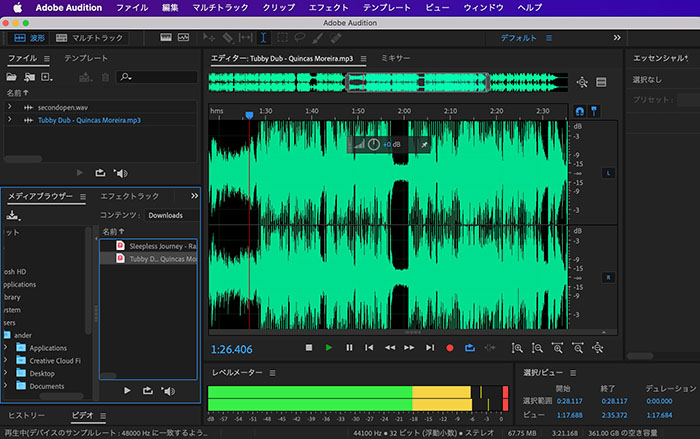
7. Using Audition (Introduction Only)
For advanced audio editing that isn’t possible in Premiere, we use Adobe Audition. In Audition, you can not only edit waveforms but also create music through multitrack editing using looped audio clips.
8. Exporting (3 Methods)
8.1 Setting the Export Range
In Edit Mode, set the export range using the IN point and OUT point (or the work area).

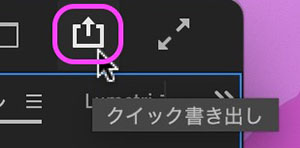
8.2 Method 1: Quick Export
With the Sequence Panel selected in Edit Mode, click the icon in the upper-right corner of the UI. If a clip is selected in the Project Panel, you can also export it as a format conversion.
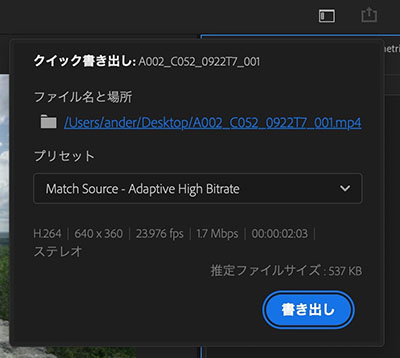
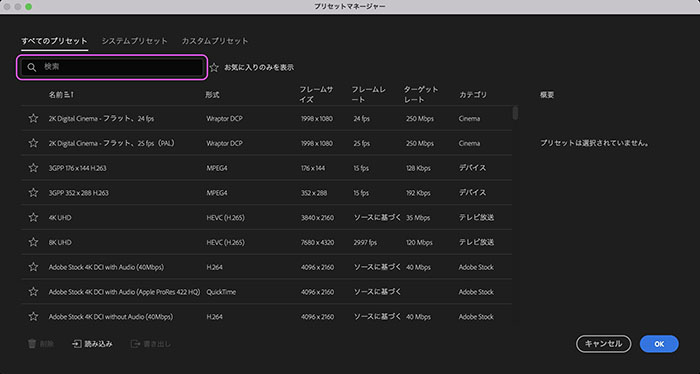
Select the file name, location, and preset, then click the Export button.
Settings not included in the preset drop-down list can be selected from the “Other Presets” option.
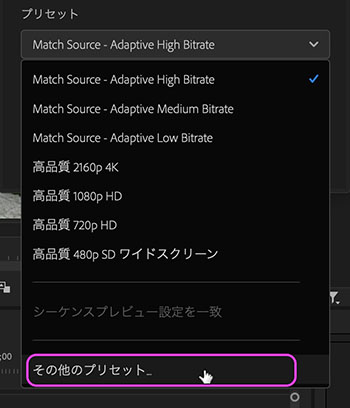
There are many presets available, so search for keywords using the search bar. To create a custom preset, launch Media Encoder.
8.3 Method 2: Export Mode
Switch to export mode. The File menu > Export > Media option performs the same action.

Configure the following settings on the screen shown below.
- File name
- Location
- Preset (frame size, frame rate, bitrate, etc.)
- Format (may change automatically depending on the preset)
- Range (entire source / source in/out / work area / custom)
In export mode, you can also configure settings for uploading to YouTube, Behance, and other platforms from the menu on the left.
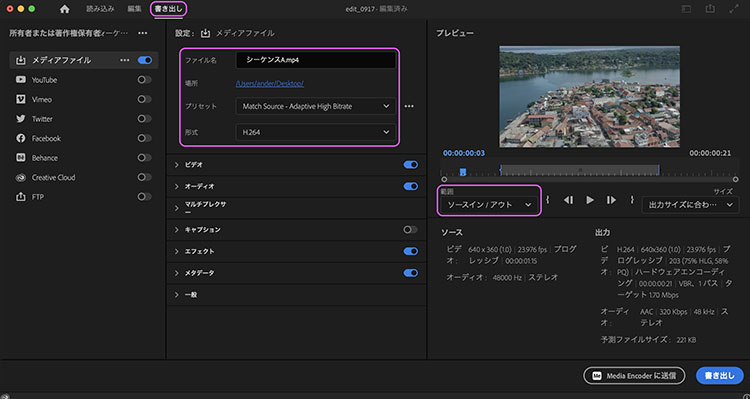
Click the export button in the lower-right corner.

8.4 Method 3: Exporting from Media Encoder
If you need to perform batch processing or trimming, you can also export the footage using Media Encoder. Premiere export presets must be created in Media Encoder.
Click “Send to Media Encoder” in the lower-right corner of the export mode.

Click here to learn how to use Media Encoder.