Using a Tripod

1. Various Camera Stands
Camera stands come in a variety of shapes and designs—including tripods, monopods, stands for still photography, stands for video recording, slide rails, and gimbals—to accommodate a wide range of shooting styles. Choose the one that best suits your needs.
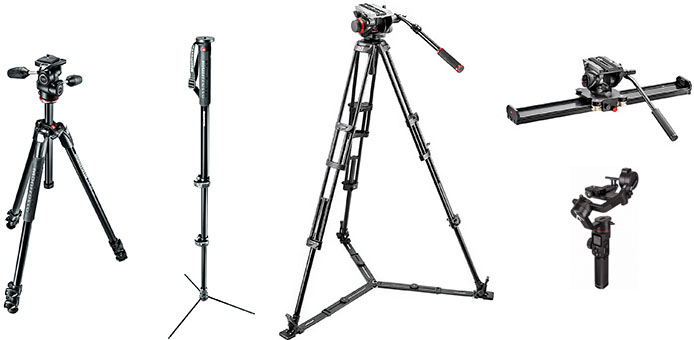
(Reference) https://www.manfrotto.com/jp-ja/
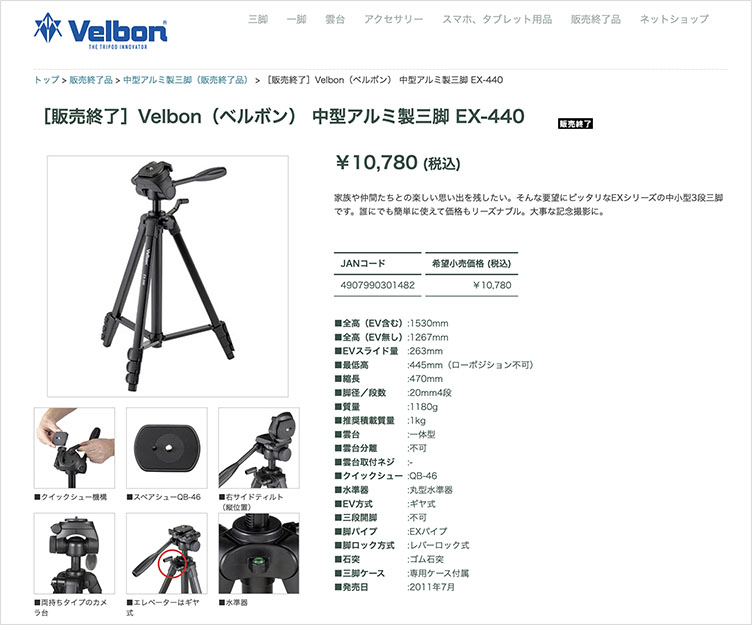
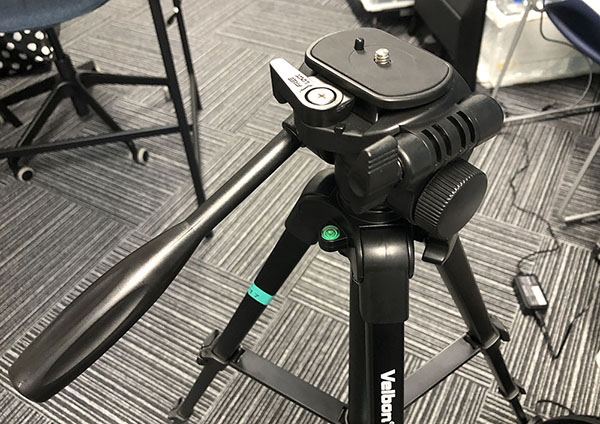
2. Velbon EX-440 N
Here, we will use the Velbon EX-440 N tripod available in Room 12-212 at the Minami-Osawa Campus. Although it is a relatively inexpensive tripod, it can support the weight of a DSLR camera and is equipped with a quick-release plate. It is not suitable for dynamic camera work during video shooting but is ideal for stationary shots.
https://www.velbon.com/products/detail/1101200440-00-00-00
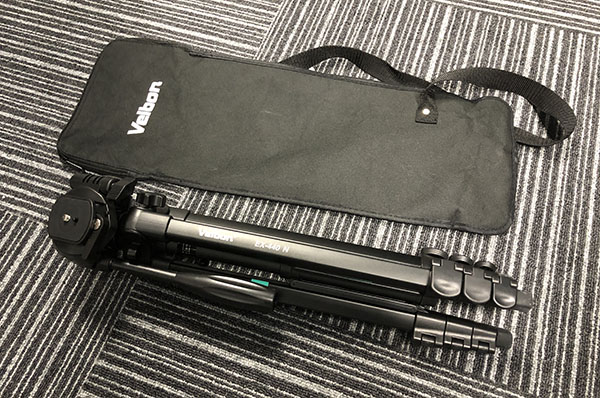
3. Remove from the bag
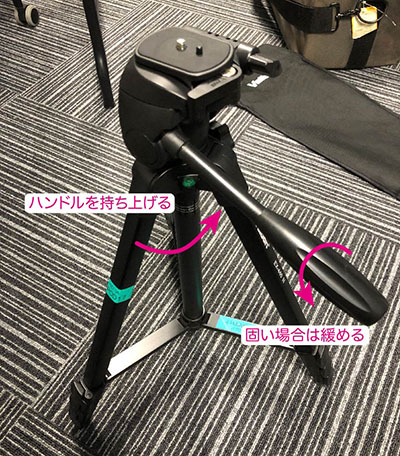
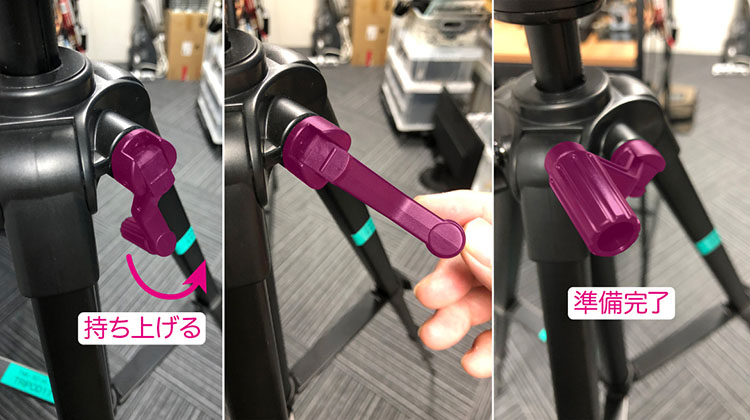
4. How to Stretch Your Legs
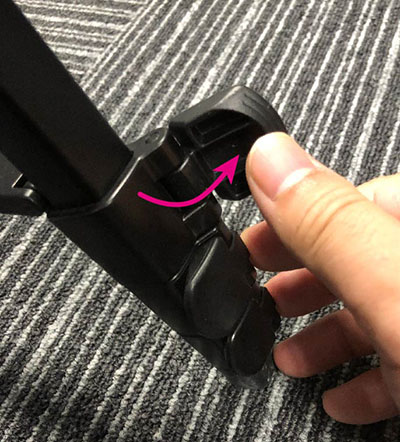
Spread your legs and lower the spreader firmly.

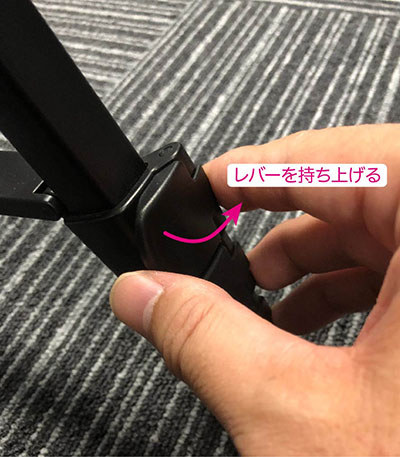
Lift the handle. If it is stiff, turn the handle counterclockwise.
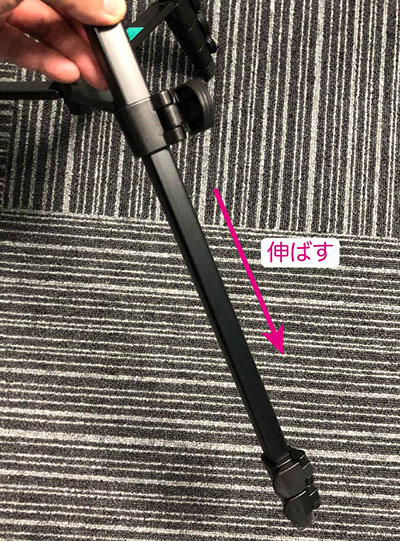
Extend the legs starting from the thicker end (the top lever). This ensures the unit remains as stable as possible during use.
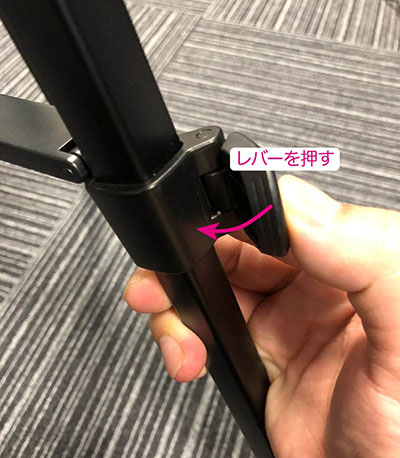
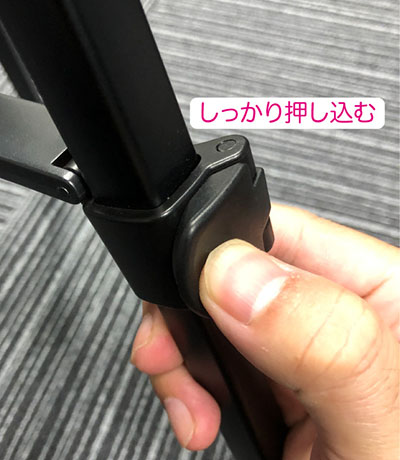
If the lever isn’t fully engaged, the tripod could tip over and cause an accident, so make sure to push it all the way in.
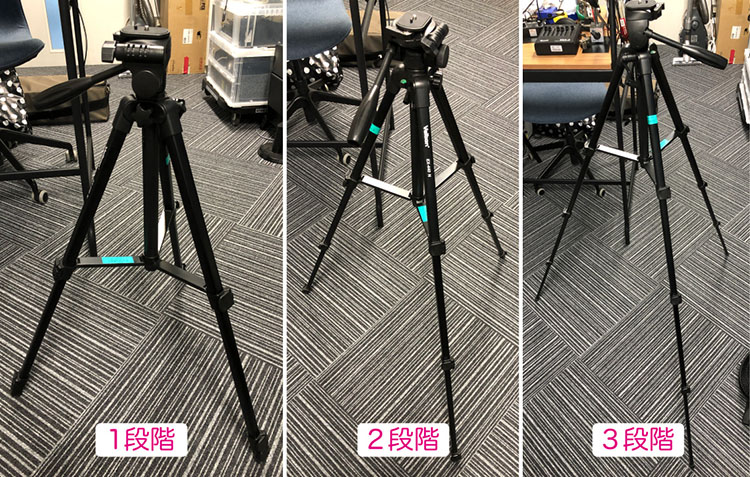
The legs can be extended to three different positions.
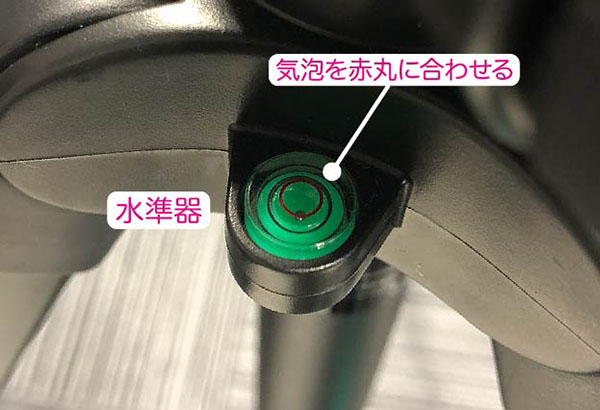
5. Spirit Level
Fine-tune the leg lengths so that the bubble in the spirit level is centered in the red circle. Keeping the tripod level ensures that the camera remains level even when panning.
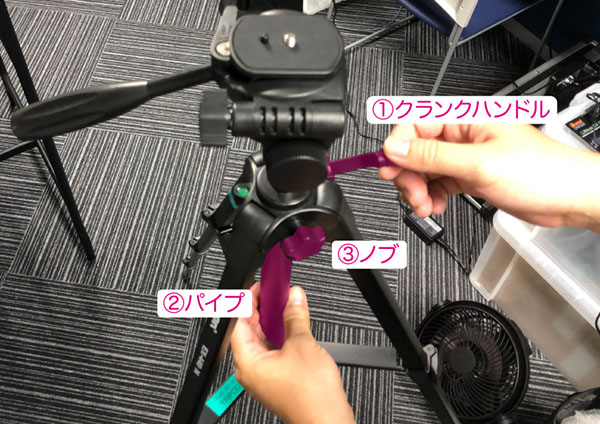
6. Elevator
The elevator is controlled at three points to adjust its height.
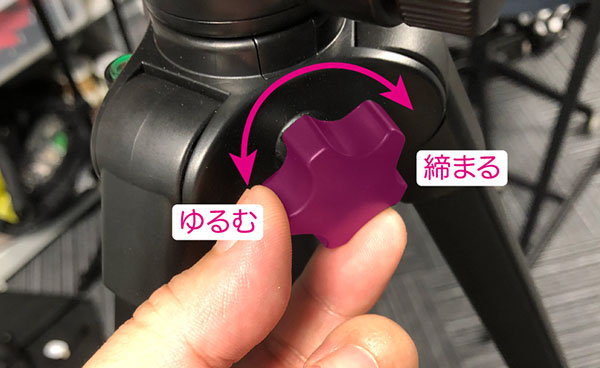
Loosen the knob shown below.
Lift the folded crank handle. Fold it back into place when you have finished adjusting the elevator or when putting it in a bag.
Turn the pipe under the tripod head to loosen it.
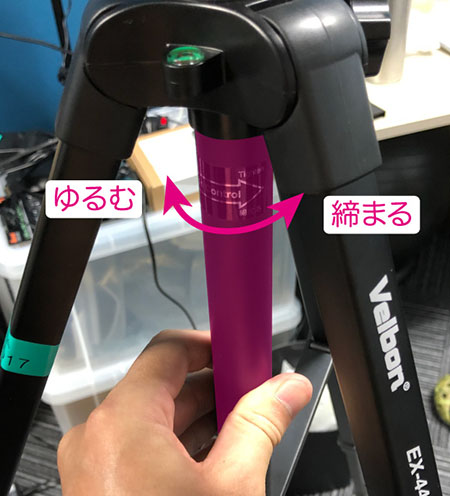
As shown in the figure below, hold the pipe with your left hand and tighten it while adjusting the height of the elevator with the crank handle in your right hand. This is a two-step process that concludes by securing it with the knob. Once the adjustment is complete, fold the crank handle back into place.
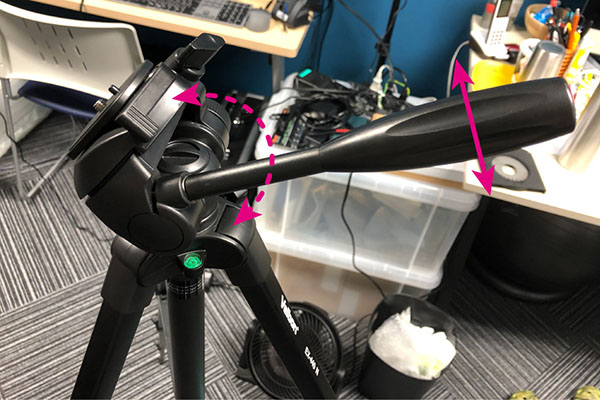
7. Tripod Head
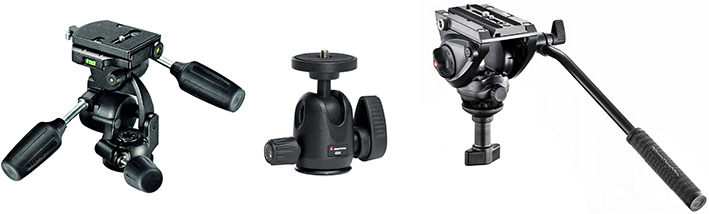
7.1 Various Tripod Heads
The main types of camera heads include 3-way heads, ball heads, and video heads. Video heads are equipped with ball levelers or fluid heads, enabling smooth camera movement (as demonstrated using a professional Lebec tripod).
The head on the Velbon EX-440 N is similar to a 3-way head and is best suited for shooting with the camera fixed in place. It is not suitable for video shooting that involves camera movement (panning and tilting).
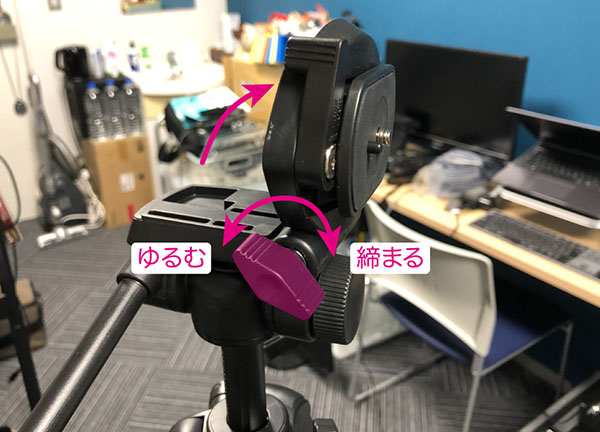
7.2 Bread
Turn the dial shown below to loosen it.
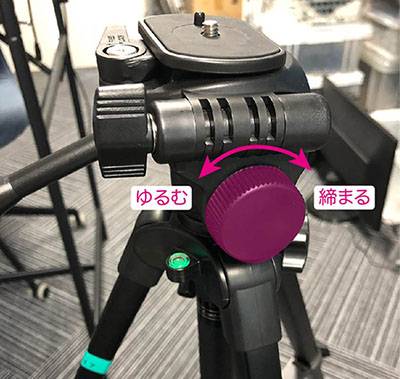
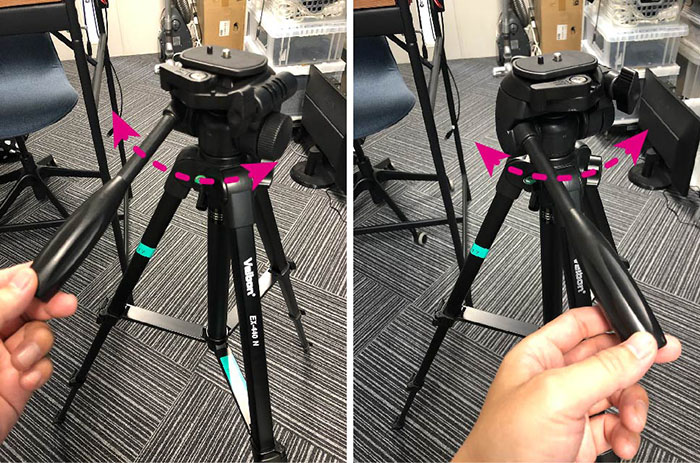
You can pan the camera by moving the joystick left and right.
When mounting the camera for a shot, make sure to tighten the dial. If you leave it loose, your body might bump into it and cause it to move, or the camera’s weight might cause it to shift gradually over time, so it’s best to tighten the dial to secure it in place.
7.3 Tilt
Loosen the handle.
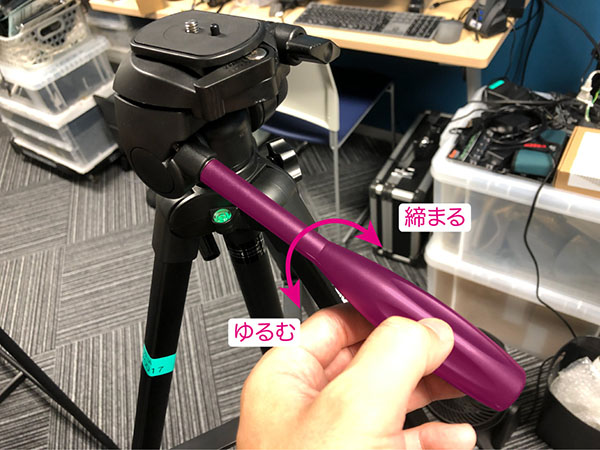
Move it in the tilt (up and down) direction. Tighten the handle to secure it.
7.4 Vertical Shooting Function (Side Tilt)
You can switch between portrait and landscape orientation on the camera.
8. Quick Release Plate
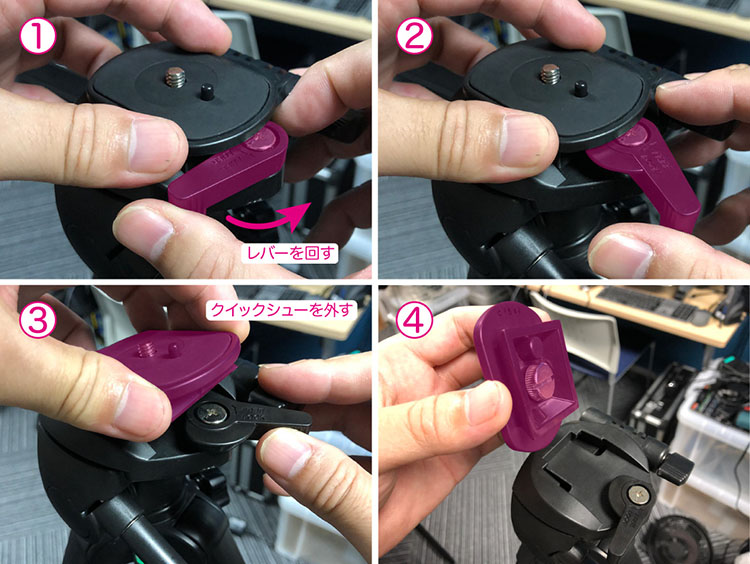
8.1 How to Remove the Quick Release Plate
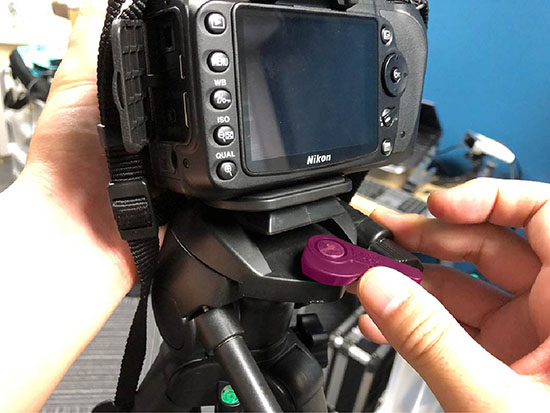
Turn the lever with your right hand, and while holding it down, remove the quick-release plate with your left hand.
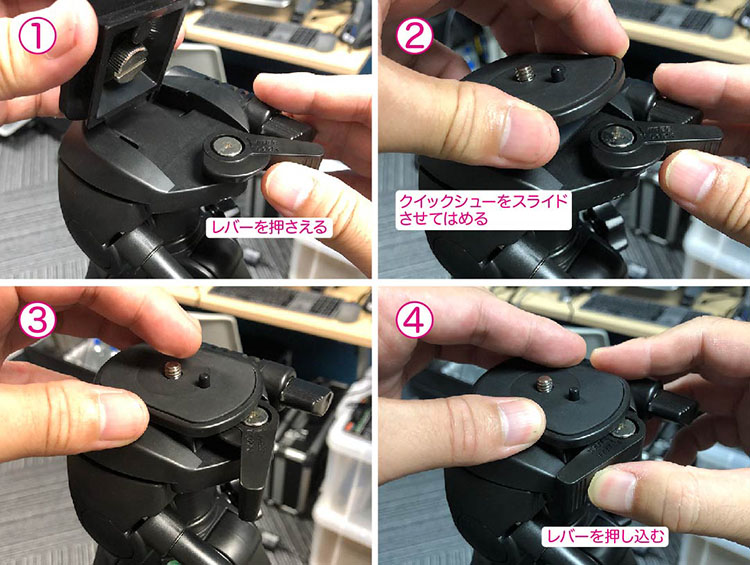
8.2 How to Install the Quick Release Plate (Required for Return)
When returning the equipment, remove the quick-release plate from the camera and attach it to the tripod. Be careful not to forget this step, as it’s easy to overlook.
9. For DSLR Cameras
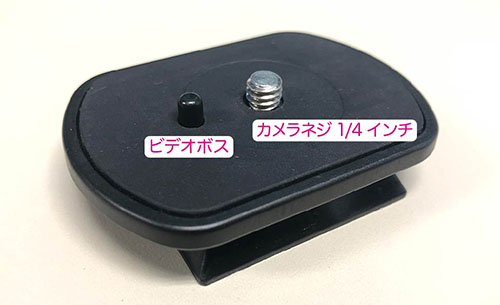
9.1 Video Mounts for Quick-Release Plates
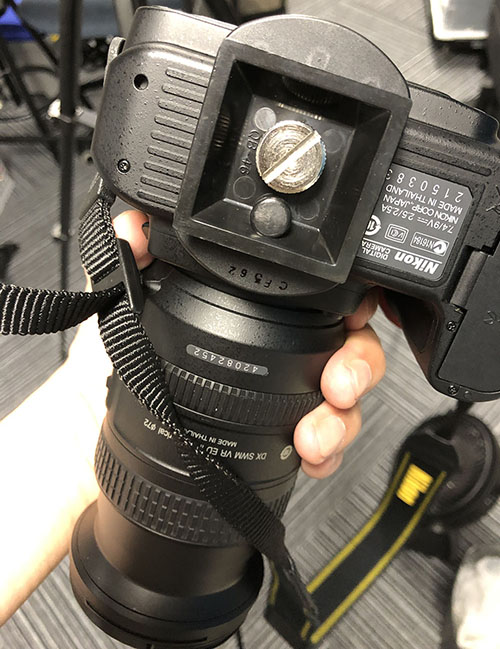
The quick-release plate on this tripod is equipped with a video boss (fixed camera stand bolt and anti-rotation pin). The video boss is designed to prevent video cameras—which often use panning movements—from shifting on the quick-release plate by inserting it into the hole on the bottom of the camera. Since still cameras do not have a hole for the video boss on their bottoms, the boss is designed to retract when pressed against the camera.
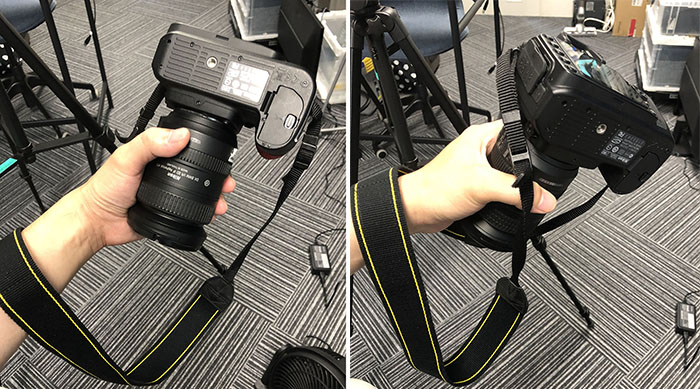
9.2 How to Hold the Camera
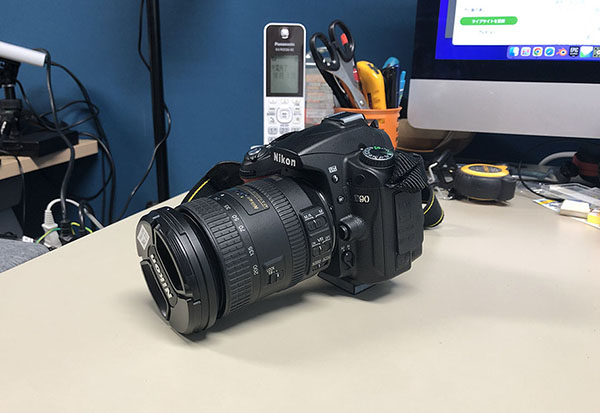
Since the camera body is hard to hold, make sure to grip the lens firmly. Wrap the neck strap around your arm as tightly as possible to protect the camera in case it falls.
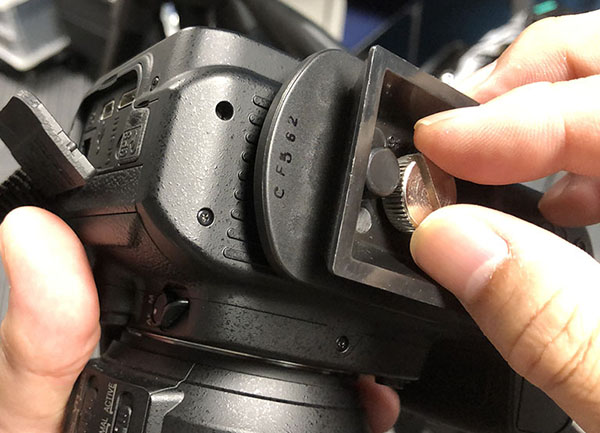
9.3 Attaching the Quick Release Plate to the Camera
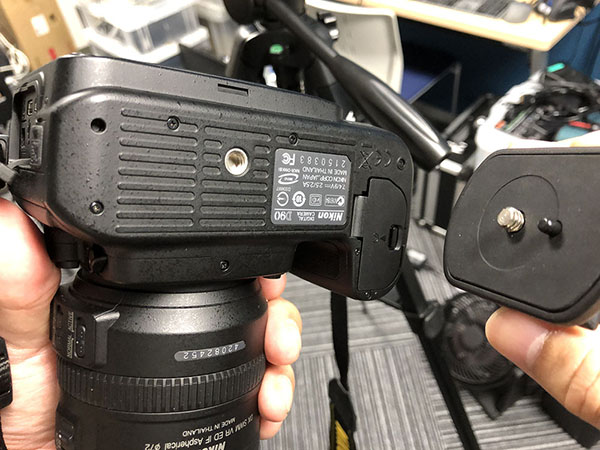
Press the video boss against the bottom of the camera and align the inch screws to secure it. If you can’t turn it with your fingers, use a coin or similar object.
9.4 Attaching the Camera and Quick-Release Plate to the Tripod
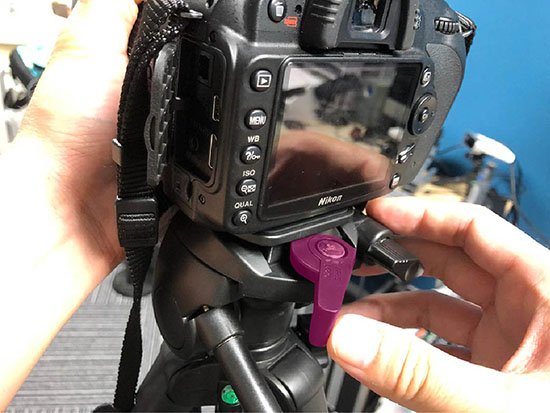
Open the lever and slide the quick-release plate into place.
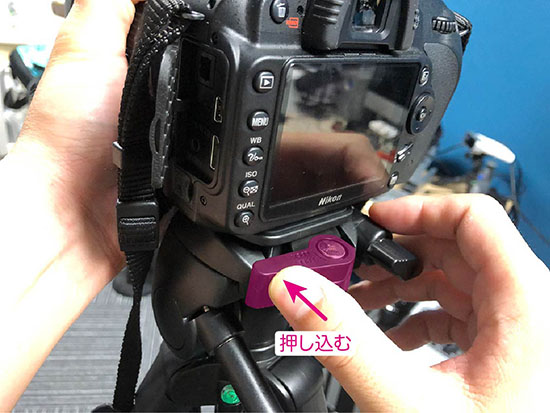
Make sure to push it all the way in. If you don’t push it in all the way, the camera might come loose.
10. For smartphones
10.1 Attaching the Quick Release Plate to the Smartphone Holder
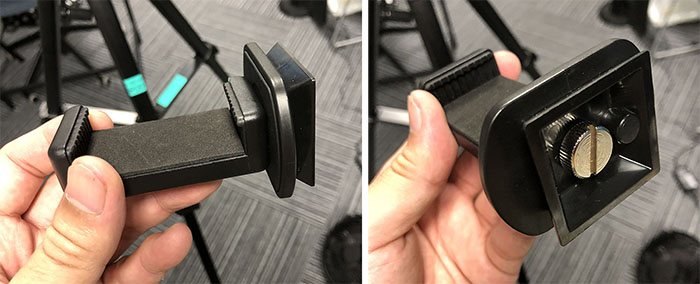
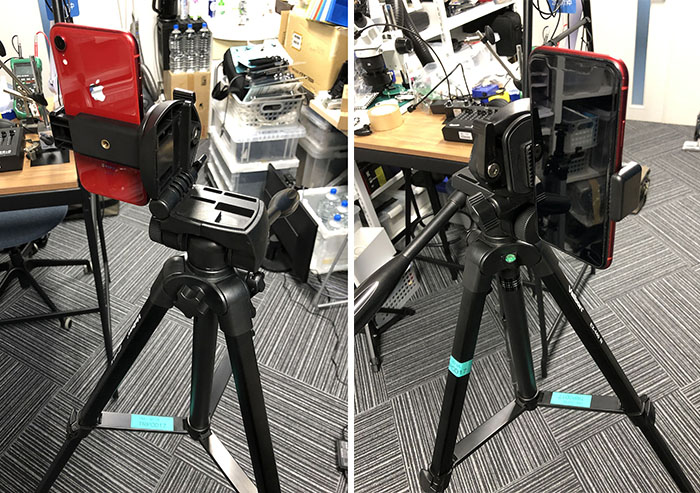
10.2 Mounting a Smartphone

With the side tilt raised.
11. Tips for Photography
11.1 Checking Handle Tightness
Check that the tilt handle is tightened securely. Since DSLR cameras are particularly heavy on the lens side, if the handle isn’t tightened properly, the camera will gradually tip forward. Because cameras are precision instruments, this alone can cause malfunctions, or in the worst case, the tripod could tip over and damage the camera.
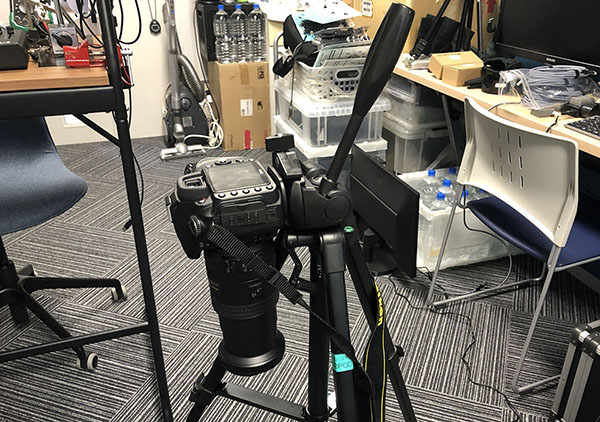
11.2 Keep the camera mounted on the tripod
The camera may tip over if it’s hit by the wind or a passerby. Make sure someone is always standing next to the camera. If you need to step away, remove the camera from the tripod and place it on a desk or on the floor where it won’t be in the way. If you’re working alone, take it with you.
12. Pre-Shooting Preparation Procedures
Before setting up the camera on a tripod, do not determine the composition while the camera is mounted; instead, first determine the composition while holding the camera in your hands, and then adjust the tripod’s position and height. If a camera assistant is present, steps 2 through 4 should be performed by the camera assistant.
① Determine the camera composition while holding the camera. ② Adjust the tripod to that height. ③ Attach the camera (quick-release plate) to the tripod. ④ Level the camera using the spirit level. ⑤ Use the pan bar to adjust the camera composition. ⑥ As needed, fine-tune the tripod height, level, and composition.