Audio Reactive ver.2 - Part1

1. What Is Audio-Reactive Art?
This is a visual expression technique that generates visuals in real time in response to sound, and has long been a standard feature in media players for Mac and Windows as a sound visualizer. Tools for creating audio-reactive content include After Effects, VJ software, Cycling’74 Max, Unity, and, more recently, web services (such as https://musicvid.org/).
While audio-reactive art is broadly considered a form of audiovisual art, it differs in mechanism from works that create synergistic effects through editing, as it analyzes audio data in real time and visualizes it. In practice, many artists combine these techniques in their work, and in recent years, a wide variety of expressive methods have emerged, including integration with lighting and robotics.
2. This Exercise
We will conduct a workshop on audio-reactive performances using TouchDesigner. The song in the video below is different from the one used in the workshop.
Reference: Other Tutorials
This is a rendering where the image has been converted to pseudo-3D, and the volume of the sound corresponds to the changes in the height map.
https://old2-lecture.nakayasu.com/index_p=2544.html
You can also find a variety of tutorials by searching for “audio reactive touchdesigner” on YouTube.
There are also examples of audio-reactive applications using Stable Diffusion.
3. Preparation
3.1 Preparation of Experimental Image Data
The Tokyo Metropolitan University logo will be used during the experimental phase. Tokyo Metropolitan University students can download it. Instructions will be provided in class.
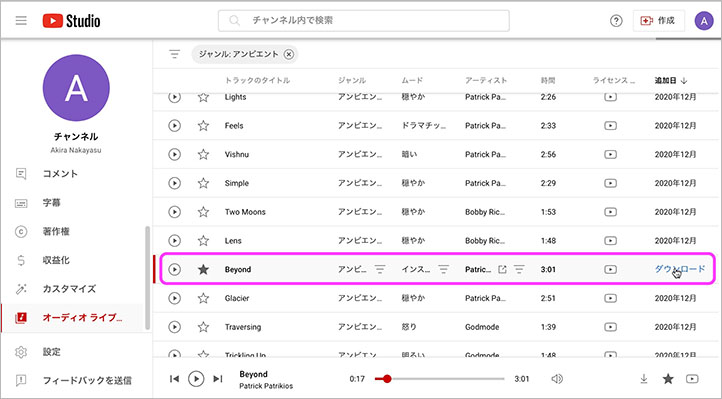
3.2 Preparing Music Data
Download it from the YouTube Studio audio library. Since we’re only analyzing the volume in this case, tracks with a good dynamic range—with quiet sections and enough rhythm—tend to work best.
In this session, we will be using Beyond (see below), an ambient music track.
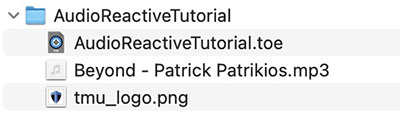
3.3 Creating a Working Folder
Create a folder with any name, as shown below, to organize your music files, image files, and TOE files (TouchDesigner Environment files).
3.4. Launching TouchDesigner
After launching TouchDesigner, delete the sample data and close the palette on the left.
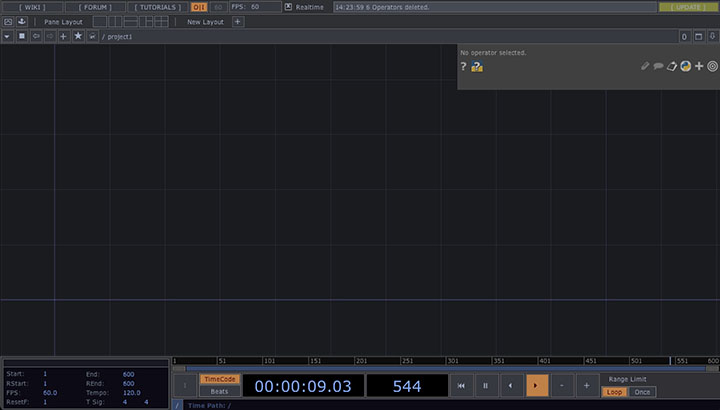
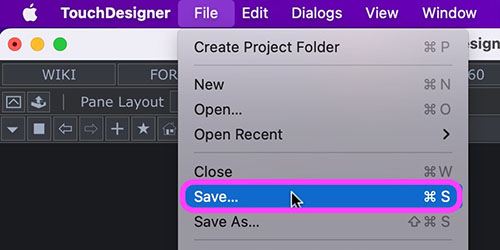
From the File menu > Save, save the toe file to the working folder.
4. Audio Reactivity in Images
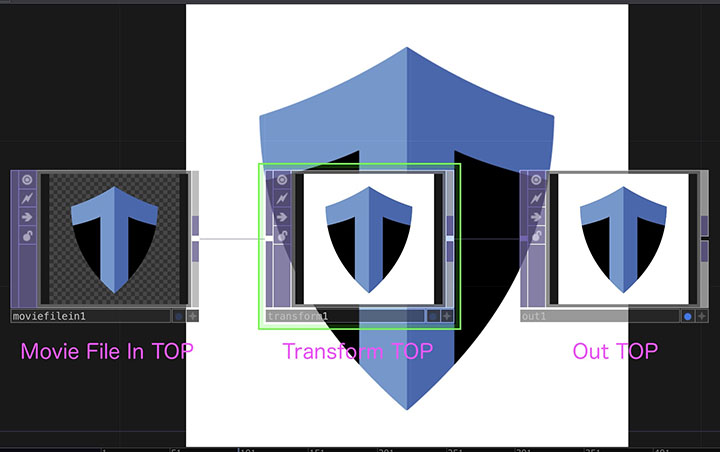
4.1 Displaying the Metropolitan University Logo Image
- Movie File In TOP
- In the File menu, change the banana image (Banana.tif) to tmu_logo.png
- Transform TOP
- Set the Background Color to 1, 1, 1, 1 to make it white
- Turn on Comp Over Background Color
- Out TOP
- Turn on the Display button (Background display) as needed
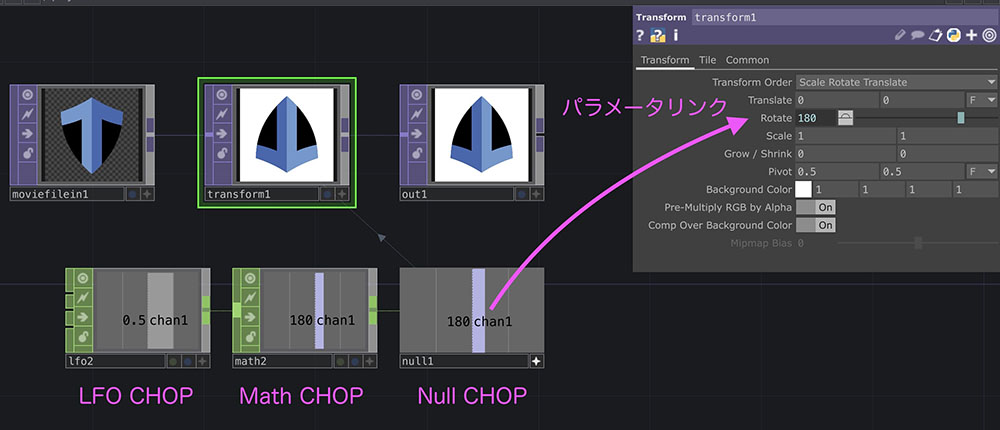
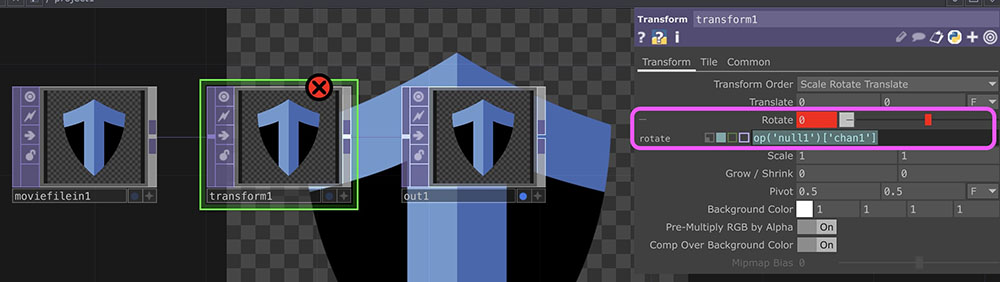
4.2 Rotation Experiment (Optional)
*Delete after the experiment
- LFO CHOP
- Type: Ramp
- Math CHOP
- To Range: 0–360
- Null CHOP
- Parameter link (CHOP Reference) to the Rotate parameter of the TOP
If you want to delete an operator that contains a parameter link, you must display the script for the linked operator and delete it.
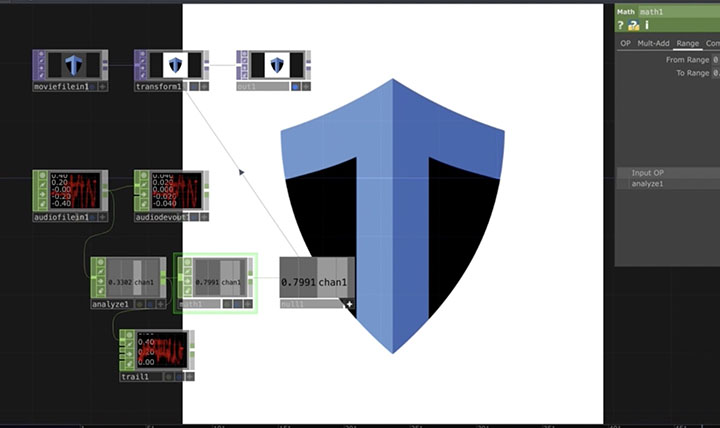
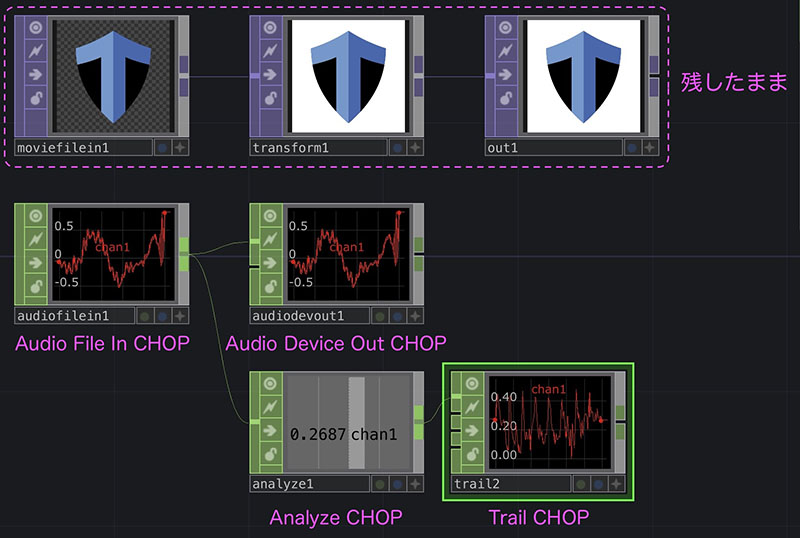
4.3 Analysis of Sound Intensity
- Audio File In CHOP
- Mono: ON
- Audio Device Out CHOP
- Click Bypass (arrow icon) to mute the audio while continuing playback
- Analyze CHOP
- Function: RMS Power
- Trail CHOP
- For monitoring changes in values
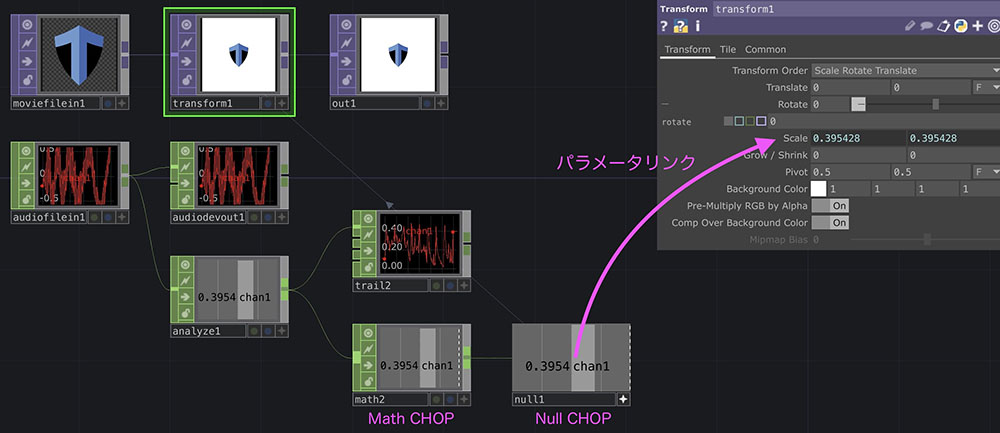
4.4 Reflecting Sound Volume in the Logo Scale
- Math CHOP
- To Range: Change to approximately 0.9–1.2
- Null CHOP
- Link parameter to the Scale of the Transform TOP