Premiere Pro Part 1
1. About These Lecture Notes
These lecture notes do not assume any specific video footage. They introduce the basic features of Premiere and the editing workflow. In actual classes, students will practice editing using videos shot during class and copyright-free music.
1. What is Adobe Premiere Pro?
Video editing software developed and sold by Adobe. While it is primarily based on timeline editing (*), effects and other elements can also be edited using keyframes, similar to After Effects.
The official website is packed with information, so you can learn just by going through the tutorials.
*Since layers are also stacked within the Timeline panel in After Effects, the term “timeline editing” is somewhat ambiguous. On the official website (Differences Between After Effects and Premiere Pro), the method of arranging clips on the Premiere timeline for editing is referred to as “timeline editing.” After Effects, on the other hand, is based on the concept of adding a timeline to Photoshop layers and is sometimes described using layer-based terminology.
The animation in the image above is © Erika Oda
2. DaVinci Resolve (Introduction only)
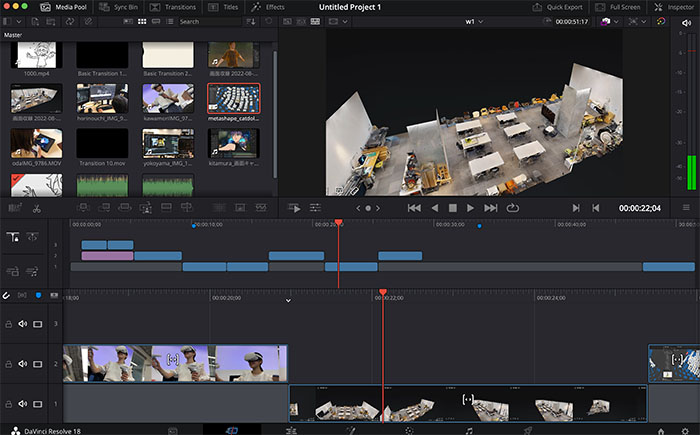
Alongside Adobe Premiere Pro, this is a widely used video editing software. It comes in both paid and free versions, and even the free version offers a full range of useful features.
https://www.blackmagicdesign.com/jp/products/davinciresolve
3. Frame.io (Introduction only)
Frame.io is a cloud-based collaboration tool for video production. It allows you to review videos and provide feedback online. It is compatible with Premiere Pro and After Effects.
This feature does not allow for collaborative editing online; rather, it is designed solely for reviewing footage during the editing phase and providing feedback. It facilitates efficient communication in video production projects where roles are clearly defined, such as between clients, directors, and editors.
(For reference)
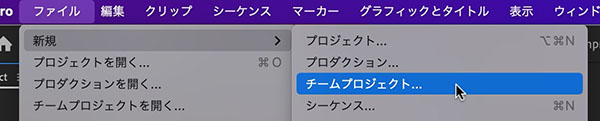
4. Premiere Pro Team Projects (Introduction Only)
The team project feature enables remote users to collaborate on video editing.
Procedure Overview:
- Share media files using the Creative Cloud folder included with Adobe CC or online storage services such as Dropbox. For the Creative Cloud folder:
- Check the location of the Creative Cloud folder using the Creative Cloud desktop app.
- Create a folder in Creative Cloud Web.
- By default, shared folders in Creative Cloud are set to “View Only,” so use the “Invite People” option to change the permissions to “Edit.”
- Create a Team Project.
- Add co-editors.
- Team Project files are stored in the cloud rather than locally, so you will access the media files shared in the Creative Cloud folder.
- You can convert between standard project files and Team Projects.
References)
-
Adobe Official Site - Adding and Managing Media in Team Projects
-
[Notes] Collaborative Video Editing in Adobe Team Projects, Even in Remote Environments
5. The Role and Usage of Sequences
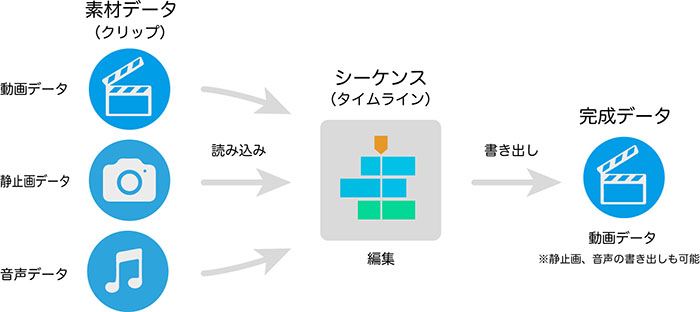
5.1 The Premiere Workflow
In Premiere, you first create a sequence, then place video, still images, and audio clips into it to edit them. The format of the final output (resolution, frame rate, etc.) depends on the sequence settings.
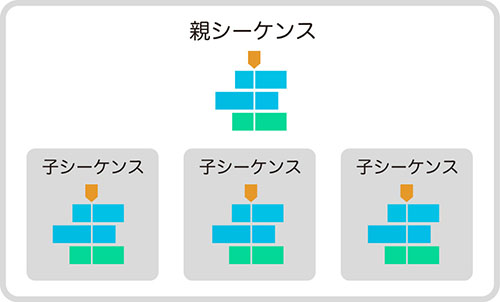
5.2 Nested Sequences (Introduction Only)
In Premiere, you can create multiple sequences. Furthermore, as shown in the figure below, by nesting sequences within other sequences, child sequences can be treated in the same way as clips. This allows for a wide range of editing tasks, such as hierarchical editing, combining multiple sequences edited for different scenes, and converting formats.
6. Creating a Folder
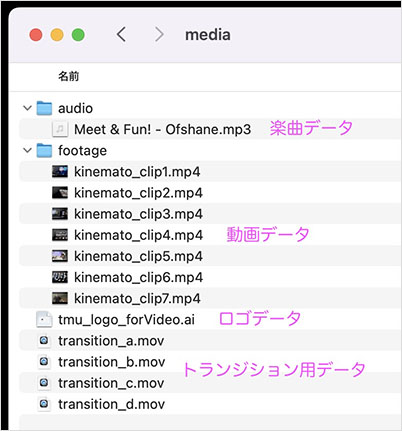
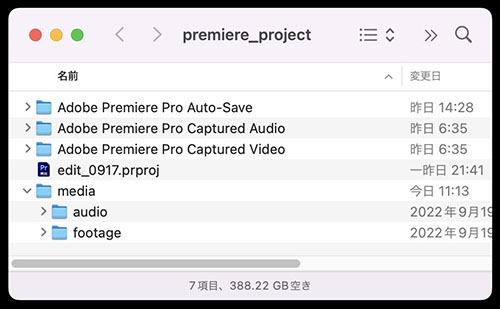
Create a folder (name it whatever you like; in the figure below, it is called “premiere_project”) in a suitable location. Next, create folders within that folder to store video data (footage, videos) and audio data (audio). You can also group these together in a “media” folder.
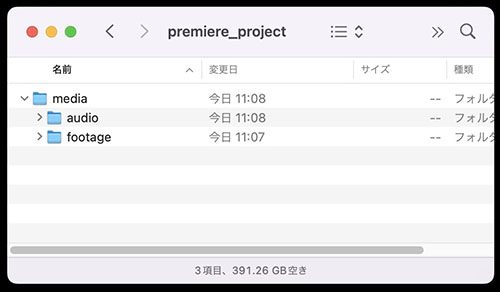
Video editing, not just in Adobe Premiere, involves working with a large number of files. Organizing your files into folders based on data type, shooting date, and other criteria helps prevent data loss and enables efficient video editing. The method shown in the figure above is just one example; please structure your folders to suit your specific production needs.
7. Preparing the Materials
7.1 Video Data
I will distribute the video data for the editing exercise. Please copy it to the “footage” folder you created earlier.

7.2 Music Data
The YouTube Studio Audio Library offers a wide selection of copyright-free music. You may use other audio sources for your project.
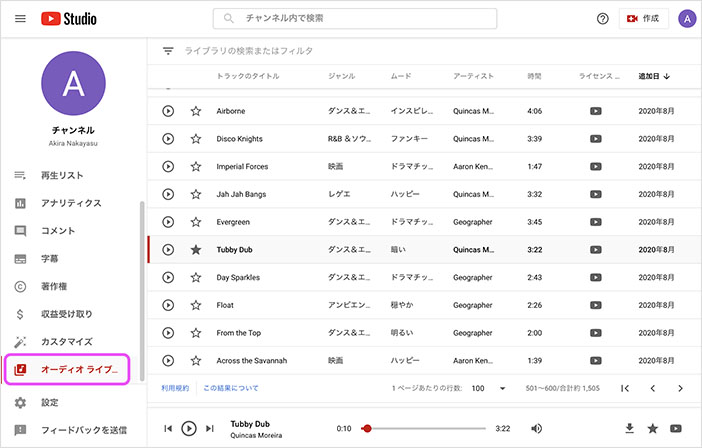
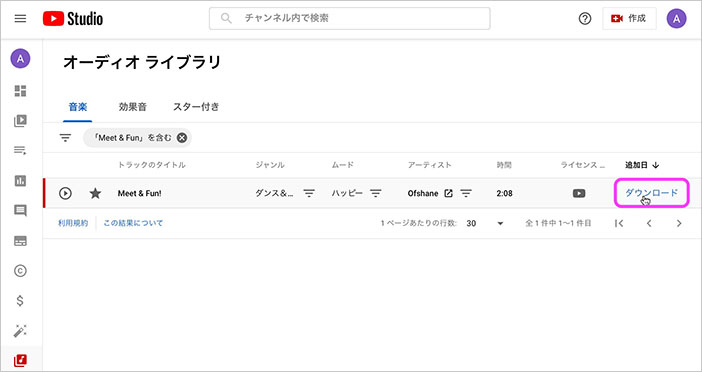
Use the YouTube Studio audio library for practice. Search for “Meet & Fun” in the search bar.

Click the “Download” button on the right side of the image below. Move the downloaded “Meet & Fun! - Ofshane.mp3” file to the “audio” folder.
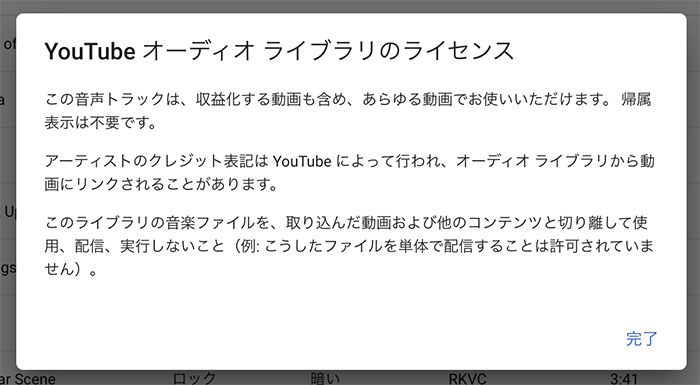
7.3 Important Notes Regarding Licenses
Various stock media sites offer not only music tracks but also a wide range of libraries containing still images and videos. Each piece of content is subject to specific licensing terms, and the conditions regarding permitted use, distribution, and credit attribution vary depending on the content, so be sure to review them carefully before using the material.
The image below shows the license information for the YouTube Audio Library.
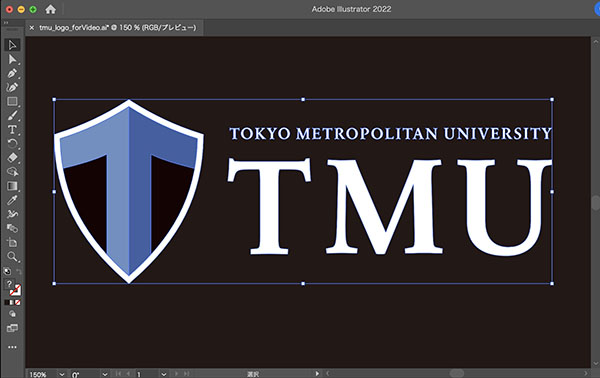
7.4 Tokyo Metropolitan University Logo
Students and faculty members of Tokyo Metropolitan University may use this service without prior notification. Please review the manual and other relevant materials before using the service.
https://www.tmu.ac.jp/university/symbol.html
During class, I will distribute copies that have been adjusted for a black background.
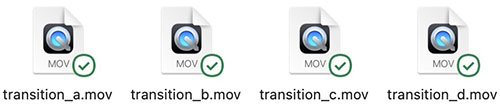
7.5 Distribution of Transition Data
We will distribute data with an alpha channel for transitions.

7.6 Structure of All Data and Folders
8. Launching Premiere
As of October 2022, Adobe Premiere Pro 2023 is the latest version. While this article uses Adobe Premiere Pro 2022, you can use either version without any issues. However, since the user interface was redesigned in the April 2022 update, you will need to update if you are using that version.
There are several ways to create projects and sequences. You can choose the method that best suits your production needs. However, since beginners who are not yet familiar with the process may find it confusing, we recommend Method 1.
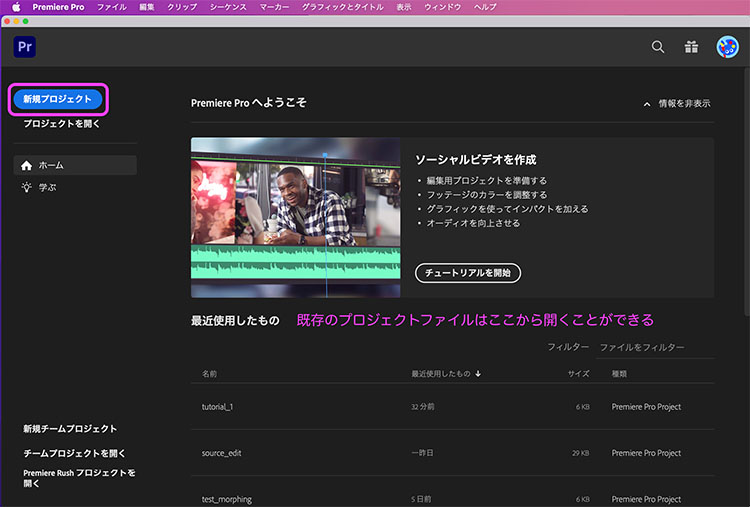
8.1 Method 1: Create an empty project (Method used in class)
Click “New Project” as shown below. You can open existing project files by selecting “Open Project” or from the “Recent” list.
The loading screen (including project creation) appears.
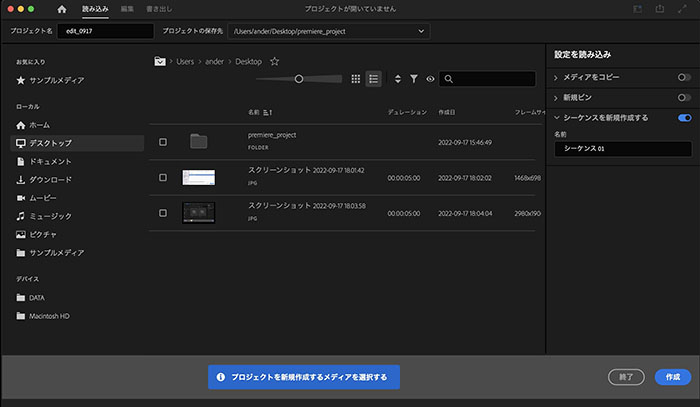
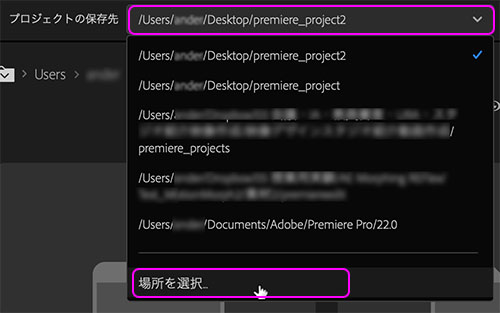
Open the drop-down list to the right of the project’s save location and click “Select Location” at the bottom.
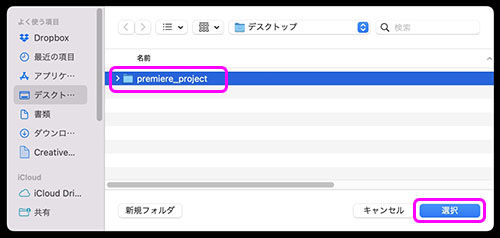
Select the folder you just created, then click the “Select” button in the lower-right corner.
Change the project name (optional). In the figure below, it is edit_**** (date).

Click the “Create” button in the lower-right corner of the import mode.

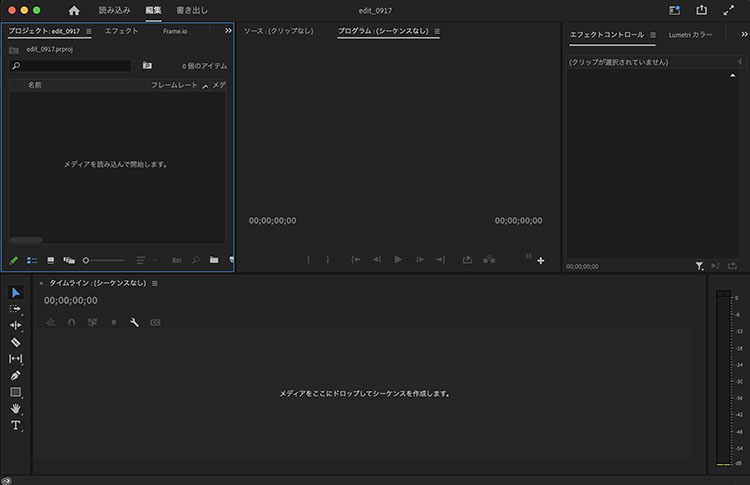
An empty project is created.
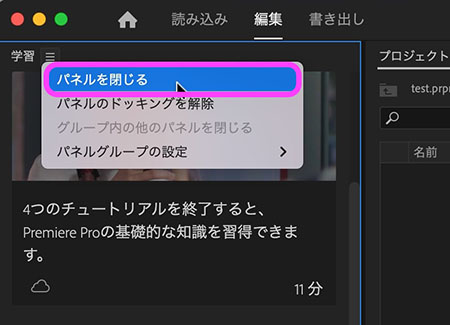
If the Learning Panel appears when you launch the program for the first time after installation, close it. It will not appear again in the future. To display it, go to “Window Menu > Learning Panel.”
8.2 Method 2: Creating a Sequence from Footage When Creating a Project
When creating a project, import the media and enable “Create Sequence” (on the right side of the figure below) to create the project. If you only want to import the media at this stage, leave “Create Sequence” disabled.
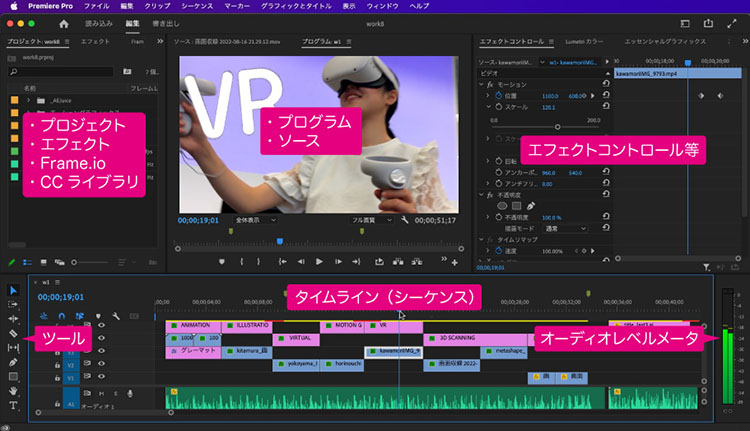
9. User Interface
9.1 UI Overview
9.2 Various Modes
The 2022 update introduced a revamped UI, adding “Import,” “Edit,” and “Export” menus (i.e., modes) in the upper-left corner. Please note that the usability of the “Import” and “Export” functions has changed in particular.

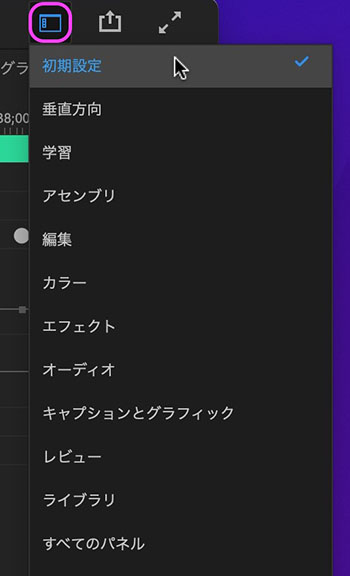
9.3 Switching Workspaces
A workspace is a preset panel layout that allows you to switch between workspaces depending on your workflow, enabling efficient editing. The workspace selection, which was previously displayed in the upper-right corner, is now consolidated into a set of icons.
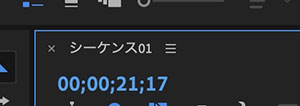
9.4 Selection Status of Each Panel
The processing steps vary depending on which panel you select. In some cases, the options available in the menu will change accordingly. A blue line appears along the edge of the selected panel. If the process isn’t proceeding as intended, check which panel is currently selected.
10. Loading Assets
There are several methods available, so choose the one that best suits your situation.
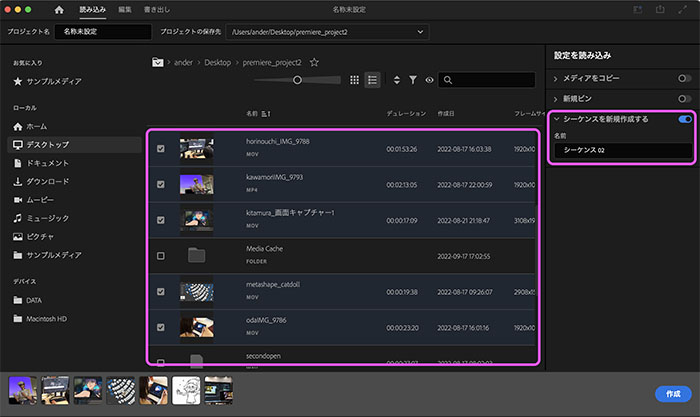
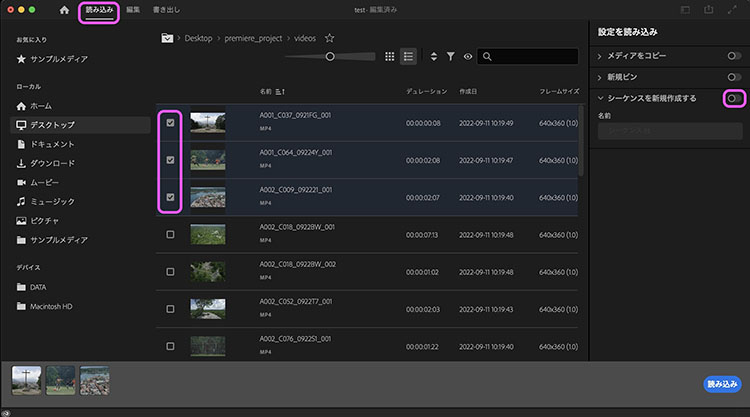
Method 1: From Read Mode (Introduction Only)
Switch to read mode.

Make sure the “Create New Sequence” option on the right is turned off.

Select the required materials and click the “Load” button in the lower-right corner.
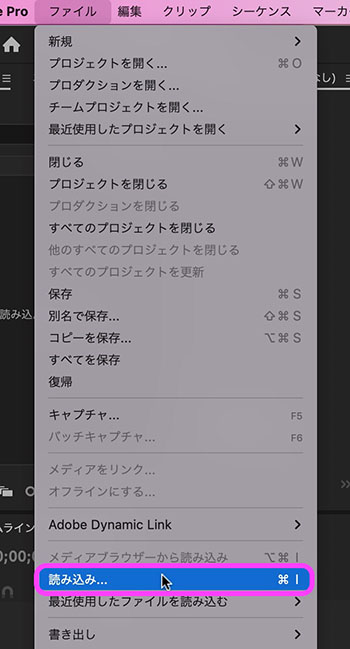
Method 2: From the Menu (Edit Mode)
Switch to edit mode.

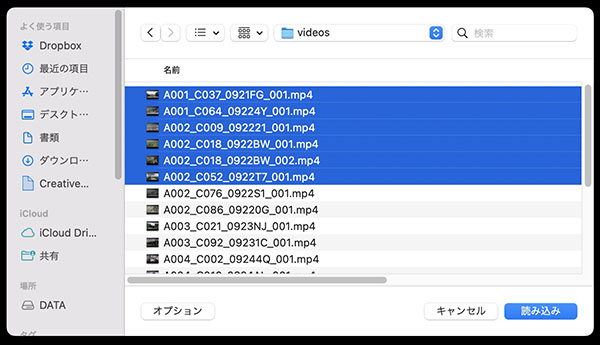
Click File > Open.
Select the required file and click the “Load” button in the lower-right corner.
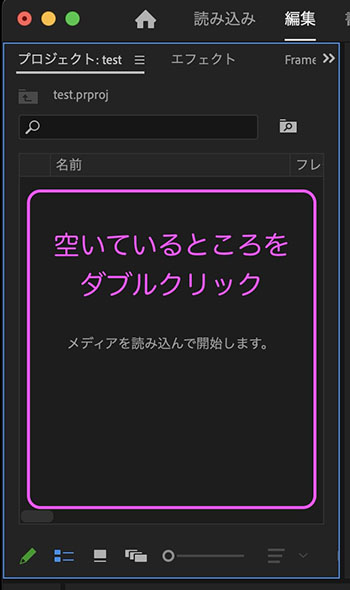
Method 3: From the Project Panel (Edit Mode)
Double-click an empty area in the Project panel. Follow the same steps as in Method 2 from here on.
Method 4: Drag and Drop into the Project Panel (Edit Mode)
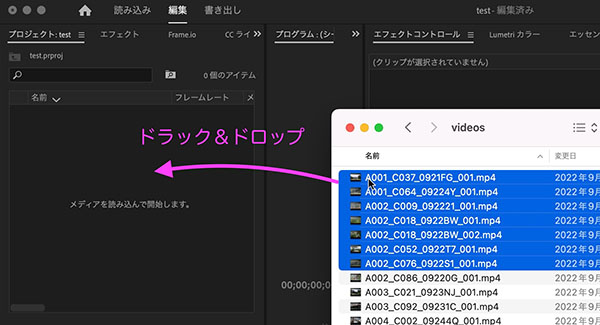
You can also drag and drop entire hierarchical folder structures (this also applies to version 11.2). However, it appears that not all folders are included. In the data provided here, the “footage” folder is included, but the “audio” folder is excluded.
11. Using the Project Panel
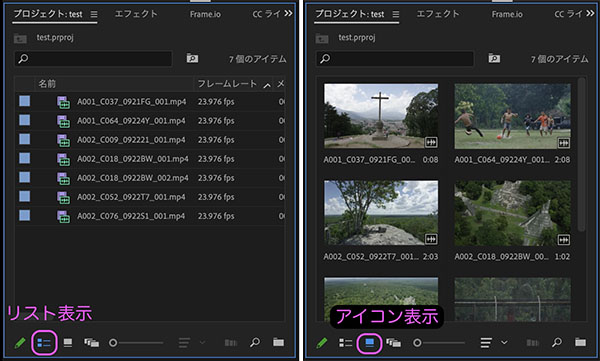
11.1 Switching Views
You can switch between list view and icon view using the button in the lower-left corner of the project panel. If a clip is a video, you can preview its content by hovering over the icon and scrubbing the timeline.
(Reference) Tips from Mr. Ito [Premiere Pro CC 2019] Freeform View
11.2 Organizing Materials
- Import and organize the video files distributed during class, the Tokyo Metropolitan University logo files, and the downloaded music files.
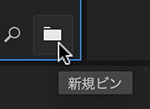
In the Project panel, you can add features that function like folders, called “bins.” However, bins are not linked to folders in Finder.
Click “New Bin” in the lower-right corner of the Project panel to create it.
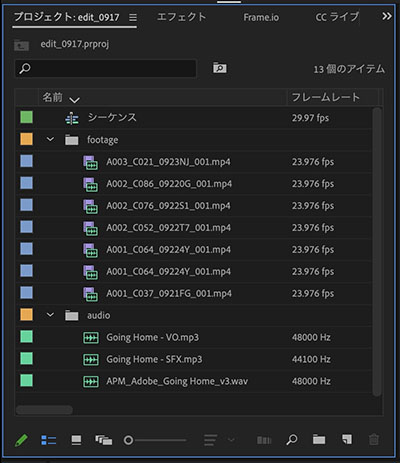
You can drag and drop clips into the bin to organize them as shown below.
12. Creating a Sequence
Method 1: Create an empty sequence (Method used in the editing exercise)
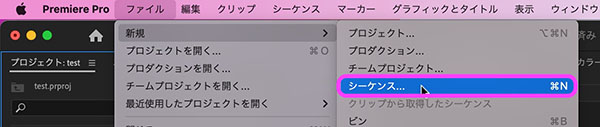
Click File > New > Sequence.
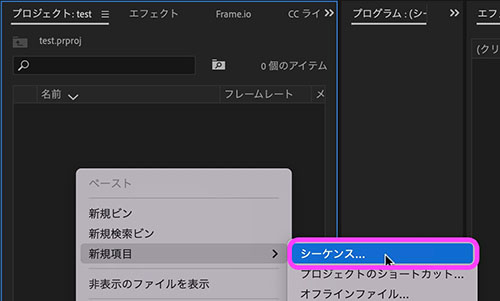
Alternatively, right-click in the Project panel and select New Item > Sequence.
For sequence presets, select HD 1080p > HD 1080p 29.97 fps in version 2024 and later. In version 2023, select AVCHD > AVCHD 1080p 30.
If necessary, change the sequence name (optional; the default is Sequence 01), then click the OK button.
Formats not included in the presets can be created from the “Settings” tab.

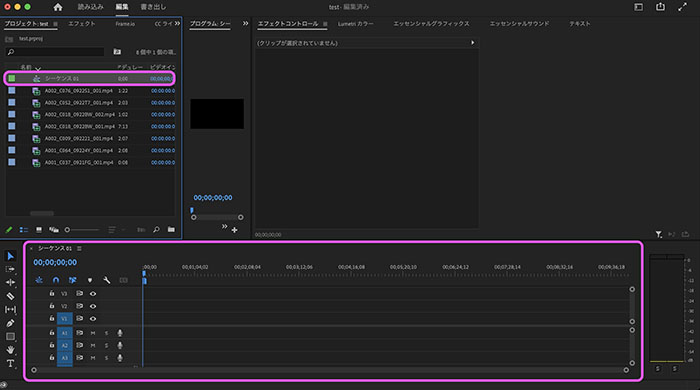
A sequence is created in the Project panel, and an empty timeline appears.
Method 2: Creating a Sequence Note: This method may be used depending on the situation
Drag and drop the video files from the Project panel onto the Timeline (without a sequence). This method automatically detects the format of the video files and creates a sequence based on that information. You should verify the format of the original video files to ensure it is compatible with the output format.
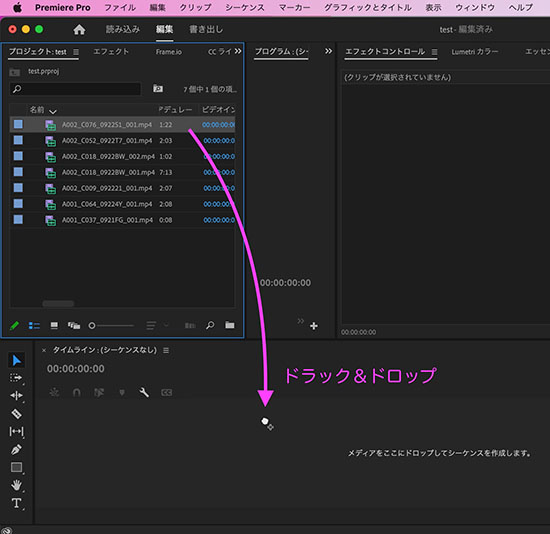
Since this method uses the original clip name as the sequence name, change the sequence name as needed.
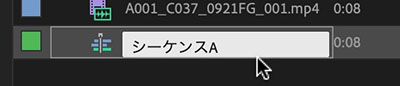
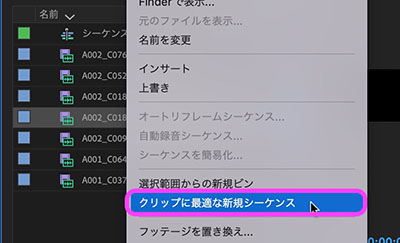
Since this method won’t work if there is already at least one sequence, right-click a clip in the Project panel and create a new sequence using “New Sequence Optimized for Clip.”
13. Saving a Project
Video editing can put a heavy load on the application, often causing it to crash unexpectedly. We recommend saving your work frequently.
Click File > Save (Cmd+S).
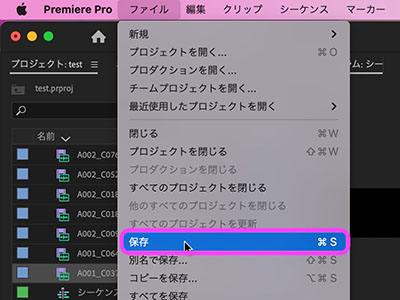
In addition to the Premiere project file (.prproj), the folder you created initially contains automatically generated folders such as “Auto-Save.”
When moving or backing up your PC environment, do so by moving the entire folder.
14 File Collection (For Reference)
When moving your PC setup or organizing assets scattered across different locations, you can copy your project files and linked assets to a single location.
Open the File menu > Project Manager, configure the necessary settings, and click OK.
