Kinetic Typography Part 2
1. Adding a text layer (first character)
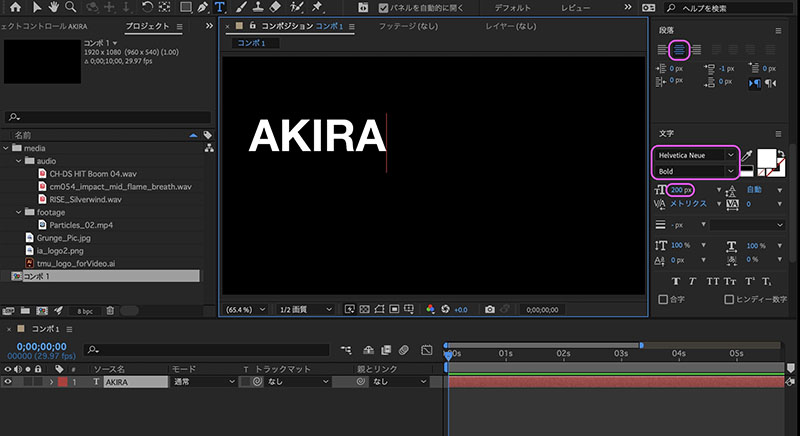
Enable the horizontal text tool.

Click in the Composition panel and enter the first character (any character). In the Character panel, set the font to Helvetica Neue, the style to Bold, and the font size to 200px. Also, set the text to center alignment in the Paragraph panel.
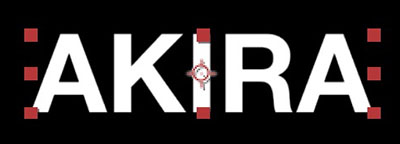
Switch to the Selection tool or press the ESC key to exit text input mode. As shown in the figure below, the anchor point is set at the bottom center of the text.
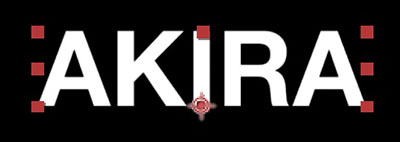
Right-click the text and select “Menu > Transform > Center Anchor Point in Layer Content.”
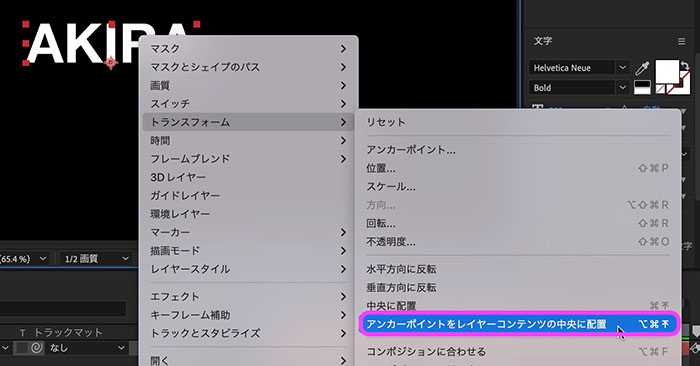
The anchor point is set at the center of the text. Depending on the text layout, it may be better to shift the anchor point horizontally so that it aligns with the center of the text’s shape.
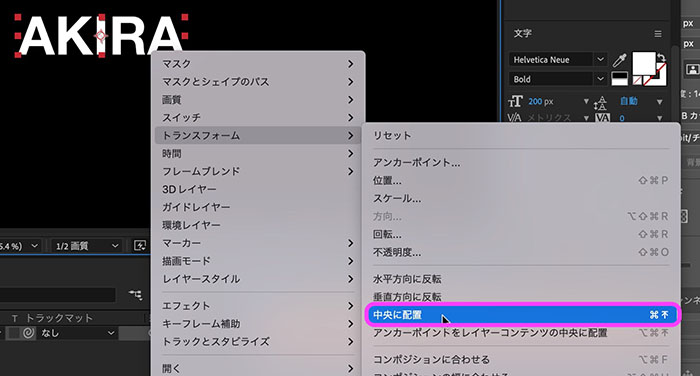
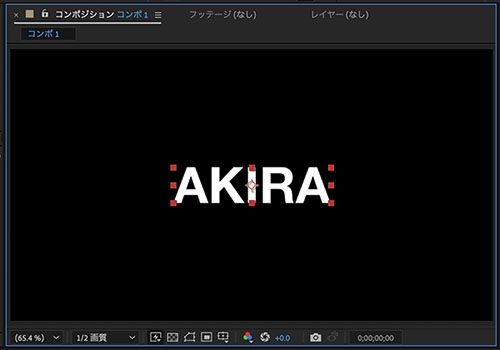
Right-click the text, select “Menu > Transform > Center,” and move it to the center of the screen.
2. Animation Settings
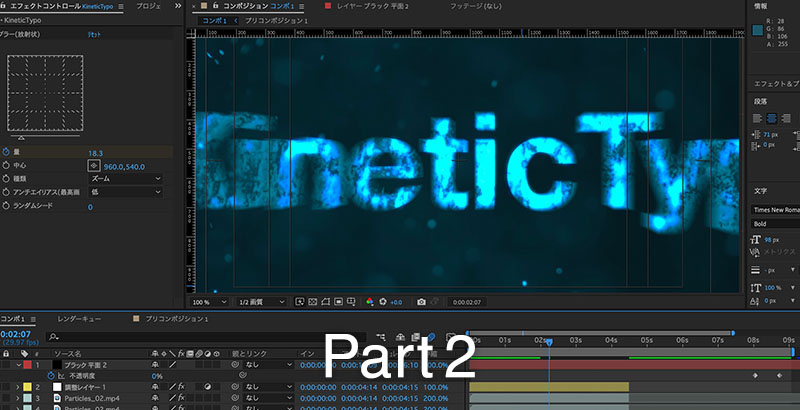
2.1 Setting Keyframes for Scale
Set the scale keyframes for the text layer as follows.
0;00 Scale 650% 0;10 Scale 100% 3;00 Scale 150%

2.2 Motion Blur
Show the Layer panel and enable motion blur for the text layer.
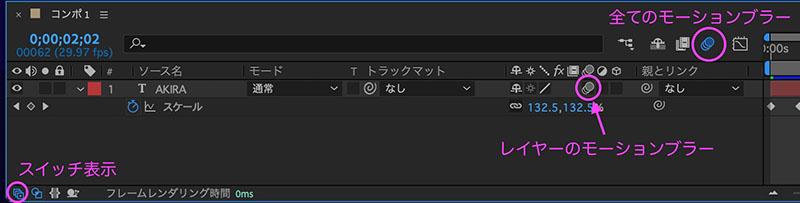
When motion blur is enabled, a blur effect is applied to fast-moving objects.
2.3 Configuring the Blur (Radial) Zoom
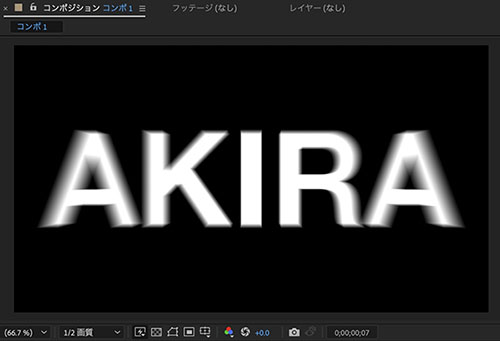
Use a blur effect to emphasize motion blur.
With the text layer selected, click the Effects menu, or right-click the text layer and select “Menu > Effects > Blur & Sharpen > Radial Blur.”

The Effect Controls panel appears in the upper-left corner of the UI. Set the time to 0 frames. Enable the stopwatch icon for the “Blur (Radial)” Amount in the Effect Controls panel. Set the Amount to 50.0 and change the Type to Zoom.
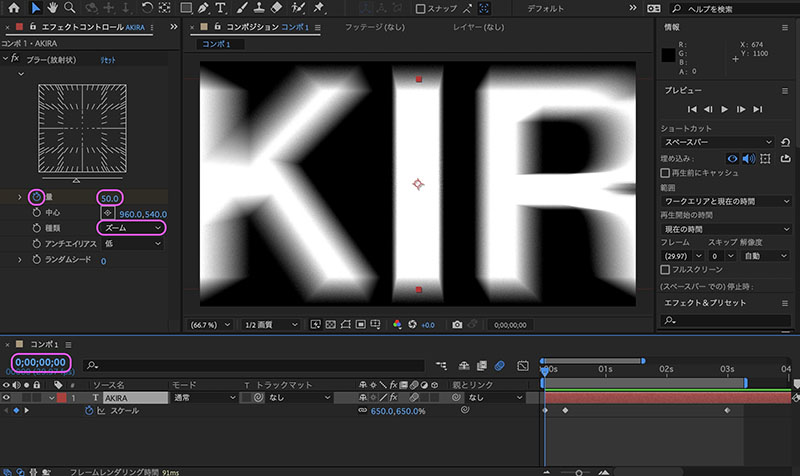
Set keyframes for the amount of blur (radial) as follows.
0;00 Blur (radial) amount 50 0;10 Blur (radial) amount 0

3. Adding Sound Effects (SE)
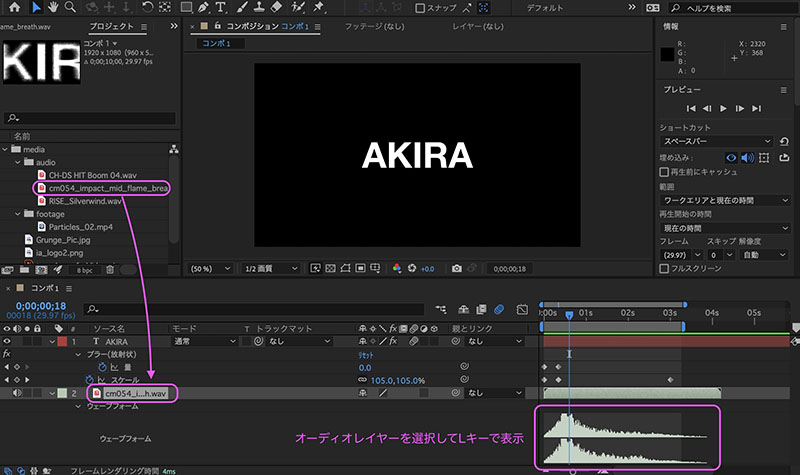
From the Project Panel, drag and drop cm054_impact_mid_flame_breath.wav onto the timeline. With the audio layer selected, press the L key twice to display the waveform. For this sound effect, the timing aligns with the flying logo without any time adjustments.
4. Configuring Texture Images
4.1 Image Composition
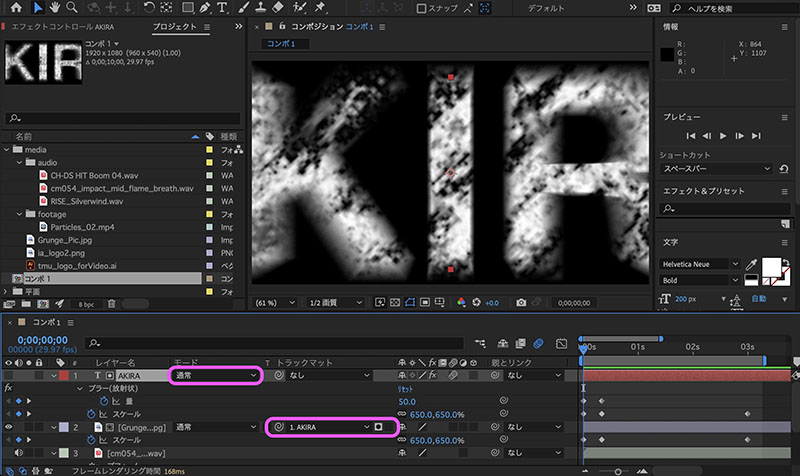
Drag and drop “Grunge_Pic.jpg” from the Project panel onto the text layer in the Layers panel.
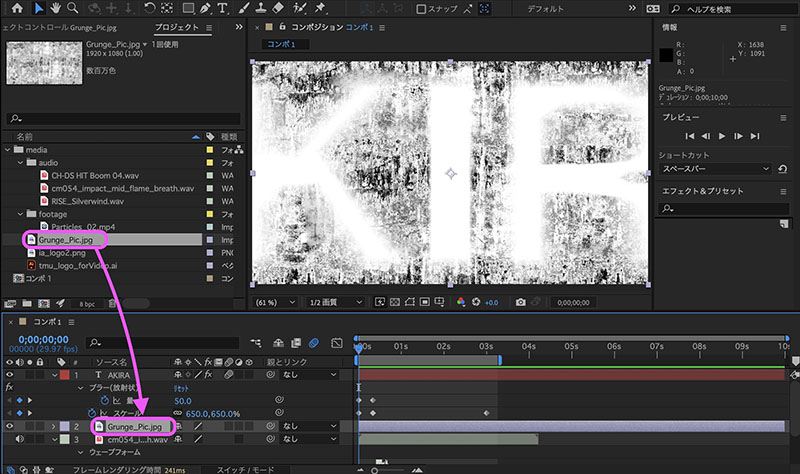
Switch the text layer’s mode to Stencil Alpha. Stencil Alpha is a mode that cuts out the transparent areas along their outlines; in this example, the image Grunge_Pic.jpg will be superimposed onto the text. If the text color is 100% white, the Stencil Luminance mode will produce a similar effect.

You can adjust the appearance of the texture by rotating (R) or adjusting the anchor points (A) of the Grunge_Pic.jpg layer. Make these adjustments at the 100% time mark. Do not use the Move (P) tool, as this will cause the scale reference to shift during the post-processing scale animation. If you want to fine-tune the texture’s appearance, it is better to adjust it as a separate element using a pre-composition or similar method.
Ideally, you should apply the blur effect to the layer in the pre-composition where the texture is set. In this case, the blur effect will not be applied to the texture image.
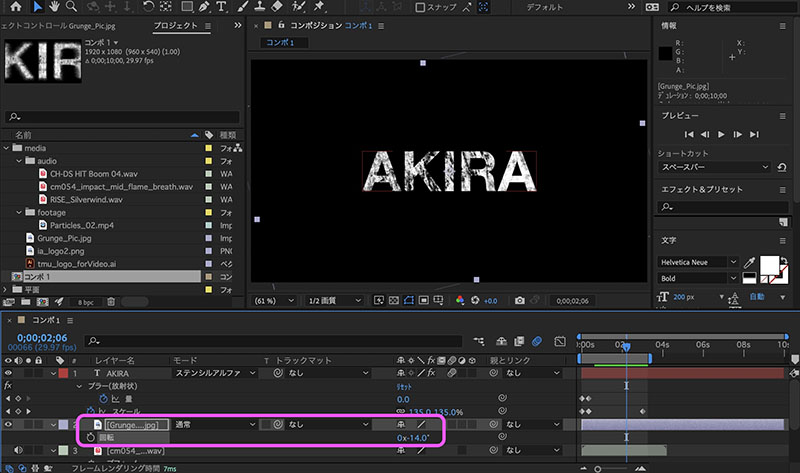
As it stands, the image scale is fixed, so the text and images won’t align properly.
4.2 Configuring Image Scale Animation
- Select all keyframes for the text layer’s scale property, then copy them (Cmd+C)
- Move the timeline to frame 0
- Display the scale property of the image layer
- Select the scale property, then paste (Cmd+V)
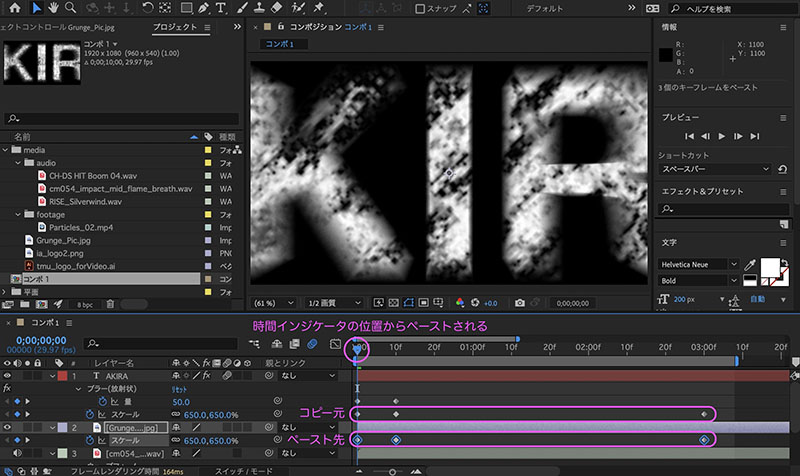
Because the text layer and the image layer scale at the same time, it looks as if the image is stuck to the text.
4.3 (Reference) Compositing Using a Track Matte
In this example, we used the blending mode of a text layer, but you can achieve the same result by designating the text layer as a track matte for an image layer. With a blending mode, the effect is applied to all layers below it, but with a track matte, you specify a specific layer, so it does not affect the layers below it.