Puppet Tool
1. Introduction
1.1 What Is the Puppet Tool?
The Puppet Tool in After Effects is a powerful tool that allows you to automatically create a mesh and animate a 2D image simply by adding pins to it. It can be applied to a wide range of creative expressions depending on your ideas, from 2D animation of illustrations to pseudo-animation of live-action footage. It is particularly useful for video production when working with limited resources or under tight deadlines.Photoshop and Illustrator also include Puppet Warp features that can be used to deform images. To create animations with a timeline, After Effects is used.
(Reference) Let’s use the Puppet Tool to add movement to your illustrations!
1.2 Tutorial Examples
There are numerous tutorials available on YouTube and other platforms.
2. Related Technologies
2.1 The Research of Professor Takeo Igarashi
-
Website of Professor Takeo Igarashi of the University of Tokyo
-
Takeo Igarashi, Tomer Moscovich, John F. Hughes, “As-Rigid-As-Possible Shape Manipulation,” ACM Transactions on Computer Graphics, Vol. 24, No. 3, ACM SIGGRAPH 2005, Los Angeles, USA, 2005 (PDF).
2.2 Multi-Input Touch Screen by Jeff Han
Jeff Han’s multi-touch demonstration included a demonstration of technology equivalent to the Puppet Tool. This level of multi-touch capability had already been achieved a year before the first iPhone was released in 2007.
2.3 Adobe Character Animator
Adobe Character Animator is a 2D character animation system that integrates real-time motion capture (facial, body, and lip-sync) with a recording system. A preview version was released in 2015 as an After Effects plug-in, but it was launched as a standalone application in 2017.While the core technology of meshing and deforming 2D images is the same as that of the Puppet Tool, its integration with motion capture has established it as a new tool that transforms traditional 2D animation workflows, earning it a Technical Emmy Award from the Academy of Television Arts & Sciences in 2020.
3. Goals for This Session
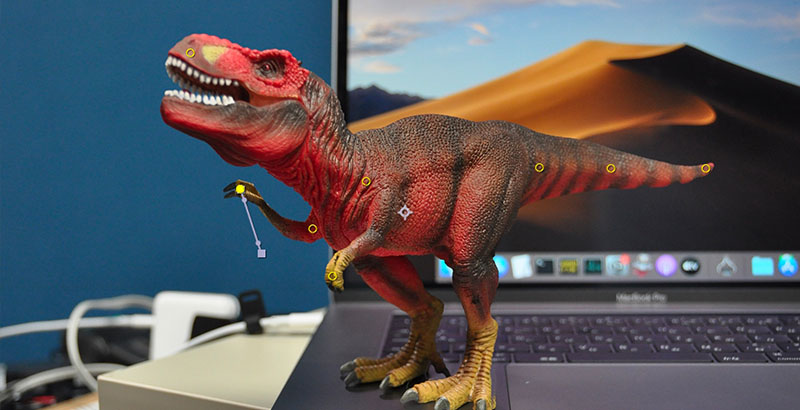
Try moving the Tyrannosaurus rex figure so that it looks like it’s breathing, as shown in the video below.
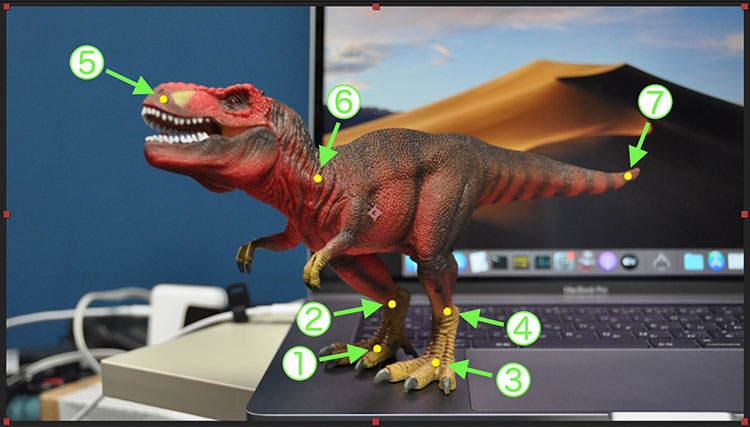
There are only seven pins, and three keyframes have been added at different time points for each pin.
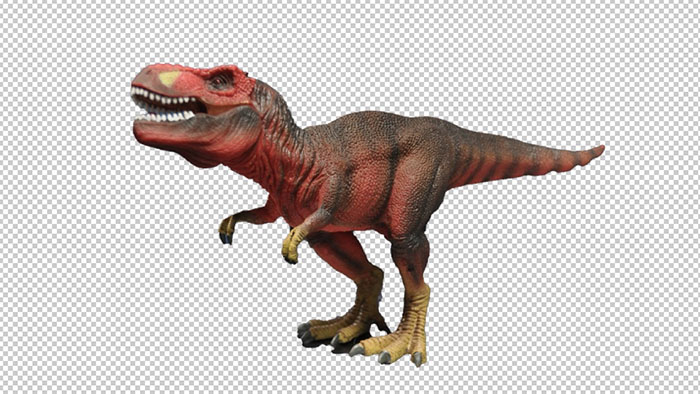
4. Preparing the Materials
4.1 Photography
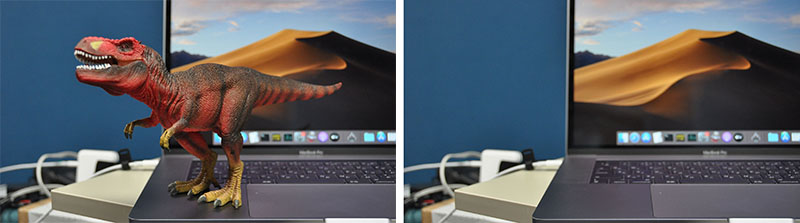
Take two types of photos: one with the doll and one without. To ensure the image remains consistent, set the white balance and focus to manual mode.
4.2 Photo Editing (Part 1)
Using a photo that includes a doll, use Photoshop’s “Select Subject” feature or similar tools to create an image with only the doll and a transparent background (in Photoshop format or PNG).
4.3 Photo Editing (Part 2)
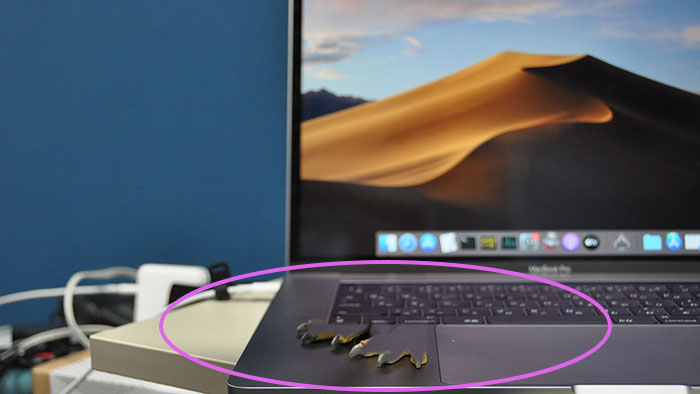
If you composite a photo of just the background onto the doll photo from Process 1, it will look unnatural.
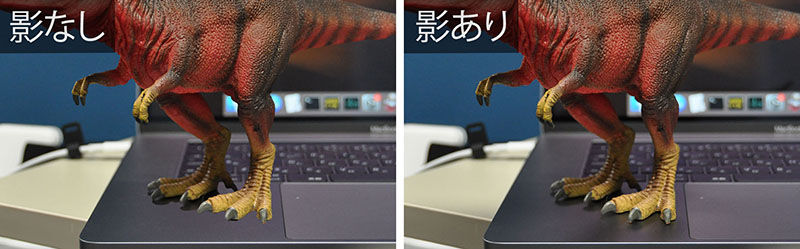
Compose a photo without a doll by superimposing only the shadow portion from a photo that does include a doll. In class, we will distribute pre-edited versions.
5. Project Preparation and Composition Settings
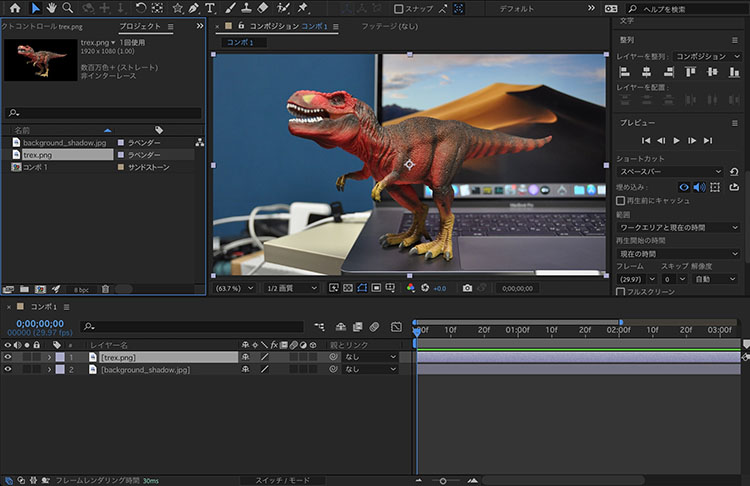
Save the assets (which differ from the actual setup) and the After Effects project as shown below.

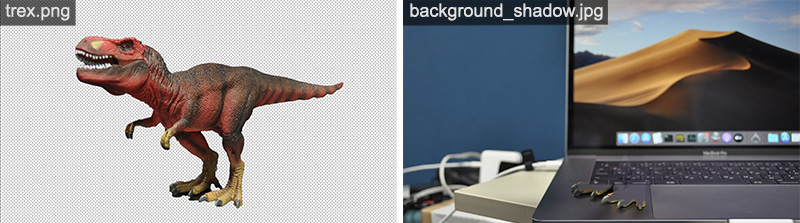
The following two images (1920 x 1080 px) will be used.
Create a Full HD (1920 x 1080) composition. The duration should be 5 seconds.
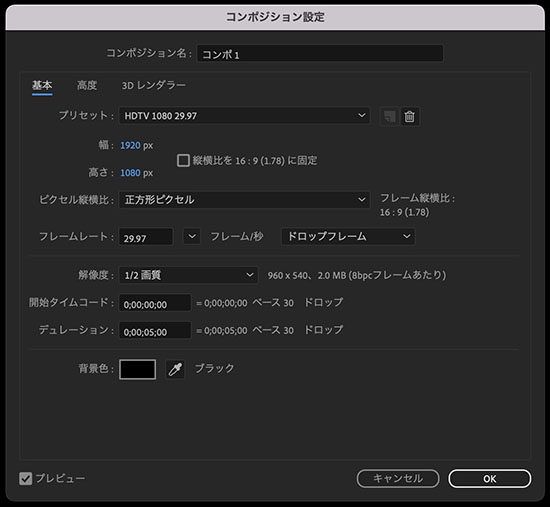
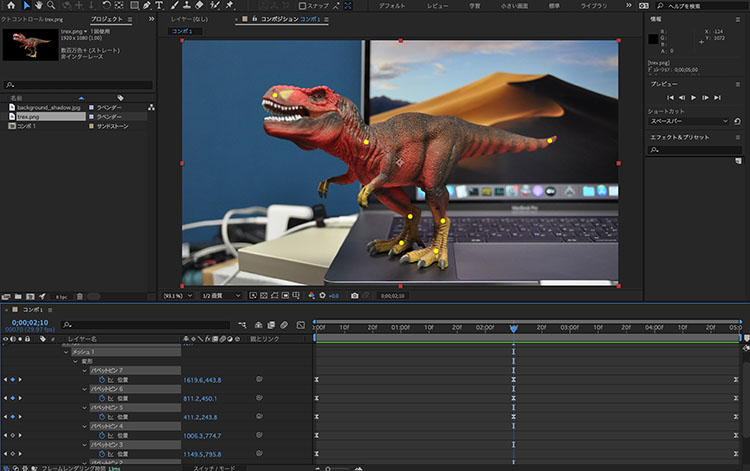
Place trex.png and background_shadow.jpg in the composition.
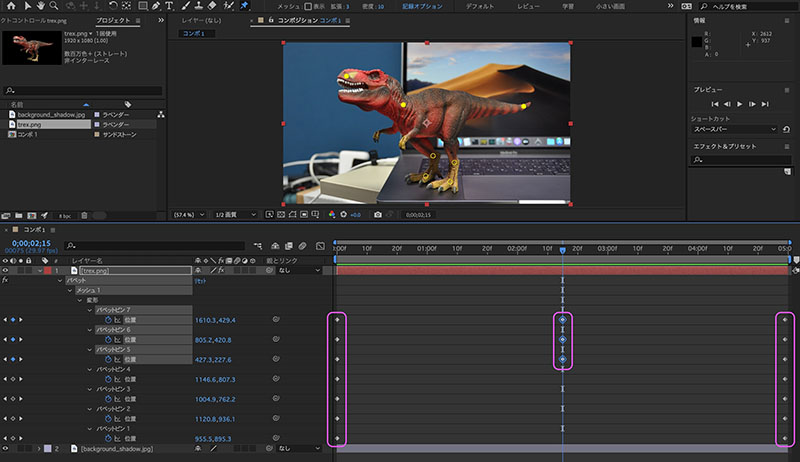
6. Configuring the Puppet Position Pin Tool
Move the time indicator to the 0-frame position.

Use the Puppet Position Pin tool to set seven pins, as shown in the figure below.
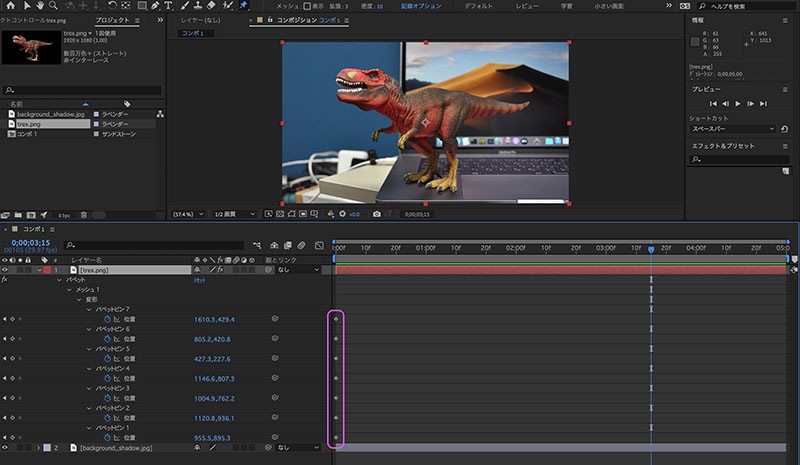
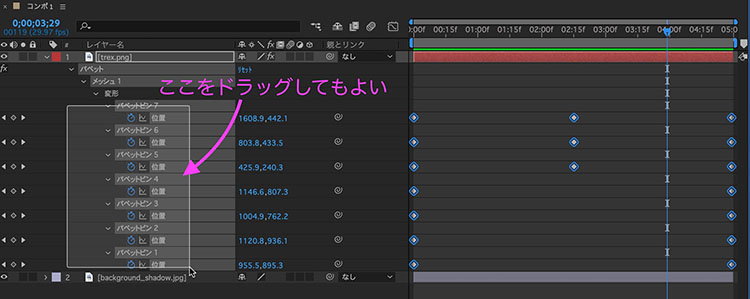
Select the “trex.png” layer in the Timeline panel and press the U key to display only the properties that have keyframes. As shown in the figure below, you can see that keyframes for each puppet pin have been added at frame 0.
7. Animation Settings
Follow the steps below to copy and paste the keyframes as shown in the figure below.
- Select and copy the 7 keyframes starting at frame 0.
- Move the time indicator to the last frame (4:29) and paste them.
- Copy the keyframes from puppet pins 5 to 7 at frame 0 (or frame 4:29).
- Move the time indicator to around the middle (anywhere) and paste them.
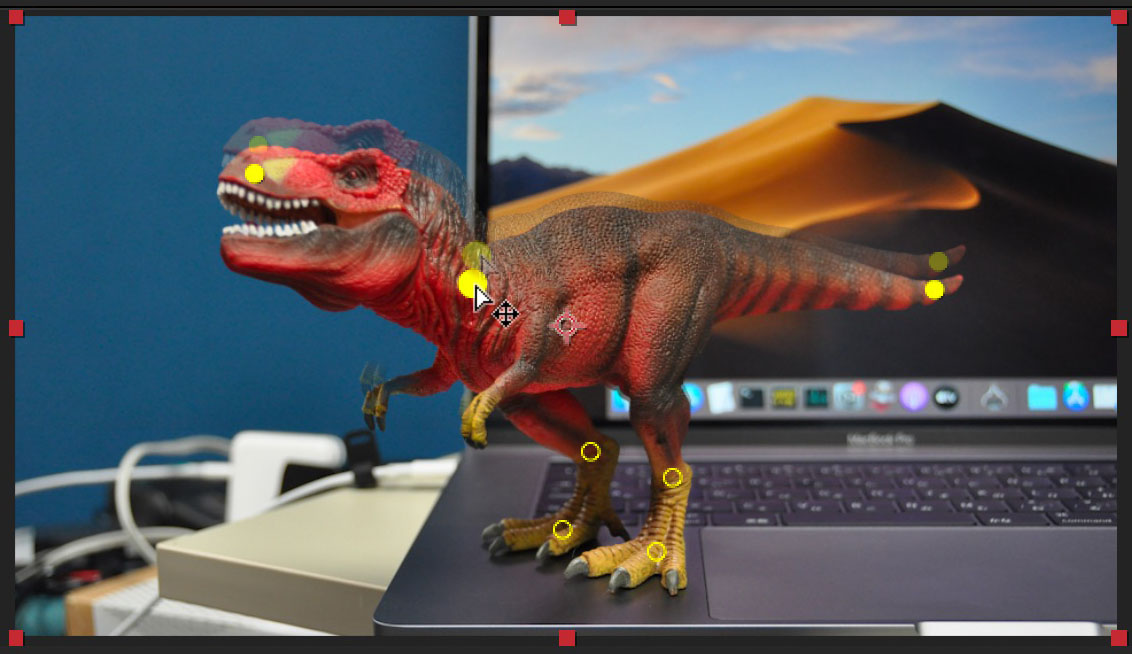
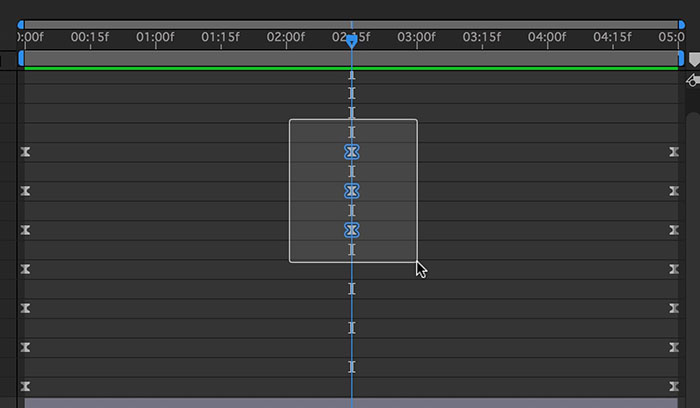
Move the time indicator to the exact location of the middle keyframe. Select the three keyframes as shown in the figure below.
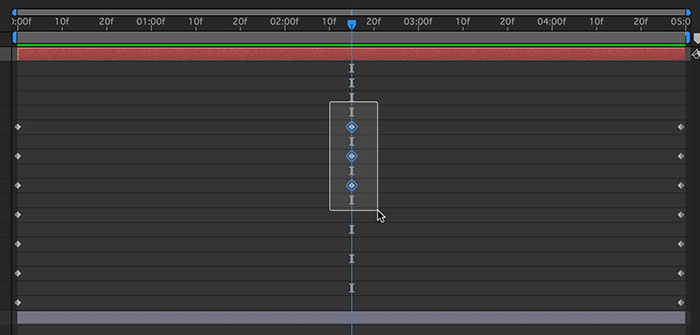
Since three pins are currently selected in the Composition panel (indicated by three yellow circles), drag one of them to make the Tyrannosaurus crouch slightly.
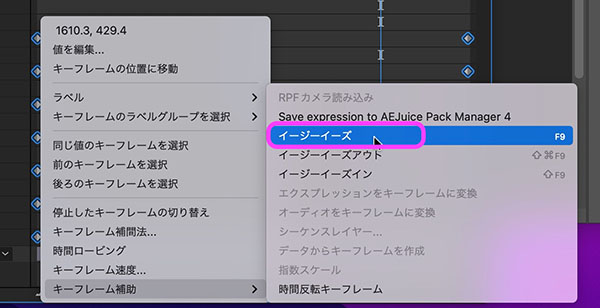
If left as is, the motion will be linear, so I’ll change the key settings from “Linear” to “Easy Ease.”
Select all the keys as shown in the figure below.
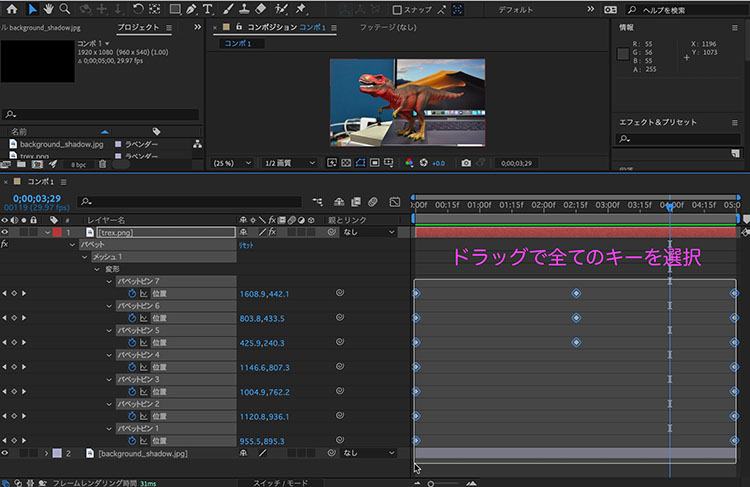
If the method above is difficult, you can drag the area shown in the figure below. Alternatively, you can click on the “Position” label while holding down the SHIFT key.
Right-click on any keyframe and select “Keyframe Assist > Easy Ease” from the menu that appears.
The key icon changes without warning.

Smooth transitions between deceleration and acceleration make the animation appear more fluid.
Play the preview to check the animation, and if you want to make adjustments, move the time indicator to the middle keyframe, then drag the T. rex pin to adjust it.
8. Submission (Assignment Submission)
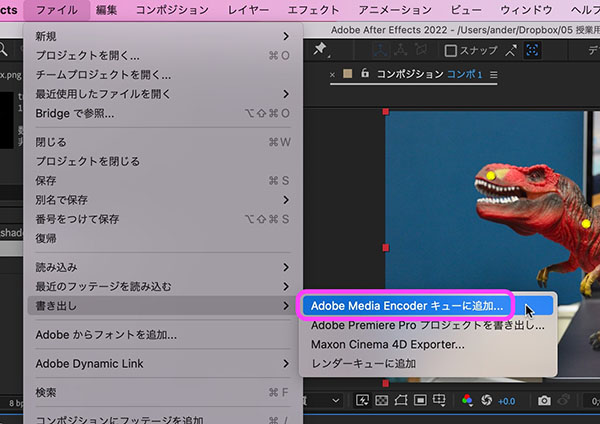
To export to MP4, use Adobe Media Encoder. See below for instructions on how to use Media Encoder.
https://lecture.nakayasu.com/adobe-media-encoder
9. Other Examples (Irasutoya)
9.1 Lion Dance Animation
9.2 Preparing Materials
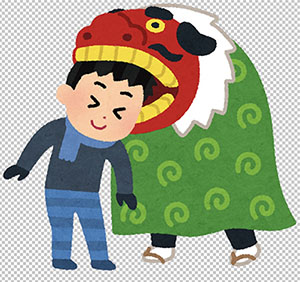
Download the illustration titled “Man Being Bitten on the Head by a Lion Dance Lion” from the Irasutoya website.
https://www.irasutoya.com/2018/10/blog-post_465.html
Since this is a transparent PNG image, it can be used as is without any editing.
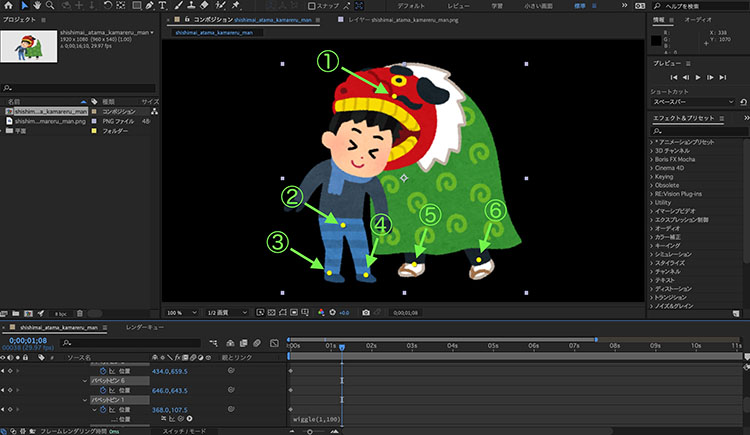
9.3 Configuring the Puppet Position Pin Tool
Import the file into After Effects and set six pins using the Puppet Position Pins tool. Since the background will be black by default, add a solid layer beneath the lion dance layer if necessary.
9.4 Configuring Expressions (Wiggle)
In this tutorial, we will create animations using expressions (a scripting feature exclusive to After Effects) rather than keyframes.
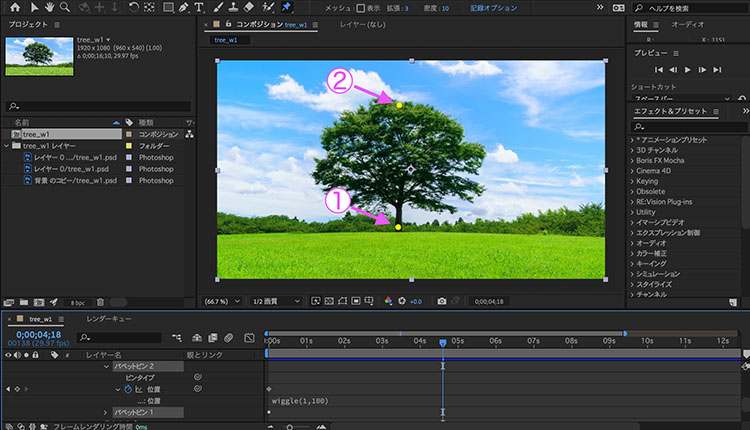
8.3 Click the stopwatch icon (see figure below) corresponding to pin ① in Figure 8.3 while holding down the OPTION key to enable the expression. Enter wiggle (1, 100), as shown on the right side of the figure below.The wiggle command generates a swaying motion. When it has two parameters, freq represents the speed of the motion and amp represents the magnitude of the variation. Changing the values of freq and amp produces interesting effects.

See also: YouTube - Chapter 10: Become an Expression Master!
Bonus: A video created using Irasutoya clip art.
10. Other Examples (Oki Photos)
10.1 Animation of a Tree Swaying
10.2 Preparing Materials
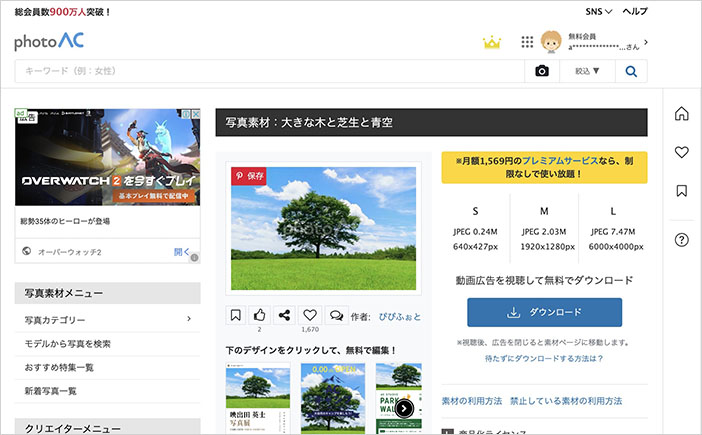
Use images from the photo stock site photoAC. You must create an account to use photoAC.
Download the M size (1920 x 1280 px) from the URL below.
https://www.photo-ac.com/main/detail/24721737
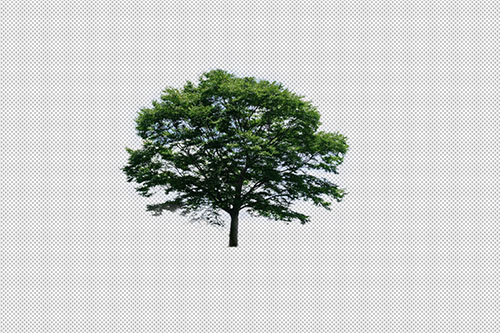
Using features such as Photoshop’s “Select Subject,” create a transparent image (in Photoshop or PNG format) that contains only the large tree from the downloaded image.
Using features such as Photoshop’s “Content-Aware Fill,” create an image in which the large tree has been removed from the downloaded image.
(Reference) How to naturally remove unwanted objects from photos

10.3 Configuring the Puppet Position Pin Tool
In After Effects, overlay the two images, then use the Puppet Position Pin tool to set two pins on the layer containing only the tree.
10.4 Configuring Expressions (Wiggle)
9.3 Hold down the OPTION key and click the stopwatch icon corresponding to pin ② in the figure to enable the expression. Enter “wiggle (1, 100)” as shown on the right side of the figure below.
