Audio Reactive ver.2 - Part3

1. Preparation
- From the final state in Part 2, keep only the audio and delete everything else
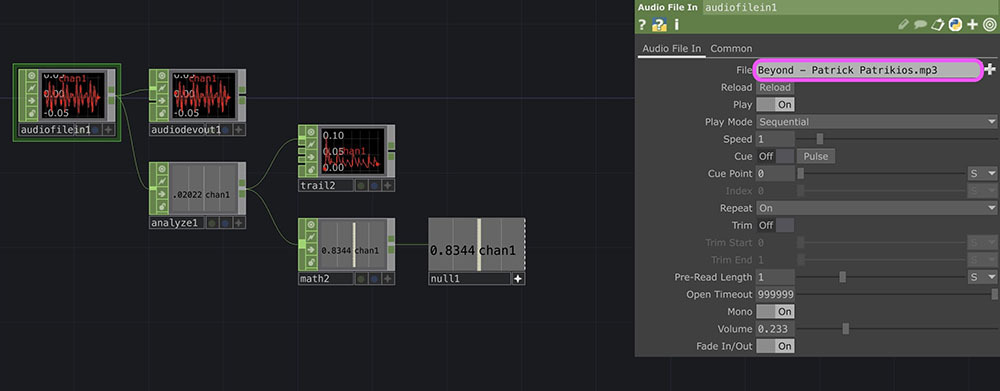
- In the “File” field of the Audio File In CHOP, change it to the “Beyond - Patrick Patrikios.mp3” file prepared in Part 1
- Set “Bypass” in the Audio Device Out to ON (mute)
2. Sphere Particle System
Instead of using a particle system, we’ll create it using a method that simulates a particle-like effect.
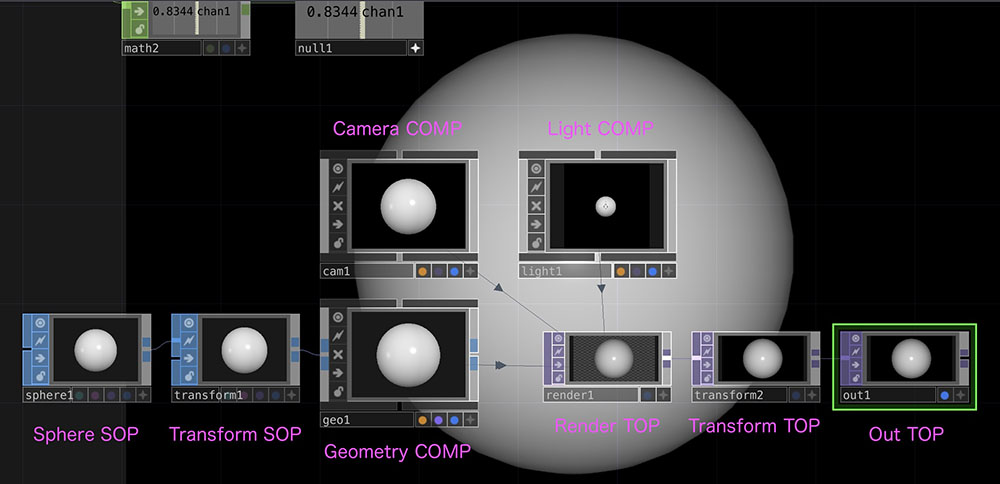
2.1 Sphere Particle
- Sphere SOP
- Transform SOP
- Geometry COMP
- Right-click the output of the Transform SOP to add an operator
- Camera COMP
- Light COMP
- Render TOP
- Transform TOP
- Set the Background Color to 0, 0, 0, 1 to make it black
- Turn on Comp Over Background Color
- Out TOP
- Turn on the Display button if necessary
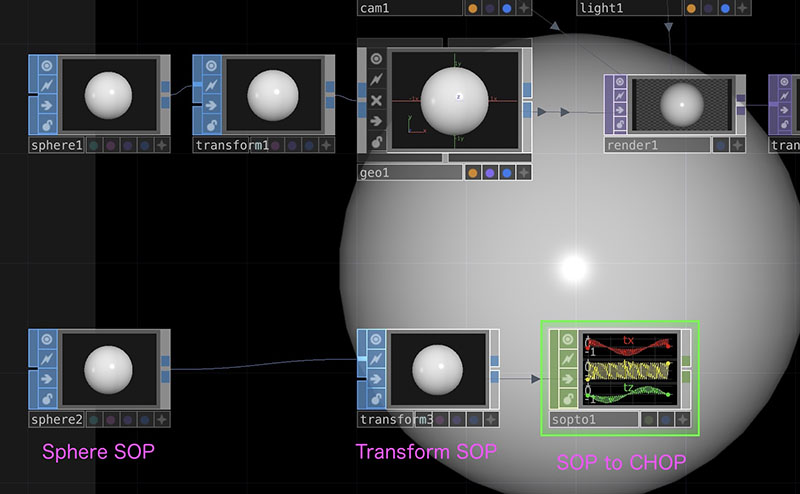
2.2 Coordinate Sphere
Create the following below the set of operators created in Step 2.
- Sphere SOP
- Transform SOP
- SOP to CHOP
2.3 Instantiating a Sphere particle at the position (coordinates) of the Sphere
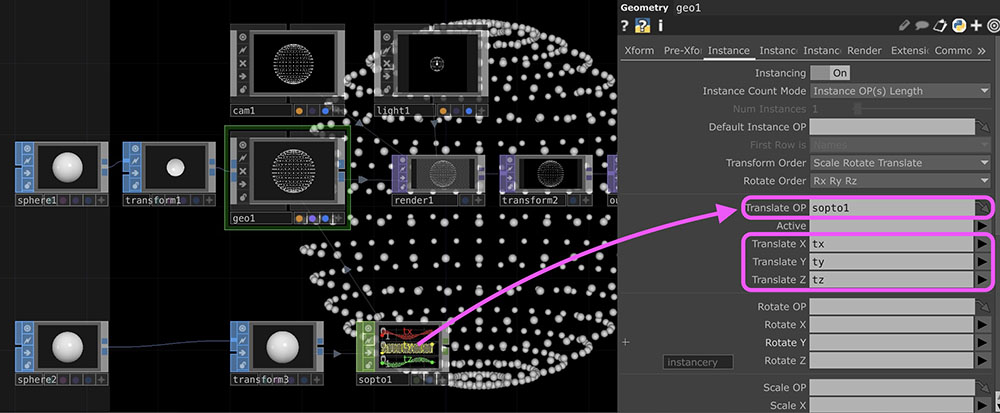
- Turn on “Instancing” in the Instance tab of the Geometry COMP
- Drag and drop “Sop To CHOP” onto the Translate OP in the Geometry COMP
- Click the ▶ to the right of “Translate X” and select “tx”
- Do the same for “Translate Y” and “Translate Z” to select “ty” and “tz”
- Set the “Uniform Scale” of the Translate SOP for the Sphere particle (labeled “transform1” in the figure below) to approximately 0.02
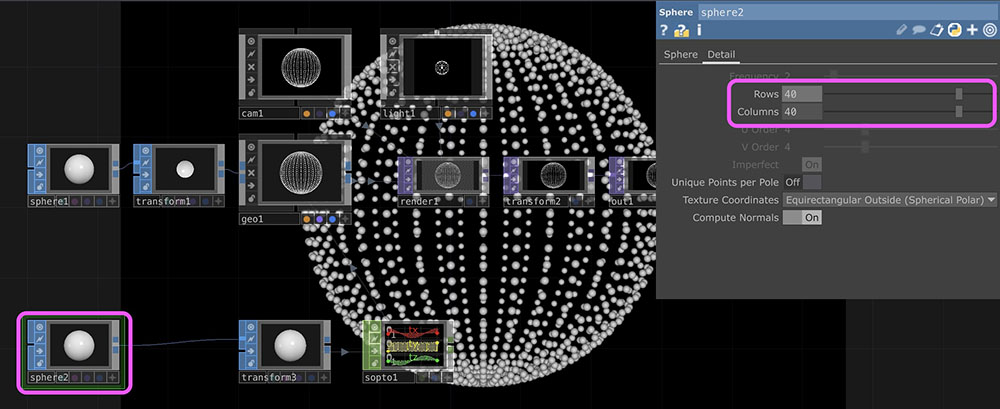
You can adjust the density of the Sphere particles by increasing the number of rows and columns in the “Detail” section of the Sphere SOP (labeled “sphere2” in the figure below).
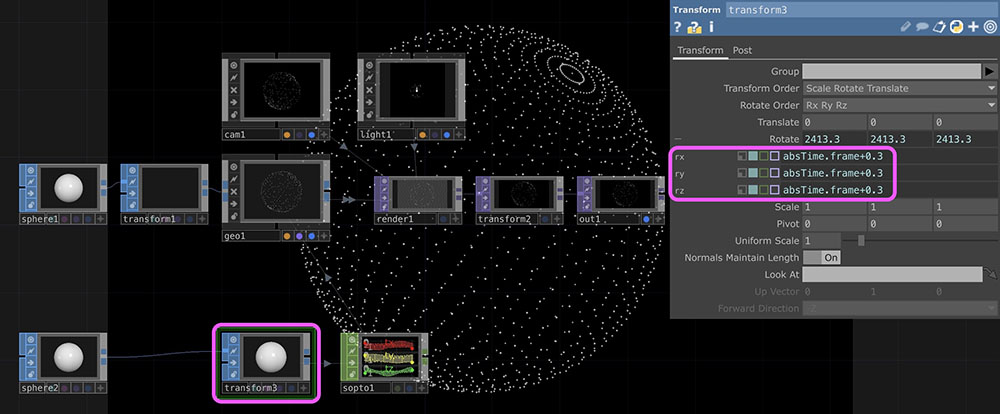
Open the Rotate settings in the Sphere’s Transform SOP (labeled “transform3” in the figure below) and enter the following values for rx, ry, and rz. You can adjust the rotation speed by changing the value of 0.3 shown below.
absTime.frame + 0.3
In the figure below, the Uniform Scale of the Sphere particle’s Translate SOP (transform1) has been set to 0.005.
You can also import other primitive SOPs (such as the Torus SOP, Tube SOP, and Text SOP) or OBJ data into the coordinate system.
3. Noise SOP
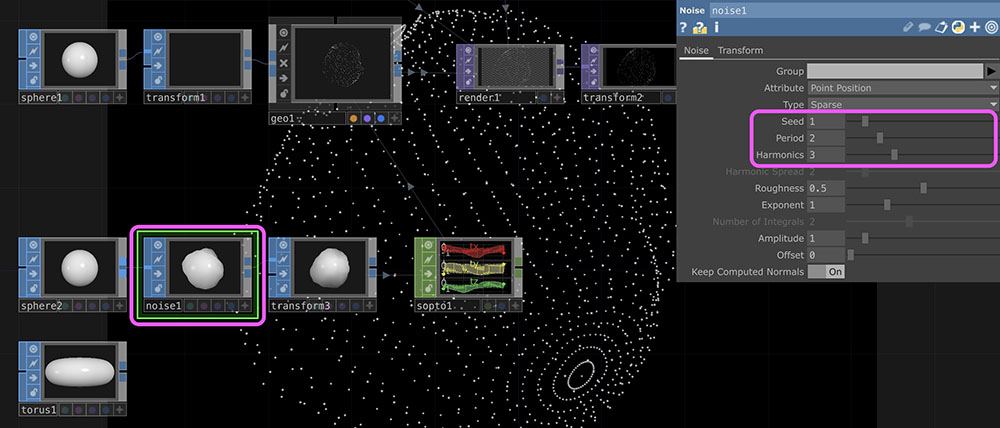
Right-click the wire between the Sphere SOP and the Transform SOP in the Sphere node and add a Noise SOP. Set the parameters as follows (you may change them as desired).
- Speed: 1 (default)
- Period: 2
- Harmonics: 3
4. Responding to Sounds
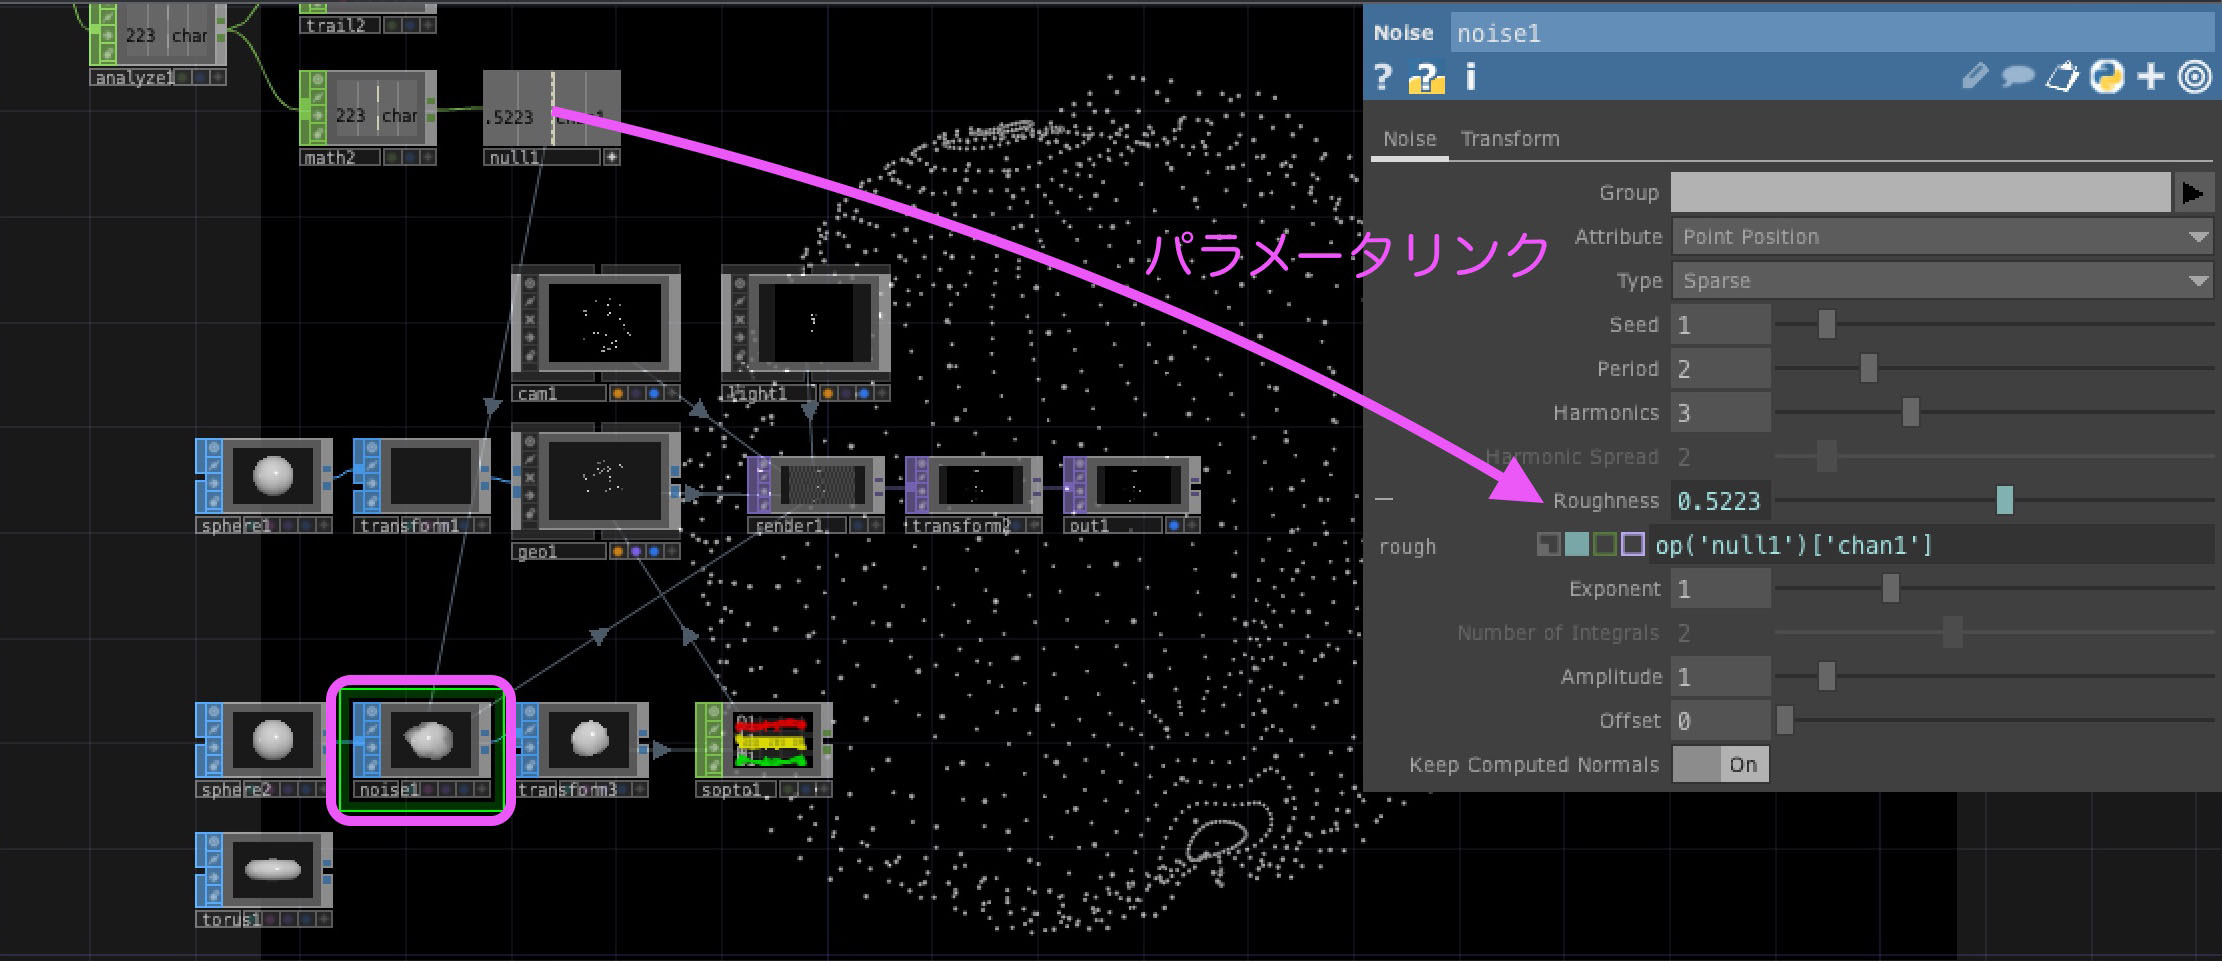
Link the Sound Analysis Null CHOP to the Roughness parameter of the Noise SOP. Adjust the To Range parameter of the Sound Analysis Math CHOP to a value between 0 and 10 (or as desired). Since the degree of visual change varies depending on the song, adjust this setting for different songs.
Turn on the Render view in the Noise SOP. This will display both the particles and the 3D object simultaneously. Change the Uniform Scale in the Transform SOP to around 1.2. The particles will appear outside the 3D object.

5. Color Changes Over Time
5.1 Color Changes
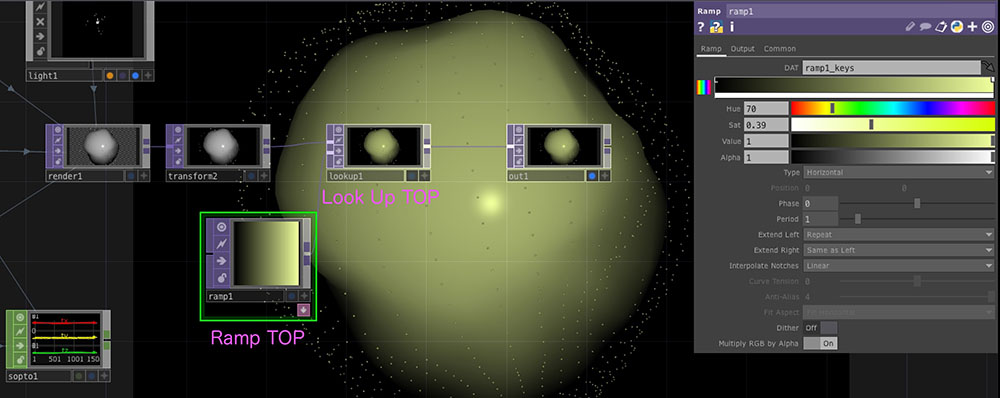
Insert a Look Up TOP before the final Out TOP. Use the Ramp TOP as a color palette. In the Ramp TOP, increase the Saturation and adjust the Hue.
5.2 Color Changes Over Time
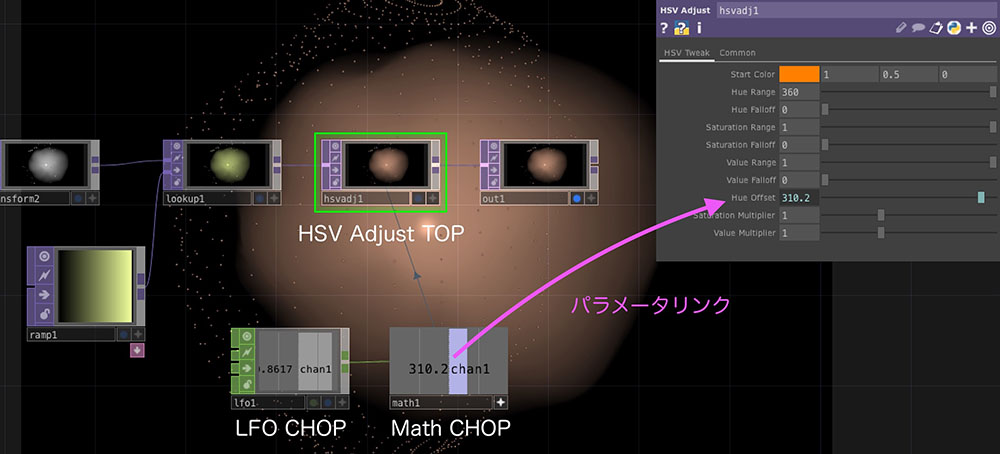
Next, insert an HSV Adjust TOP between the Out TOP and Look Up TOP. Add an LFO CHOP (Ramp, Frequency: 0.2) and a Math CHOP (To Range: 0–360), and parameter-link the Math CHOP to the HSV Adjust’s Hue Offset.
6. Changes in Movement and Scale (Bonus)
By linking the values from LFO + Math to the Radius and Center parameters of the Sphere, you can apply movement and scaling effects.
7. Recording (for Assignment Submission)
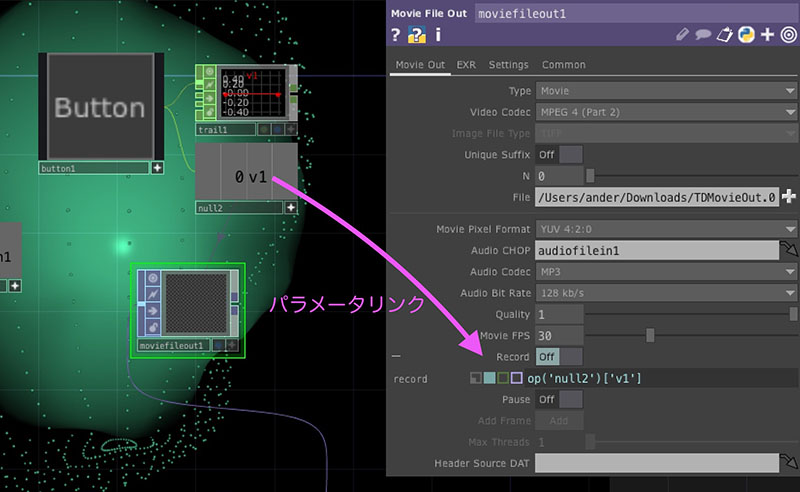
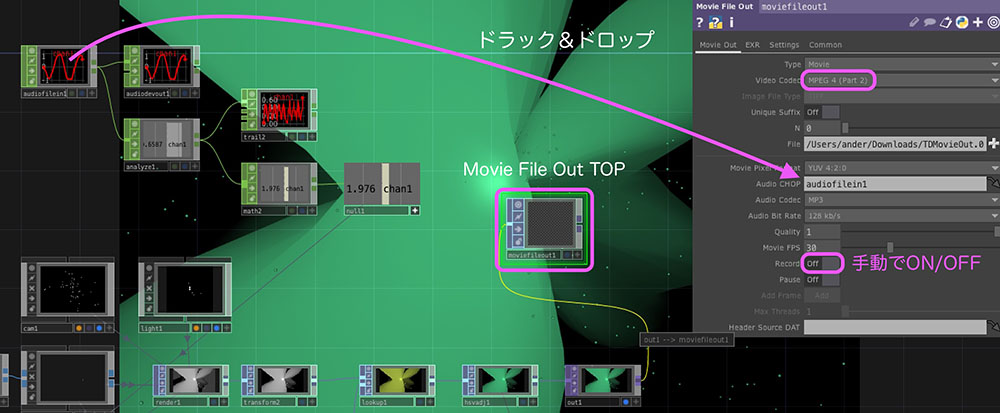
To convert TouchDesigner output into video data, use the Movie File Out TOP.
- Connect the Out TOP to the Movie File Out TOP
- Video Codec: MPEG-4 (Part 2) *NVIDIA GPUs are not supported on Mac
- Drag and drop the Audio File In onto the Audio CHOP
- Specify the save location and filename from the File menu
To record, manually turn the “Record” button on or off.
As shown in the figure below, you can use Button COMP and similar components to start and stop recording from the UI, or create an operator to specify the recording duration.