Morphing Part 1
1. Morphing
Morphing is a visual technique that creates transitions by gradually transforming two different images (the image below is from Wikipedia). In recent years, it has become increasingly common in online videos on platforms like TikTok and in “aha moment” visual effects. While morphing can be achieved using only warp transformations and dissolves, generating images that blend at the pixel level is necessary to achieve more natural transitions.
In the 1991 film Terminator 2, morphing was used to depict the T-1000 transforming into a human.
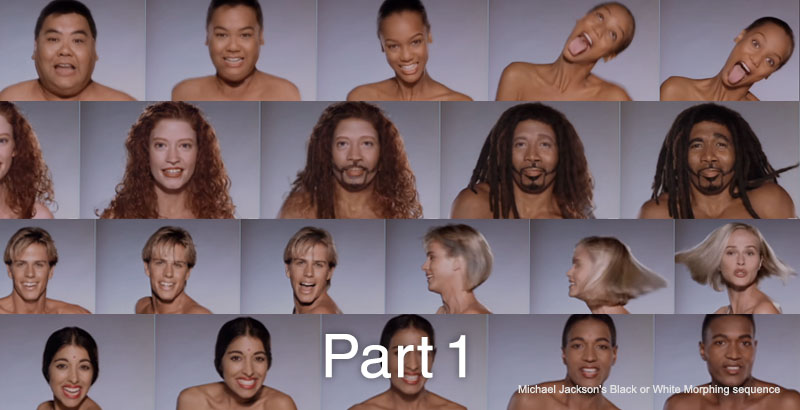
Also in 1991, the morphing footage of different people in Michael Jackson’s music video for “Black or White” became a hot topic. At the time, technology for automatic morphing did not yet exist, so the footage was created manually, frame by frame. The morphing sequence begins around the 5:26 mark.
A video consisting solely of morphing sequences.
Visual effects that depict the passage of time are also considered a form of morphing.
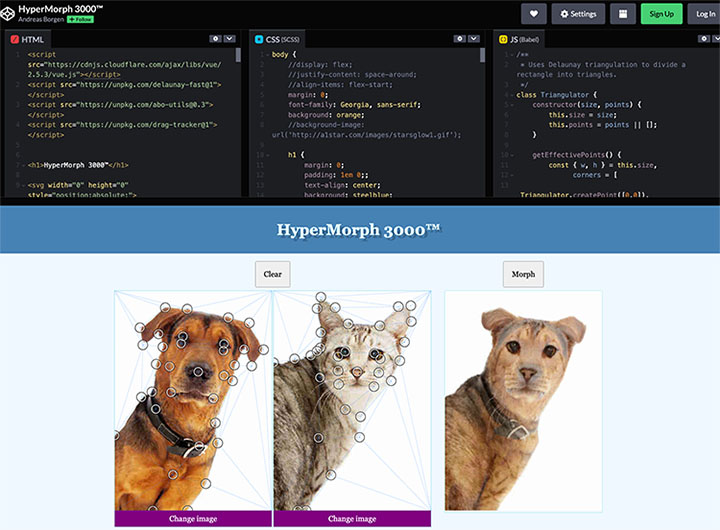
If you only need an image, you can also create one using the online tool HyperMorph 3000.
https://codepen.io/Sphinxxxx/pen/pZQRGB/
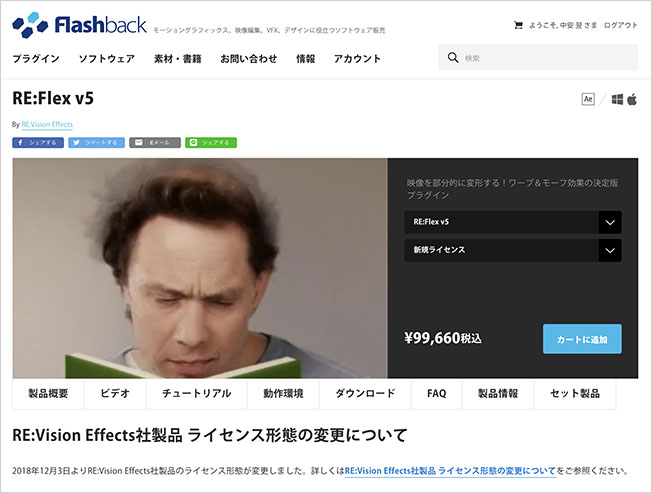
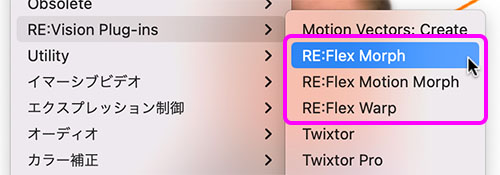
2. RE:Flex
Software sold by RE:Vision Effects that enables warping and morphing. It is not available for direct purchase; it can be purchased through the Flashback website, the official distributor in Japan.
RE:Flex includes three features—RE:Flex Warp, RE:Flex Morph, and RE:Flex Motion Morph—and is also available as a standalone plugin.
RE:Flex Warp (Warping) Not covered in this exercise
You can apply a path to a photo and transform the image in sync with the path’s transformation animation. For example, you can create a video of a person blinking using a single portrait photo. The image below is from the manual.
RE:Flex Morph (Still Image Morphing) To be covered in Part 2
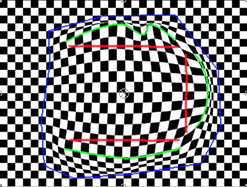
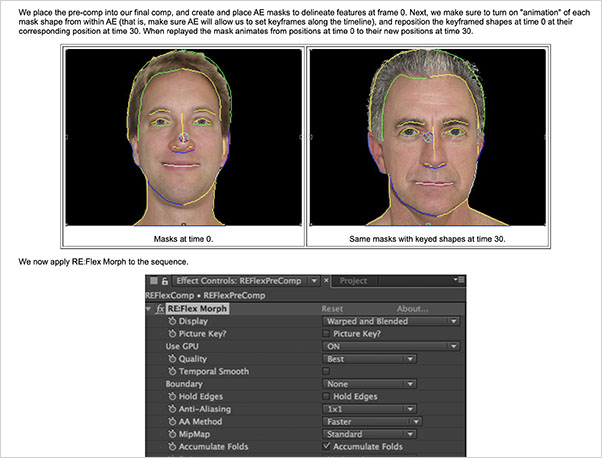
You can create a morphing effect where two different still images transition into one another while transforming. The image below is from the manual.

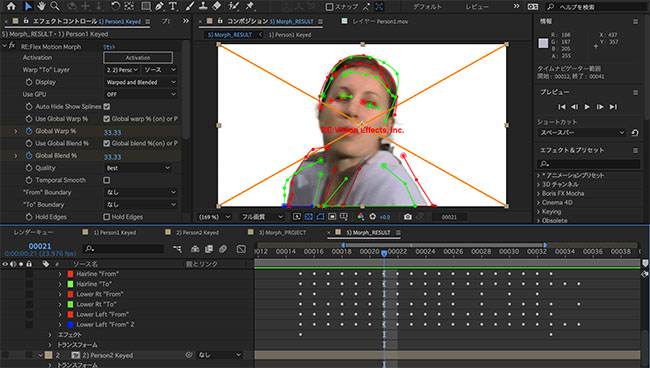
RE:Flex Motion Morph (Video Morphing) To be covered in Part 3
You can create a morphing effect where two different videos transition into one another while transforming. The image below is from the manual.

3. Installing the Demo Version
3.1 Using the Demo Version
The demo version allows you to use all features, but an “X” will appear on the output image.
3.2 Downloading the Installer
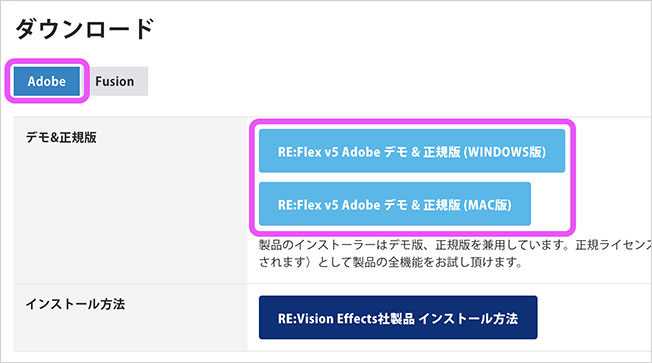
Go to the URL below and click “Download” in the menu.
https://flashbackj.com/product/reflex
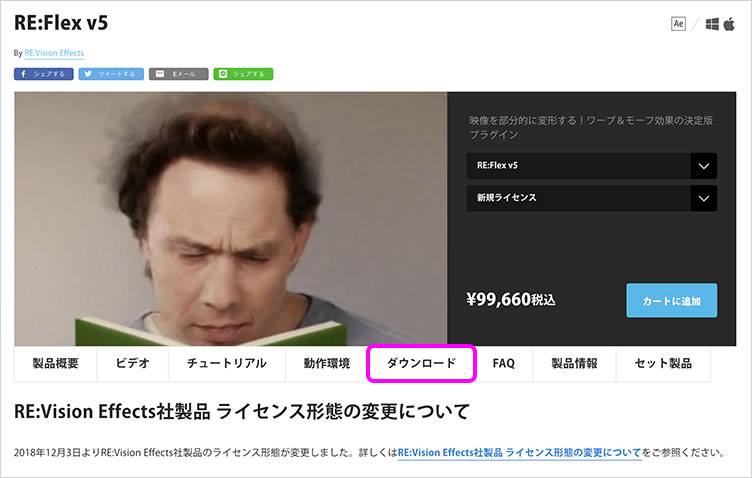
From the Adobe tab in the Downloads section, click either the Windows or Mac version to download it.
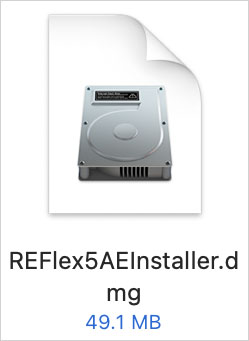
Double-click the downloaded DMG file (for Mac).
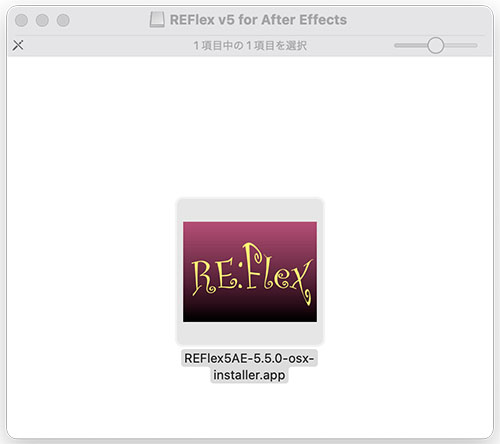
Once the virtual drive is mounted, double-click REFlex5AE-***-osx-installer.app to launch the installer.
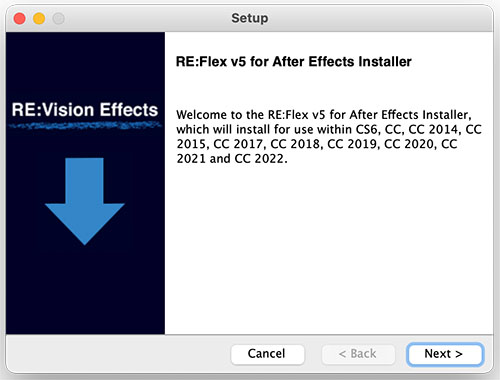
Follow the instructions in the installer to complete the installation.
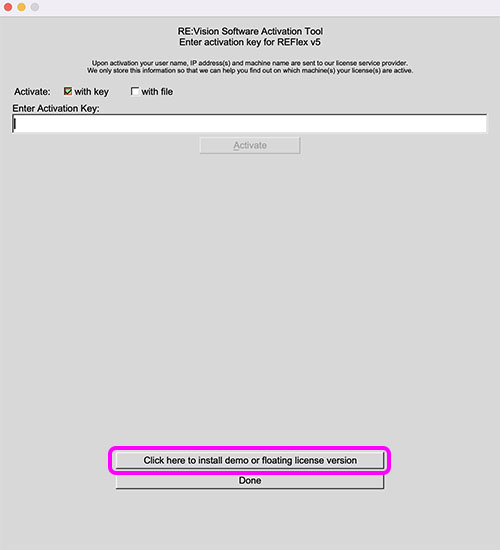
In the window shown below, click “Click here to install demo or floating license version.”
3.3 Manual (English)
On a Mac, a folder named “REVisionEffects” is created in the Applications folder, and an HTML manual (in English) is located inside the “REFlex5AE” folder within it.

Double-click the REFlex5ManualAfterEffects.htm file shown above to view the manual. It includes tutorials, and you can practice using the files in the “images” and “movies” folders. In Part 2 and Part 3,
4. Official Tutorial
Go to the URL below and select the RE:Flex tutorial from the “BY PRODUCT” section. A variety of tutorials are available. Some of them also allow you to download asset data.
