Time Displacement
1. What Is Time Displacement?
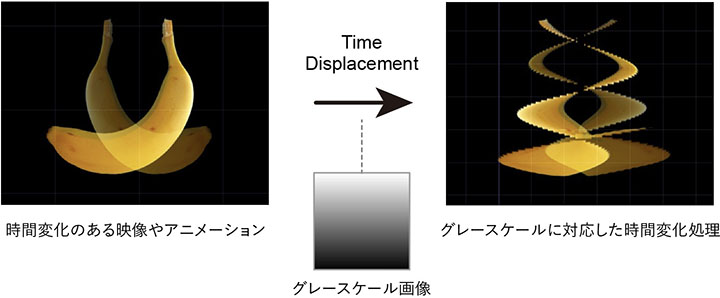
Time displacement is a technique that creates complex visual effects of displacement and distortion by using the pixel brightness of a grayscale image (0–255 for 8-bit images) as a parameter for temporal variation. It is frequently used in motion graphics, kinetic typography, and slit scan, and can be created using After Effects or Touch Designer.
I will cover Slit Scan in a separate set of lecture notes.
2. Process Flow
Time Displacement requires video footage or animation that contains some movement. Applying Time Displacement to a still image will not produce any changes.
3. Reference Tutorials and Goals
In this section, we will follow the tutorial below as an example of how to apply Time Displacement to kinetic typography.
In this exercise, we will create the following kinetic typography.
4. Preparation
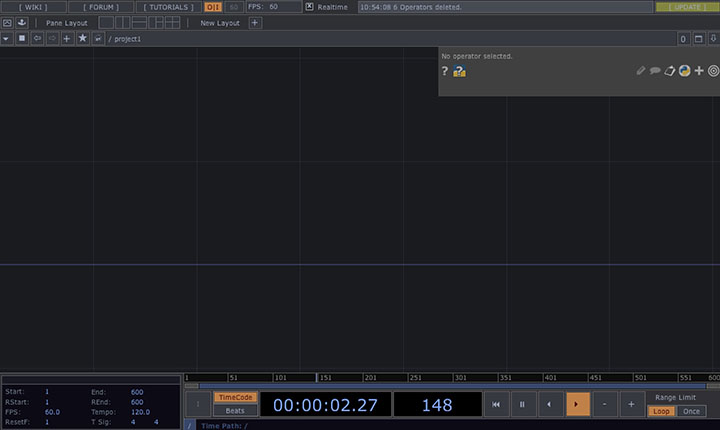
After launching TouchDesigner, delete the Startup Operator and close the Palette.
5. Text Animation
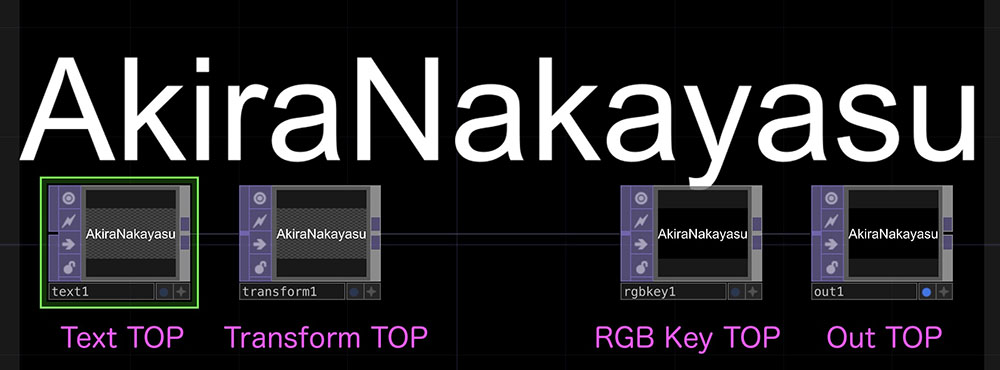
5.1 Text TOP, etc.
-
Text TOP
- Text tab - Text: Enter any text (in this case, “AkiraNakayasu”)
- Font tab - Font: Select any font (in this case, Arial)
- Font tab - Auto-Size Font: Auto-Fit Always
- Common tab - Output Resolution: 1280 x 720
-
Transform TOP
-
RGB Key TOP
-
Out TOP
- Backdrop Display: ON
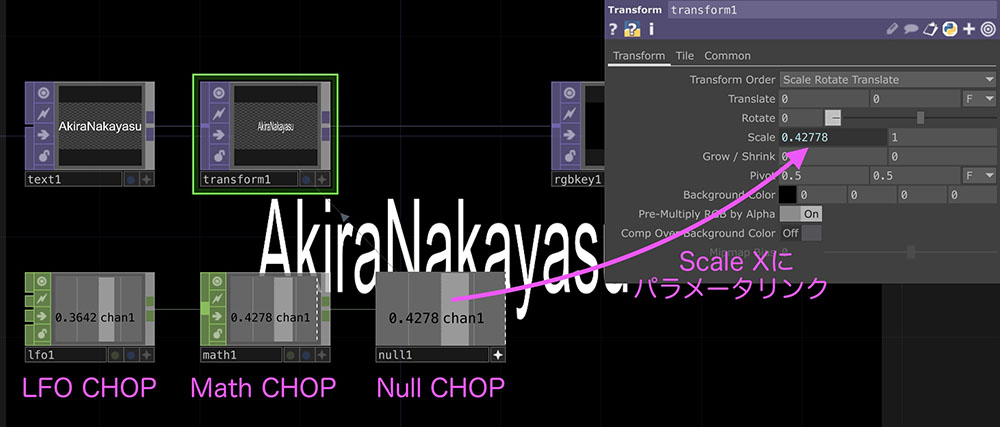
5.2 LFO CHOP and Others
-
LFO CHOP
- Type: Gaussian (Gaussian curve from 0 to 1)
- Frequency: 0.3
-
Math CHOP
- To Range: 0.1–1
-
Null CHOP
- Link parameter to Scale X of the Transform TOP
6. Time Displacement Processing
Add the following operator between the “Transform TOP” and “RGB Key TOP” layers, as shown in the figure.
-
Texture 3D TOP
- Cache Size: 128
-
Time Machine Home
-
Ramp TOP
- Phase: absTime.seconds * 0.1
- Period: 0.3
- Extend Left: Mirror
- Common tab - Resolution: 1280 x 720
- Common tab - Pixel Format: 32-bit float (RGBA)
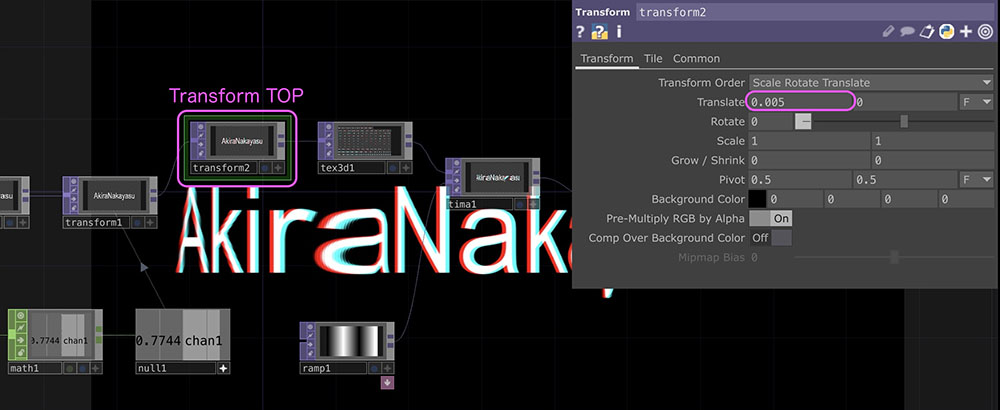
7. Simulated Color Shift Effect
Color shifts and chromatic aberrations are caused by the printing process and the performance of optical lenses. While the goal is generally to minimize these effects as much as possible, they are often intentionally added to digitally generated images and videos that are too precise to give them a distinctive character.
(Reference) A Radical Transformation of Illustrations! Creating Evocative Images Using Chromatic Aberration
Add another Transform TOP between the existing Transform TOP (labeled “transform1” in the figure below) and the Texture 3D TOP, and configure the following parameters.
- Transform tab - Translate X: 0.005
- Common tab - Channel Mask: R
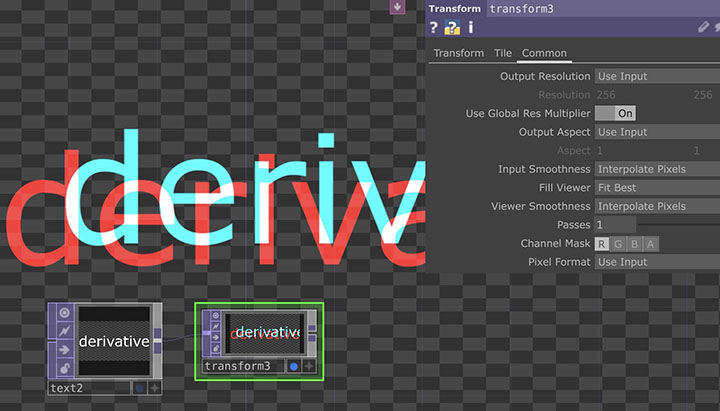
(Note) Understanding Channel Masks
When using the Channel Mask in Transform TOP to create color offsets, if you set a mask for the Red channel, as shown in the figure below, the original position (0,0) will be displayed in red, the offset position will be cyan (green + blue), and the area where the two overlap will be white (red + green + blue). In this exercise, by setting a small offset, we achieve a visual effect where the red and cyan colors slightly bleed beyond the white text.
8. Introduction to Tutorials on More Advanced Techniques
The following versions include mouse controls and movements.
An artistic expression that achieves grid misalignment and distortion. Maybe it strays a bit from “Time Displacement”?
A method that applies 3D textures using SOP.