After Effects Part 1

1. Introduction
1.1 What Is Adobe After Effects?
After Effects is a software program used for a wide range of applications, including 2D animation, motion graphics, 3D compositing, color grading, and VFX (visual effects). Because it allows users to apply keyframe animation to multiple layers, it is sometimes referred to as the “video version of Photoshop.” With its advanced effects and plugins, it has evolved into a unique software solution.
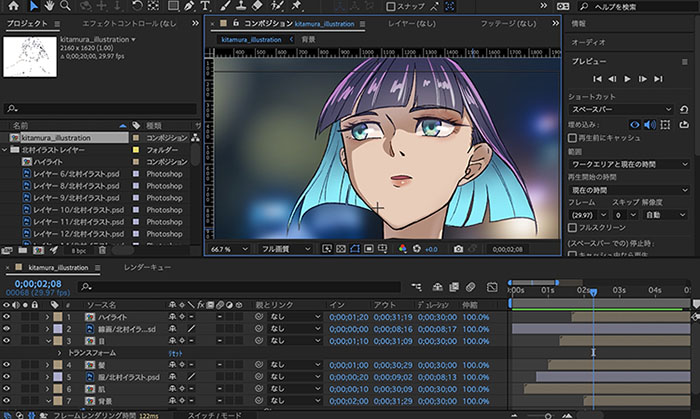
The illustration shown above is © Kana Kitamura.
1.2 The Role of After Effects
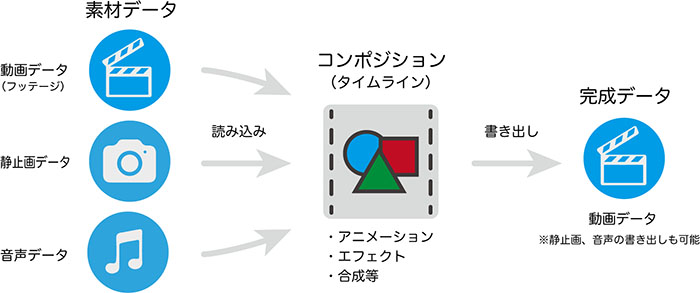
The diagram below illustrates an example of the structure of a video production. In video production, there are sections that involve video editing (timeline editing) using software like Premiere, and sections—such as opening sequences, VFX, and 3D CG compositing—that require precise adjustments within a short timeframe; After Effects is well-suited for this type of work. While Premiere is used for editing long-form content (measured in minutes or longer), After Effects is used for animations, effects, compositing, and other tasks that require precision at the second or frame level.

While Premiere’s editing concept is based on “sequences”—a continuous sequence of clips arranged in order on a timeline—After Effects’ editing concept is based on “compositions”—the arrangement and assembly of elements—and primarily involves keyframe editing, where multiple layers are stacked and keyframes are added. In recent years, Premiere has added keyframe editing features similar to those in After Effects, and the overlap in functionality between the two programs has been growing.

You can import After Effects compositions into Premiere, or import Premiere sequences into After Effects, allowing you to produce video content through seamless collaboration between the two applications.
(Reference) How do I integrate Premiere Pro and After Effects? It’s easy with Adobe Dynamic Link!
The video below explains the differences between After Effects and Premiere.
2. A Vast Selection of Plugins and Scripts
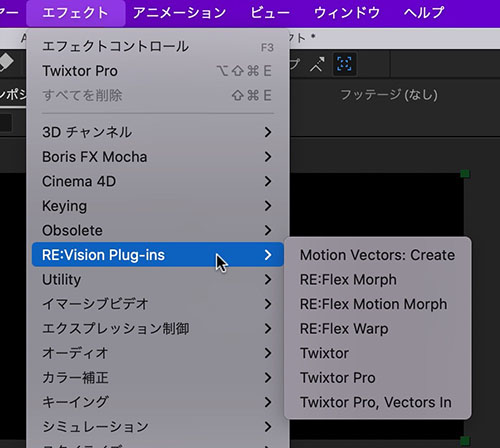
After Effects comes with over 100 built-in plugins (i.e., effects), and there are hundreds more available, including third-party plugins. Many of the plugins currently included in After Effects were originally developed by other companies and later acquired by Adobe.
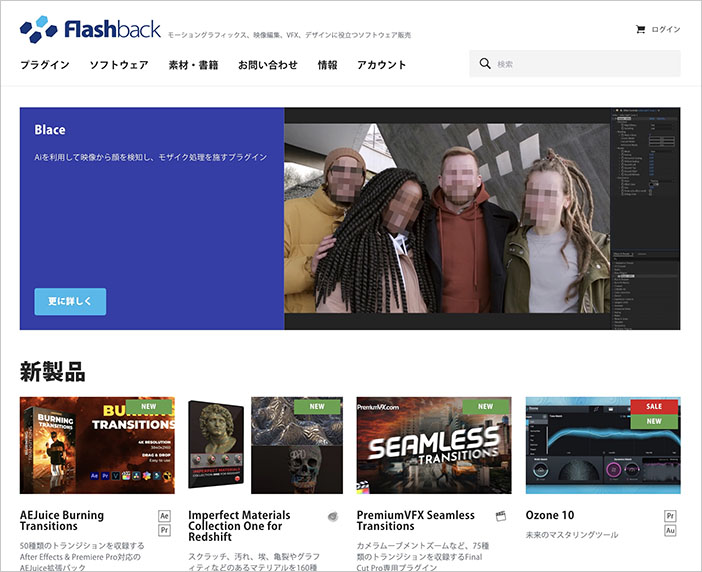
In Japan, these plugins can be purchased from Flashback. While some are available directly from overseas manufacturers’ websites, Flashback holds the domestic distribution rights for many of them.
Plugins range from simple effects to ones that offer functionality comparable to a full-fledged software application on their own. In addition, there are numerous scripts available—both free and paid—that automate tasks that would otherwise be time-consuming to perform manually. Given the sheer number of plugins and scripts, it’s difficult to grasp After Effects all at once. Much like learning a recipe, the first step toward mastering the software is to focus on the specific visual effects you want to achieve and learn the techniques needed to create them.
(For reference)
- [Including Free Options] Recommended Scripts I’ve Tried and Love_After Effects](https://vook.vc/n/2544)
- A Roundup of Must-Have Plugins, Scripts, and Extensions for After Effects
3. Tutorial Overview
As mentioned earlier, in addition to its basic features, After Effects has its own set of plug-in-specific techniques and best practices. There are various tutorials available on how to use these plug-ins, including on YouTube and the manufacturers’ websites. Below are a few examples.
3.1 Official Tutorial
https://helpx.adobe.com/jp/after-effects/tutorials.html
3.2 Video Copilot
The website of Video Copilot, a company that develops and sells After Effects plugins, features a wide variety of After Effects tutorials.
https://www.videocopilot.net/tutorials/
3.3 ayato@web
The website of Ayato Fujii, known as “ayato@web.” Although updates have been infrequent in recent years, it offers a great resource for learning the basics of VFX in After Effects.
4. The Role and Usage of Compositions
4.1 The After Effects Workflow
In After Effects, you first create a composition, then import video (footage), still images, and audio files as layers, and apply effects, keyframes, and other settings. The format of the final output (resolution, frame rate, etc.) depends on the sequence settings.
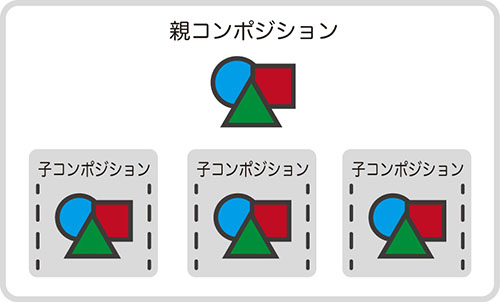
4.2 Nested Compositions
In After Effects, you can create multiple compositions. As shown in the figure below, it is common to nest one composition inside another. Child compositions can be treated in the same way as various types of media files. Unlike sequences in Premiere, nesting compositions is more similar to grouping in Illustrator. Some effects require you to apply settings to child compositions, and since the relationships between compositions can become complex, it takes some getting used to.
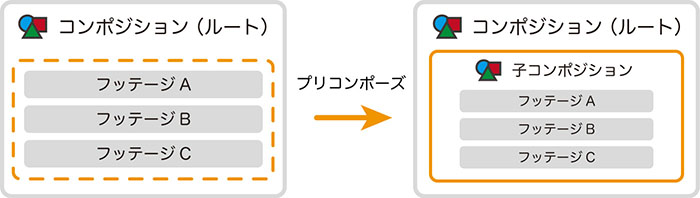
4.3 Precomposition
As shown in the figure below, by pre-composing footage, you can create a child composition and move the footage into it at the same time. You can choose whether to leave the effects and keyframes applied to the original footage as they are or apply them to the child composition. Pre-compositions are often used for organizing settings when applying effects or when layers become complex.
5. Preparing the Materials
In After Effects, you can create content without any source footage, such as motion typography. In the initial stages, we’ll proceed with the exercises without using any source footage.
As needed, we will take and edit photos, and instructors will distribute source files.
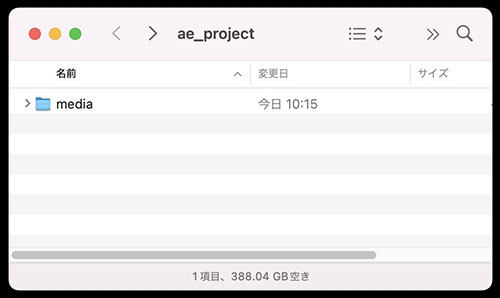
6. Creating a Folder
Just as you would when creating a video project in Premiere, create a folder for your project (you can name it anything you like; in the image below, it’s called “ae_project”), and then create a “media” folder within that folder to store your source files. We won’t be using any source files in this example, but this is typically where you would place videos, still images, and other media. This is just one example, so please organize your files by adding folders such as “footage” or “audio” as needed for your specific project.
7. Launching After Effects
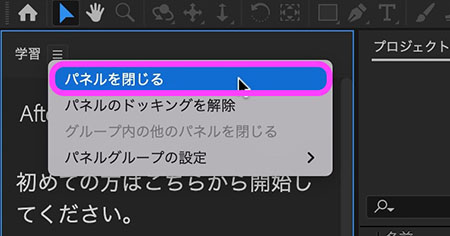
If the Learning Panel appears when you launch the program for the first time after installation, close it. It will not appear again after that. If you want to display it, go to “Window Menu > Learning Panel.”
8. Creating a New Project
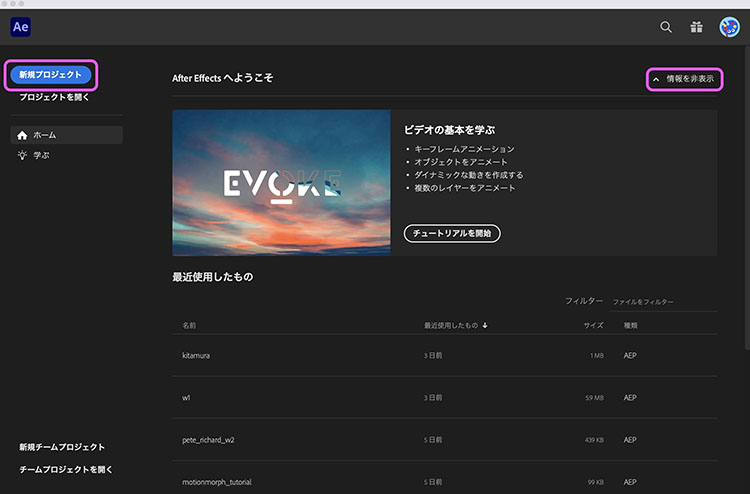
The home screen appears. Click “New Project” in the upper-left corner. Once you get the hang of it, click “Hide Information” in the upper-right corner to hide the tutorial.
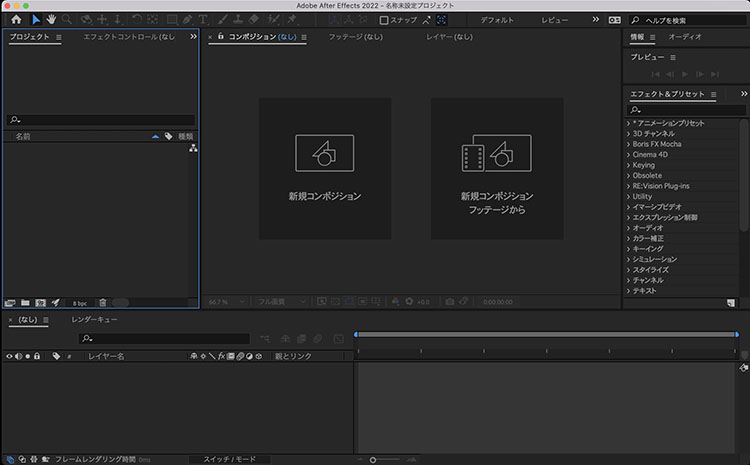
An empty project is displayed.
9. Saving Project Files
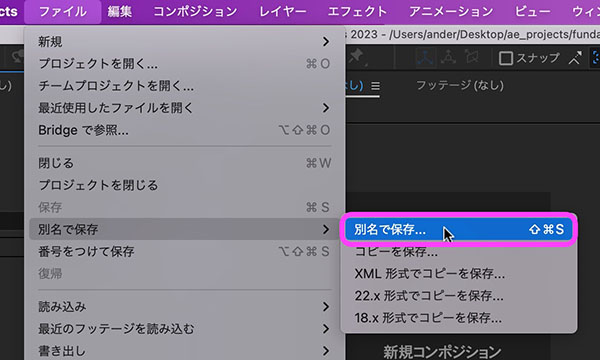
Click “File Menu > Save As > Save As.” For subsequent saves, click “File Menu > Save.”
10. Creating a Composition
10.1 Creating a New Composition from Scratch (This Method)
There are three methods as follows.
Method 1: From the “New Composition” button in the Composition panel

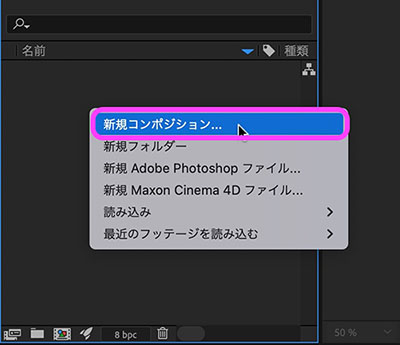
Method 2: Right-click in an empty area of the Project panel and select from the context menu
Personally, I often use this method.
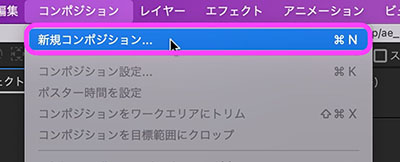
Method 3: From the Composition menu > New Composition
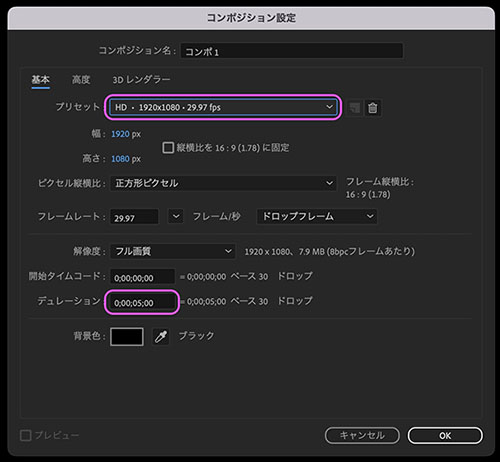
For this example, the composition will be created in the widely used Full HD resolution.
- Composition Name: Comp 1 (default)
- Preset: HD, 1920x1080, 29.97 fps
- Duration: 5:00 (default)
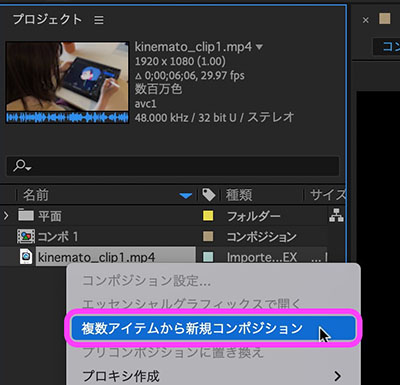
10.2 Creating a Composition from Footage (omitted)
You can create compositions that automatically adjust to the image size and frame rate of the source footage.
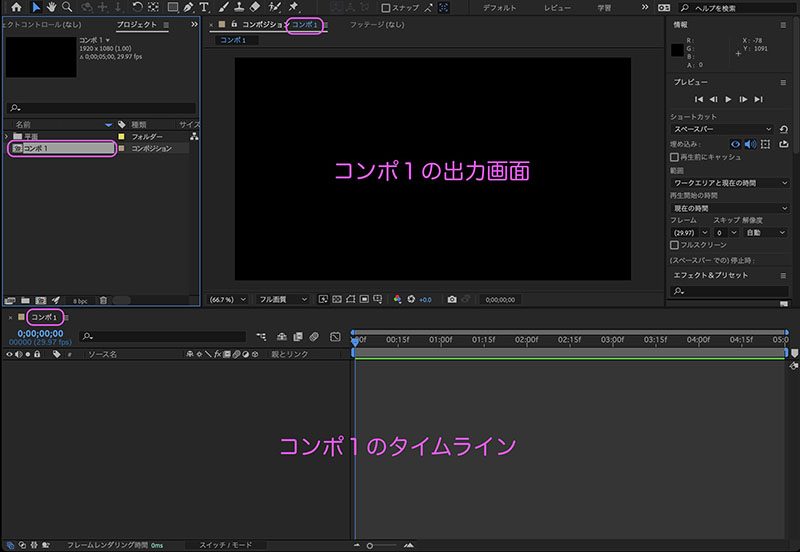
11. User Interface
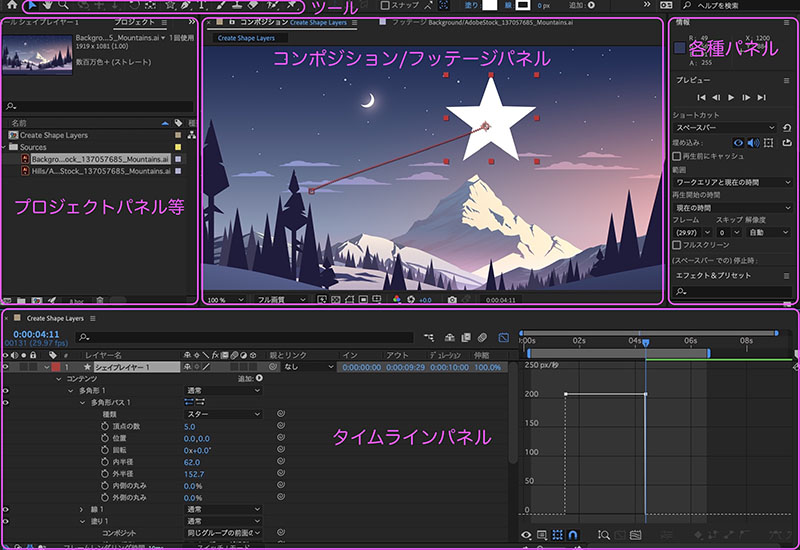
11.1 UI Overview
While the UI might seem somewhat similar to Premiere, After Effects is designed around placing multiple layers on the timeline and editing keyframes, which is a fundamentally different design concept from the clip-based approach of Premiere.
11.2 Selection Status of Each Panel
The processing steps vary depending on which panel you select. In some cases, the options available in the menu will change as well. A blue line appears along the edge of the selected panel (see figure below). If the processing is not proceeding as intended, check which panel is currently selected.

11.3 Switching Workspaces
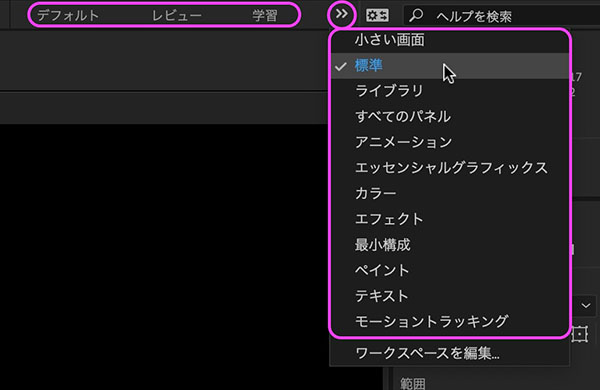
You can switch between workspaces (preset panel layouts) depending on the task at hand. In class, we will use the “Standard” layout for demonstrations, but you may change it as needed. There are two ways to do this.
How to switch from the top-right corner of the UI.
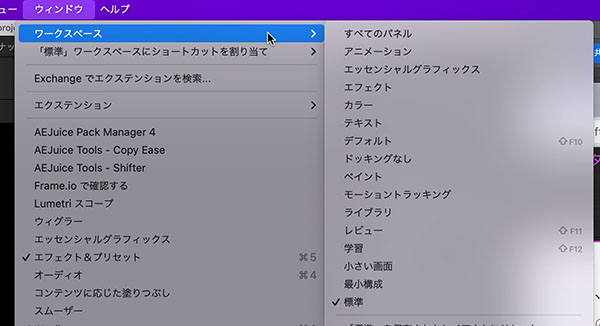
How to switch from the Window menu.
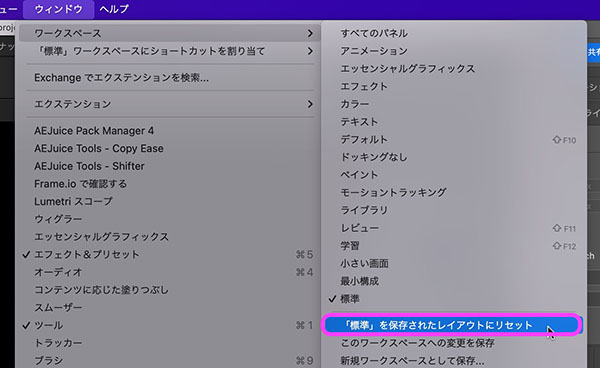
11.4 Resetting the Workspace
If the workspace layout cannot be restored due to changes in panel size or accidental actions, you can reset it to restore the default state.
12. Flat Layers
12.1 Creating a Plane Layer
Although a flat layer is a simple vector shape, it can be used for a variety of purposes, such as masks, various types of mattes, and effects. In this case, we will use it as a background color.
There are two ways to create it.
Create it by right-clicking on the timeline and selecting “New > Plane” from the menu that appears.
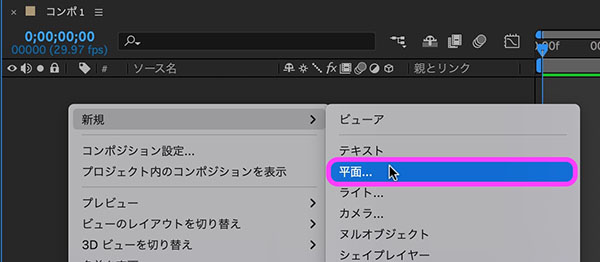
Alternatively, you can create it by selecting “Layer Menu > New > Plane.”

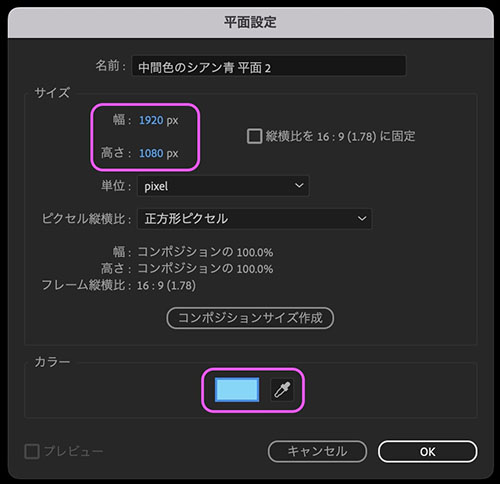
In the plane settings, configure the following.
- Width: 1920 px, Height: 1080 px. The default values are set to the composition size, so no changes are needed.
- Color: Click to change to any color.
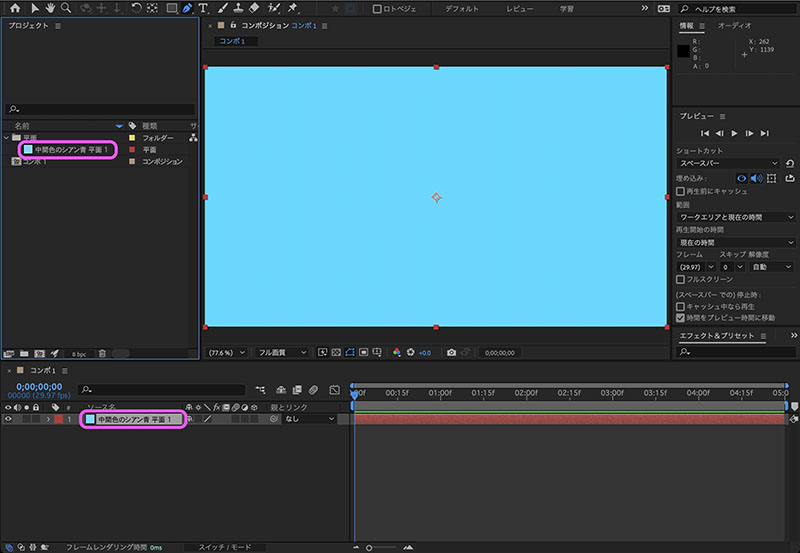
A plane layer is created on the Timeline. A “Plane” folder is automatically created in the Project panel, and the footage is saved there as “Plane” footage, making it reusable.
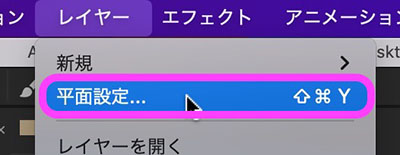
12.2 Changes After Creation
With a plane layer selected in the Timeline, click “Layer Menu > Plane Settings.” You can make changes in the same dialog box that appeared when you created the layer.