Kinetic Typography Part 3
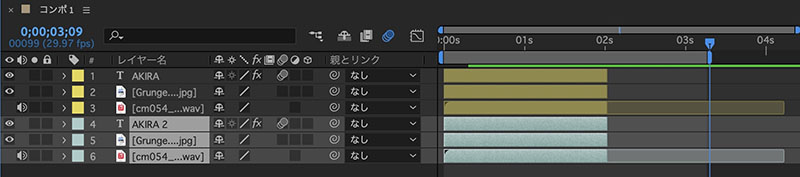
1. Adjusting the Duration of Multiple Layers
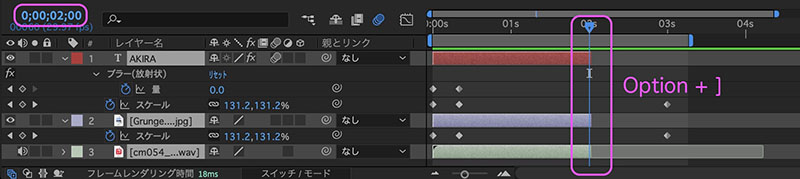
- Move the time indicator to 2:00
- Select three layers (click on the layer names while holding down the SHIFT key)
- Click Option + ] to change the end points of multiple layers at once
2. Creating the Second Text Animation
2.1 Copying Multiple Layers
Since having the properties displayed can be cluttered, press the shortcut key for hiding properties to hide the properties for all layers.

Change the label color of the three layers to the same color (any color).

Press Cmd+D to duplicate the layer. The duplicated layers will be placed on top of each other.
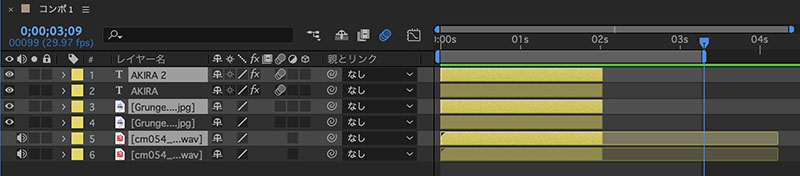
Change the label color of the three duplicated layers.
2.2 Moving Multiple Layers
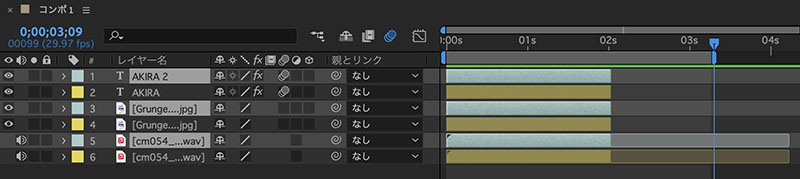
Drag and drop the duplicated layer to move it down.
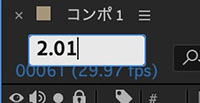
Move the timecode to 2:01 (2.01 input).
Click here to set the starting point.
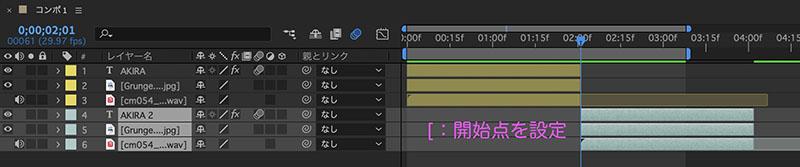
Adjust the play area (playback range) and play the video. Verify that the logo animation plays twice.
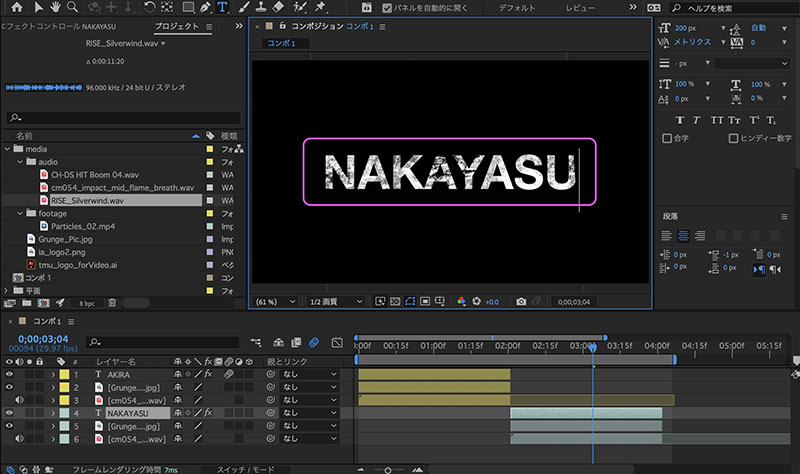
2.3 Changing Characters
Double-click the second character in the Composition panel to enter text editing mode, then change the text.
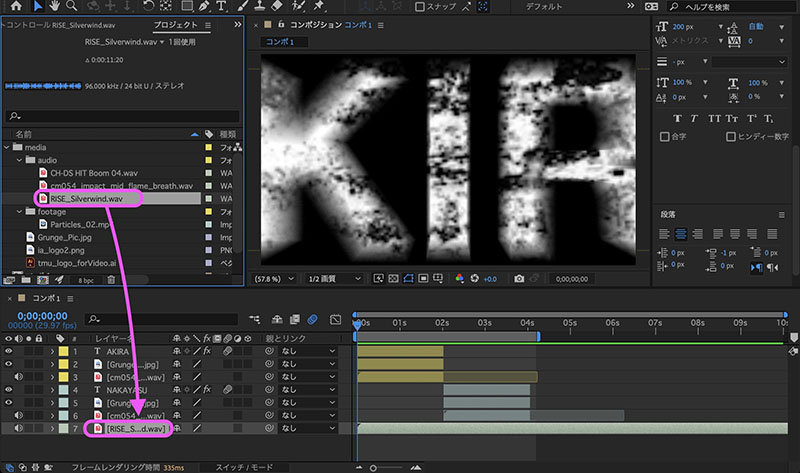
3. Adding Riser Sound
Riser sound effects are used to create a rising (building) effect and are widely used in EDM (Electronic Dance Music).
Drag the RISE_Silverwind.wav file from the Project panel onto the timeline to add it.
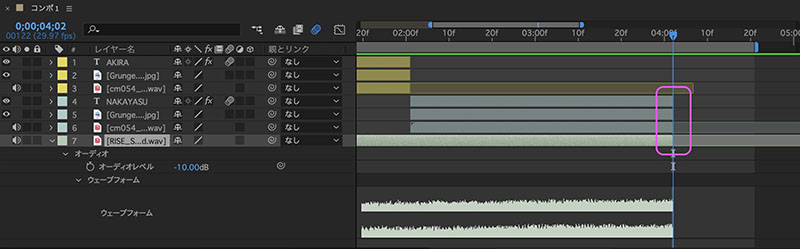
Open the audio layer’s properties and set the audio level to -10 dB. Move it slightly to the left to adjust it so that the build-up starts a little earlier.
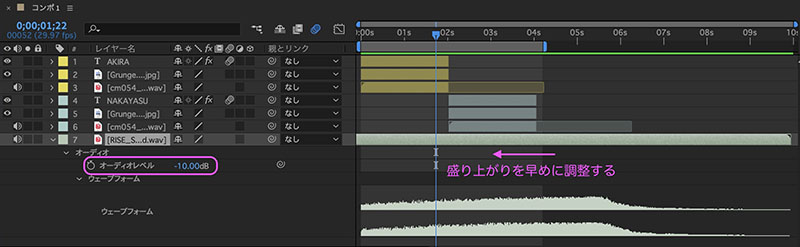
Align the out point of Riser Sound with the out point of the second text.
4. Compositing Particle Effects
4.1 Adding Footage
Drag Particles_02.mp4 from the Project panel and drop it at the top of the timeline.
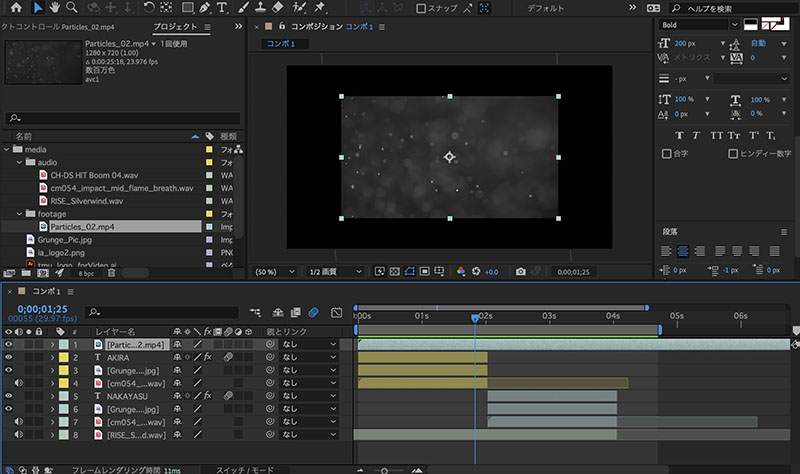
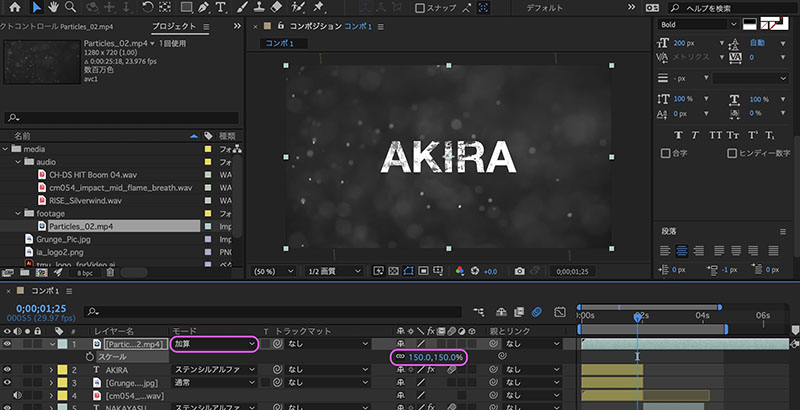
4.2 Scale and Blending Mode (Additive)
Set the scale to 150% and the mode to Additive.
4.3 Adjusting Playback Speed
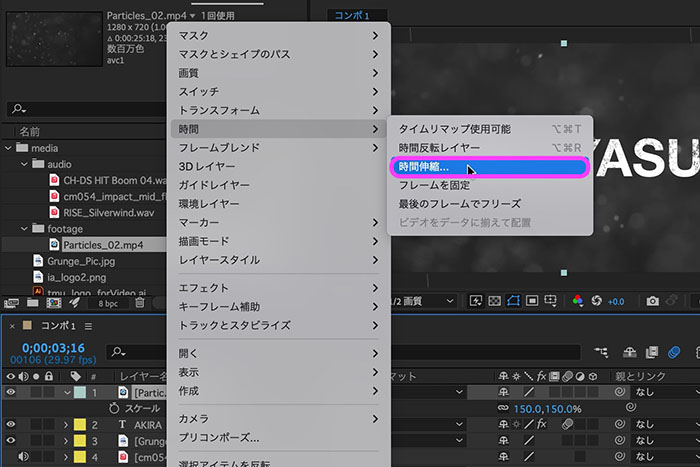
The particle effects are moving a bit too fast, so I’ll slow down the playback speed slightly.
Right-click on “Particles_02.mp4” in the timeline, then click “Menu > Time > Time Stretch.”
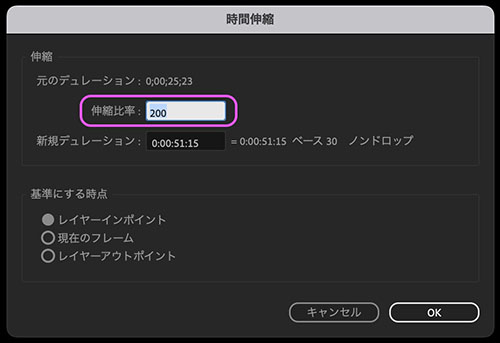
Change the scaling ratio in the Time Stretch dialog to 200% (i.e., half speed). Since this method forces the speed to be slower, the frame rate is halved, resulting in slight stuttering.
4.4 Adjusting Duration
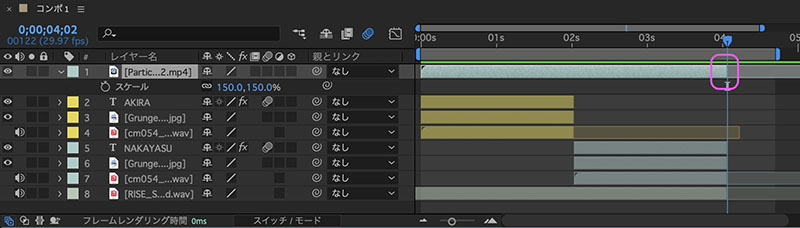
Adjust the end point of the “Particles_02.mp4” layer so that it aligns with the end point of the second text animation.
5. Color Adjustment, Tone Curve, Glow
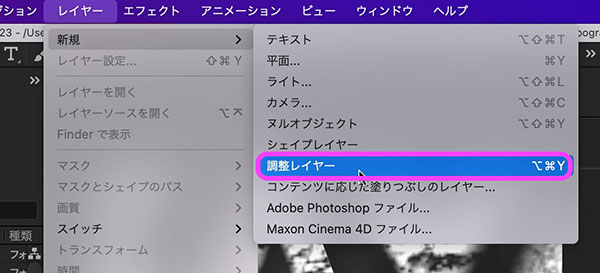
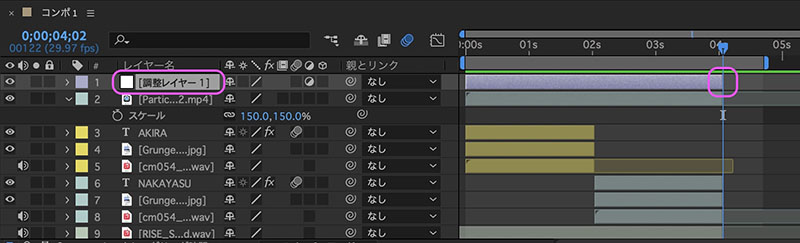
5.1 Adding an Adjustment Layer
Use adjustment layers for overall color correction and glow effects.
Click “Layer Menu > New > Adjustment Layer.”
Adjust the end point of the adjustment layer so that it matches the end point of the second text animation.
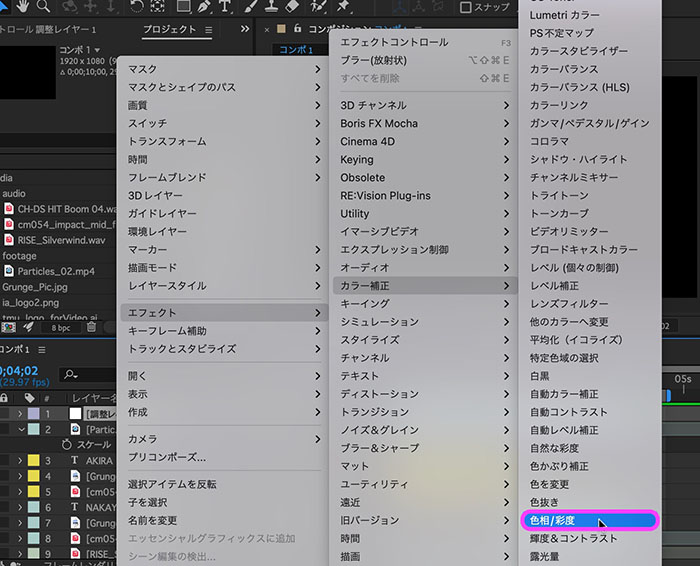
5.2 Hue/Saturation (Adjustment Layer)
Right-click the Effects menu or an adjustment layer, then click “Menu > Effects > Color Correction > Hue/Saturation.”
An effects control panel appears in the upper-left corner of the UI, displaying the Hue/Saturation effect. Check the “Unify Colors” box, then adjust the Hue and Saturation sliders below to customize the colors to your liking.

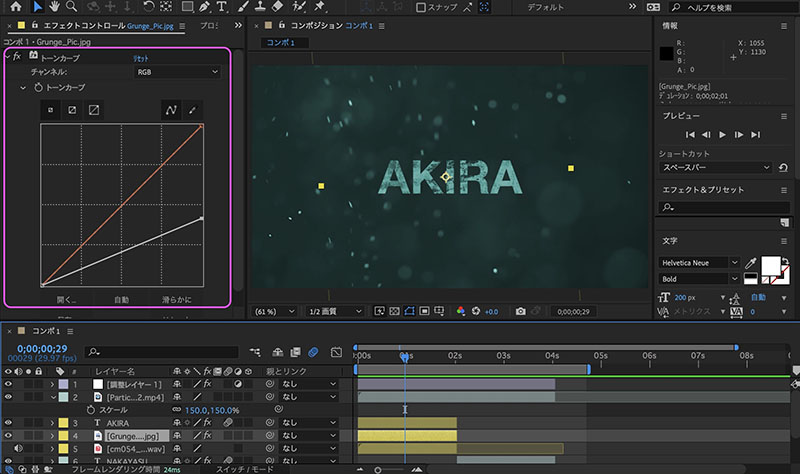
5.3 Tone Curve (Text Layer)
The time position moves to the point where the first text is visible.
Apply the Tone Curve effect to the “Grunge_Pic.jpg” layer, which you set as the texture for the first text, and lower the highlights. Reduce the brightness in the preview until the text appears slightly dimmed.
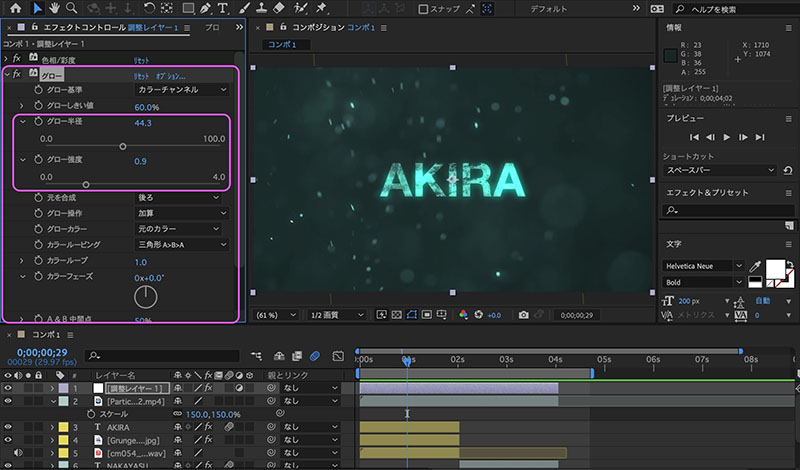
5.4 Glow (Adjustment Layer)
Select the adjustment layer and close the Hue/Saturation effect in the Effects panel. Then apply the Glow effect and adjust the Glow Radius and Glow Intensity to create a glowing effect, as shown below. By carefully balancing the brightness of Grunge_Pic.jpg with the glow settings on the adjustment layer, you can change the overall mood of the image.
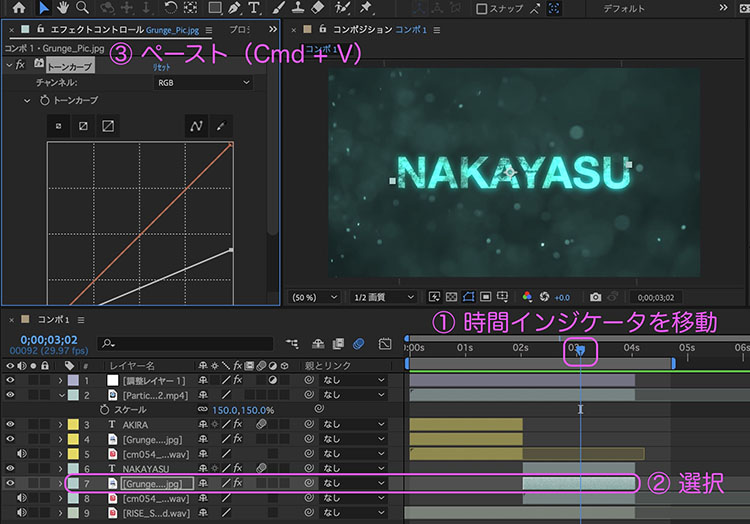
5.5 Copying a Tone Curve
Move to the first timeline marker, then select the first Grunge_Pic.jpg layer. Select the Tone Curve in the Effects panel and copy it (Cmd + C).

Move to the second timeline position, then select the second Grunge_Pic.jpg layer. Although nothing appears in the Effects panel, pasting (Cmd + ) will apply the same tone curve as the first one.
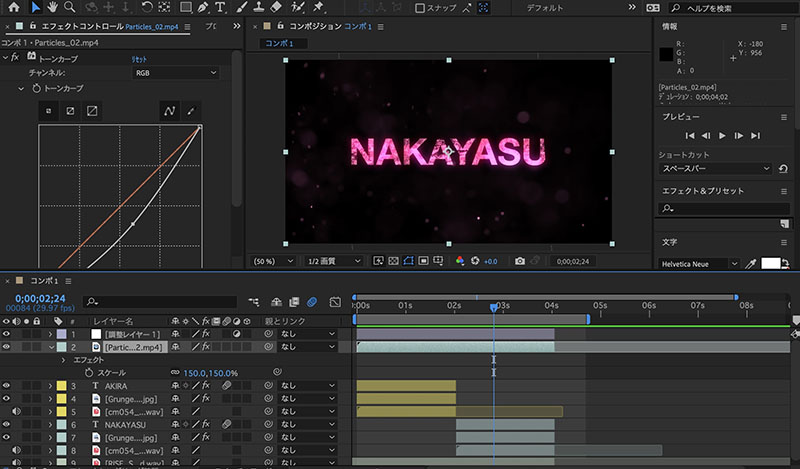
5.6 Tone Curves and General Adjustments for Particle Footage
You can also apply a tone curve to the particle footage if you like. The overall look of the image is influenced by the balance between the text texture, the tone curve of the particle footage, and the glow effect of the adjustment layer. You’ll need to fine-tune each parameter to achieve the desired result.
6. Adding a Logo and Sound Effects
6.1 Adding the IA Logo and SE
Add the IA logo (ia_logo2.png) and the sound effect (CH-DS HIT Boom 04.wav).
Set keyframes for the IA logo so that it animates at a scale of 50% to 60% at a ratio of approximately 1:15. The in-point for the sound effect should be the same as the in-point for the IA logo.

6.2 Adding the Metropolitan University Logo and Sound Effects
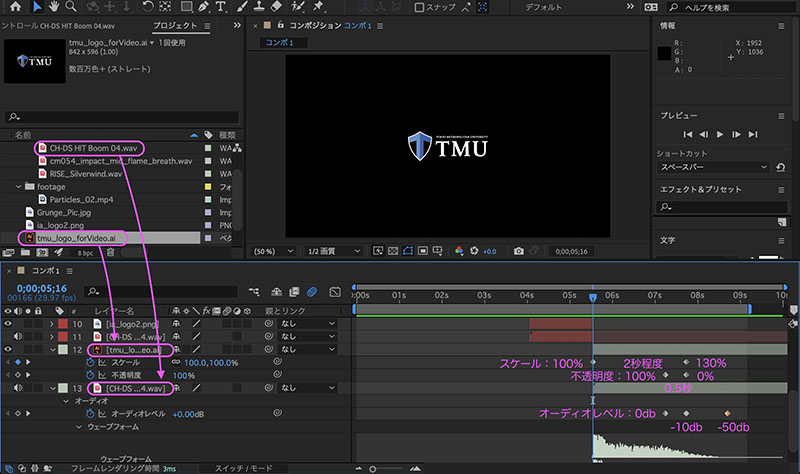
Add the Tokyo Metropolitan University logo (tmu_logo_forVideo.ai) and the sound effect (CH-DS HIT Boom 04.wav).
Set keyframes for the Metropolitan University logo so that its scale increases from 100% to 130% over approximately 2 seconds. Additionally, set keyframes for the opacity so that it decreases from 100% to 0% over approximately 0.5 seconds. To fade out the audio while leaving a lingering echo, set keyframes in stages at 0 dB, -10 dB, and -50 dB.
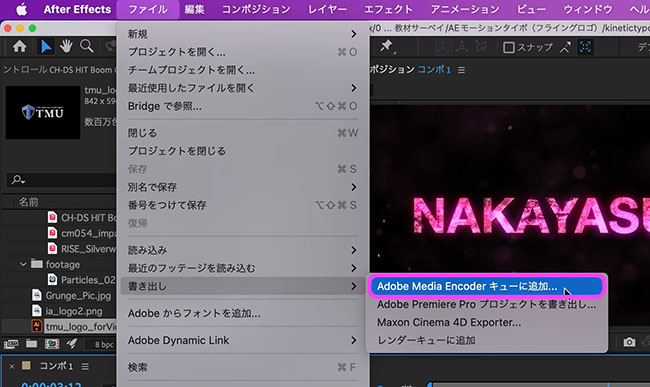
7. Exporting with Media Encoder (Assignment Submission)
After setting the export range in the work area, export the file to MP4 format using Media Encoder.
[Back to Part 2