Face Tracking + TouchDesigner
1. Introduction
The face tracking method described here is a summary of the approach outlined at the URL below. It allows you to perform face tracking using only a standard webcam and TouchDesigner. This is based solely on the experiments described in the first half of the article; the second half (68, Multi-PIE Mark-ups) has not been implemented.
2. Development Environment
2.1 Required Software
- NVIDIA Augmented Reality SDK
- TouchDesigner 2021.12380 or later (Face Track CHOP and Face Track SOP implemented)
- Anaconda
2.2 Officially Recommended Environment: Windows 10, Windows 11 (64-bit), Ubuntu 18.04
- NVIDIA GeForce RTX 20XX and 30XX Series, Quadro RTX 3000, etc.
- NVIDIA Display Driver 465.89 or later Fordetails, see “Getting Started with NVIDIA Maxine” 2.3 Test Environment: Mouse DAIV 5N
- Windows 11 Home 64-bit
- Intel Core i7-1180H (8 cores/16 threads/2.3 GHz)
- 32 GB RAM
- NVIDIA GeForce RTX 3060 Laptop 6 GB
- NVIDIA Driver version 516.94
3. Steps for Generating an NVF File
1. Download the NVIDIA Augmented Reality SDK
https://developer.nvidia.com/maxine-getting-started
On the page linked above, under “Download the Latest Augmented Reality SDK,” check the box next to “I Agree To The Terms of the NVIDIA Maxine License Agreement.”
A “Download” button will appear; click it in the order shown in the figure below to download the SDK.
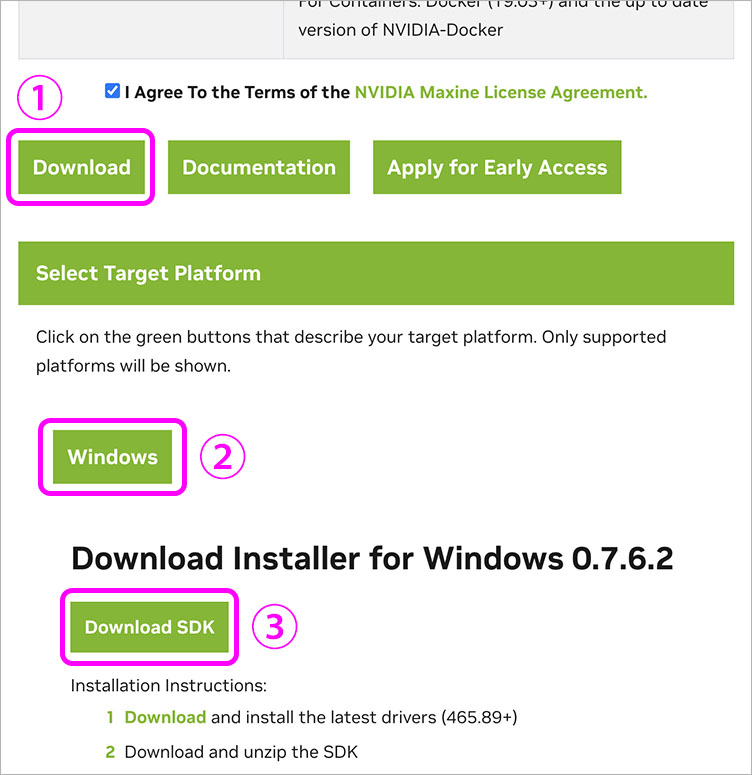
The file NVIDIA_AR_SDK_Win_****.zip (version 0.7.6.2 as of August 2022) will be downloaded.
After downloading, unzip the file.
2. Download the Surrey Face Model file
https://github.com/patrikhuber/eos/tree/master/share
Download only the following files from the website above.
- sfm_shape_3448.bin
- expression_blendshapes_3448.bin
- sfm_3448_edge_topology.json
- sfm_model_contours.json
- ibug_to_sfm.txt
3. Preparing the Data
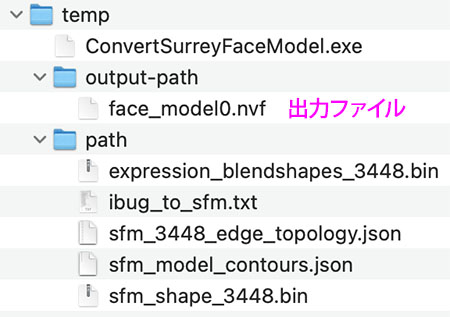
- Create a “temp” folder
- Create “output-path” and “path” folders inside the “temp” folder
- Copy “ConvertSurreyFaceModel.exe” from the “bin” folder (located in the folder extracted in step 1) to the root of the “temp” folder
- Move all data from step 2 to the “path” folder
The configuration is shown in the figure below. Since face_model0.nvf in the output-path shown below will be generated after the next processing step, it does not yet exist.
4. Installing Anaconda
https://www.anaconda.com/products/distribution#Downloads
Download the installer (Windows 64-bit version) from the website above and install it.
⑤ Generating an NVF file
Launch the Anaconda PowerShell prompt.
Use the following command to navigate to the “temp” folder on your desktop. cd C:\Users\username\Desktop\temp
Enter the following command to generate an NVF file in the output-path folder.
ConvertSurreyFaceModel.exe –shape=path/sfm_shape_3448.bin –blend_shape=path/expression_blendshapes_3448.bin –topology=path/sfm_3448_edge_topology.json –contours=path/sfm_model_contours.json –ibug=path/ibug_to_sfm.txt –out=output-path/face_model0.nvf

4. Face Tracking in TouchDesigner
1. Moving the nvf file
Since TouchDesigner’s Face Track CHOP does not support paths containing Japanese characters, you must save the nvf file in a location that does not include Japanese characters.
For this experiment, I created a folder named “td_facetrack_temp” directly under the C drive and moved “face_model0.nvf” into it.
2. Launching a TouchDesigner project file (toe)
http://qualia.social/wp-content/uploads/2021/04/FaceTracking.toe
Download the toe file from the URL above.
Double-click the downloaded toe file to launch it. After launching, a file loading error appears in Face Track CHOP.
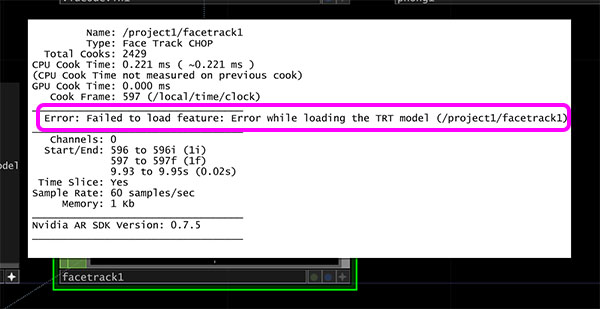
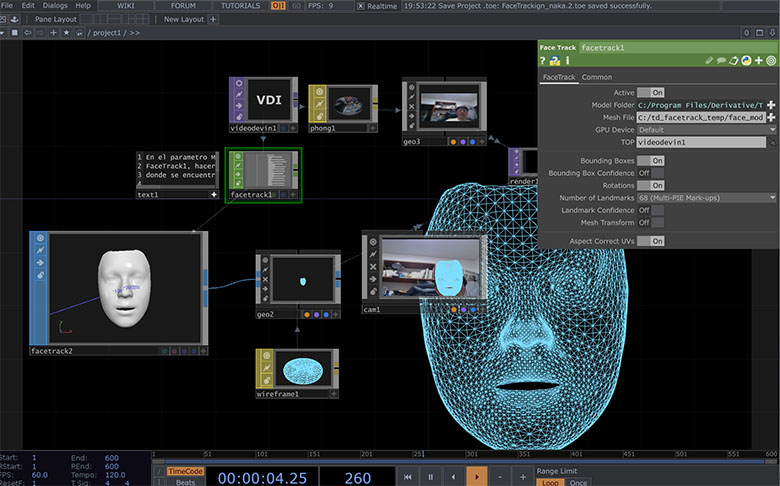
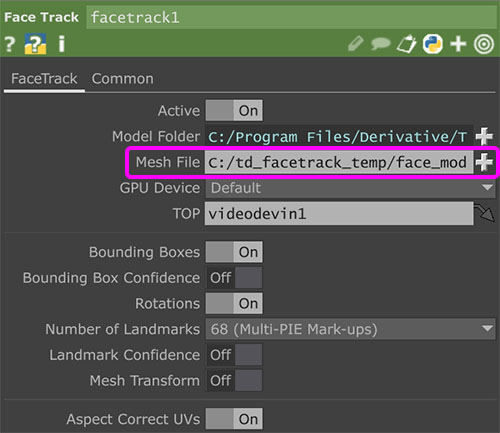
3. Configuring the Mesh File for Face Track CHOP
Set the face_model0.nvf file moved in Step 1 as the Mesh file for the Face Track CHOP.
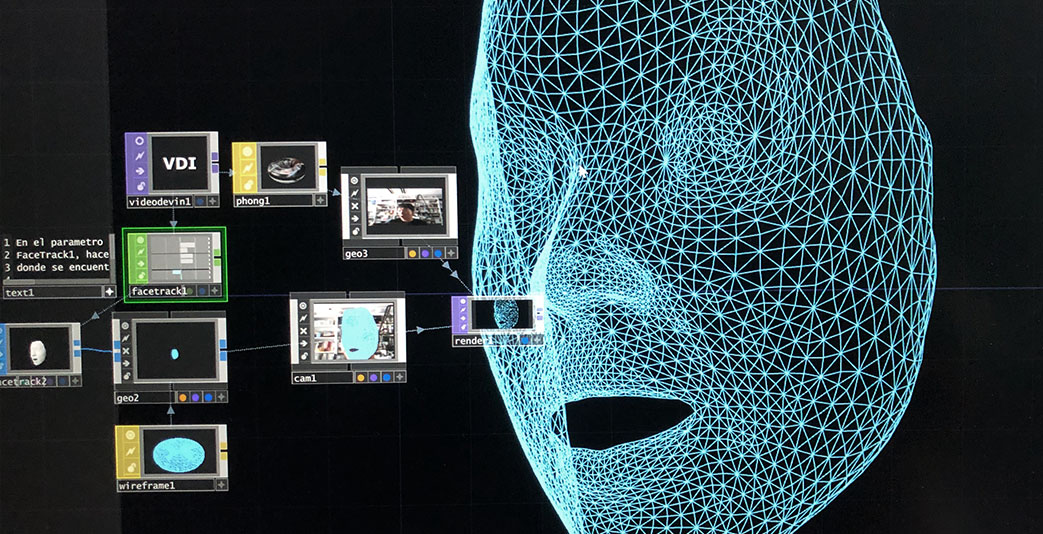
If face tracking is successful, a mesh will be displayed as shown below.