Morphing Part 2
1. RE:Flex Morph (Still Image Morphing)
Here, I will explain morphing using two still images.

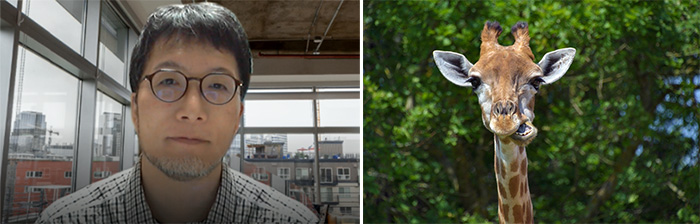
The image below shows a morph created using images of Nakayasu and a giraffe. Time-remapping was applied to the footage processed with RE:Flex Morph to create fade-in and fade-out effects.
Any object can be morphed, but in the case of a giraffe, for example, the position of its ears differs from that of a human, so the ears break up during the transformation. While this isn’t noticeable at high speeds, to eliminate any sense of incongruity, it is necessary to create separate intermediate images and adjust them.
Morphing is, by its very nature, a form of artistic license; rather than focusing on biological accuracy, it’s best to approach it from the perspective of which parts of the image would be most interesting to transform.
2. Practice Exercises
Depending on the level of preparation, we may conduct only the exercise in Section 4.
In this section, we will practice morphing using the image data included in the RE:Flex manual.
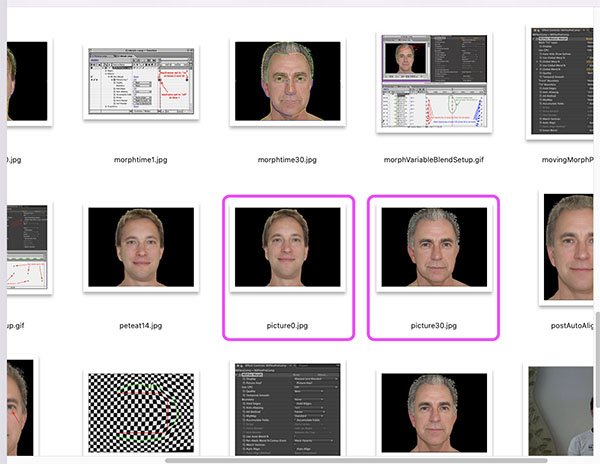
On a Mac, the /Applications/REVisionEffects/REFlex5AE/REFlex5AEManual/images/ folder contains picture0.jpg and picture30.jpg (see below).
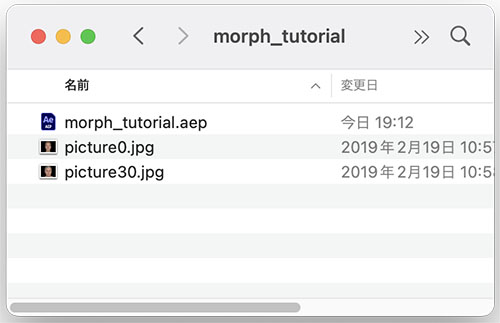
Create a folder (named “morph_tutorial” in the figure below) and copy picture0.jpg and picture30.jpg into it. Save the project file (.aep) in the same folder.
From this point on, follow the same procedure as in Section 4. Assignments (Section 4.3 and onward). Further details will be provided during class.
3. How to Make the RE:Flex Demo Version Less Prominent
I will explain this in more detail during class.
- Use source images with the highest possible resolution (this is feasible for still images since pre-composing doesn’t require much processing power)
- Specify the colors for the demo display under Effects > Keying > Color Range
- Place a crossfade of the source material on the layer below
4. Problem-Solving Exercises
4.1 Problem Statement
- Materials to use: Your own photos, photos of friends, or copyright-free images (e.g., https://pixabay.com/ja/)
- Morphing duration: 3 seconds
- Submission format: MP4
- Submission method: Submit via email using GigaFile. Nakayasu will upload the file to the Scrapbox shared for this assignment.
4.2 Preparing Source Images
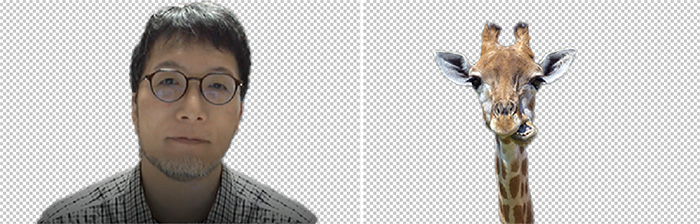
Prepare two images. Depending on your purpose, you won’t need a background to make the morphing effect stand out, so use Photoshop to make them transparent or a solid color.
In Photoshop, select the subject’s outline from the “Selection menu > Select Subject” option, then invert the selection to remove the background pixels. If you’re having trouble making a clean selection, use the “Selection menu > Select and Mask” option instead.
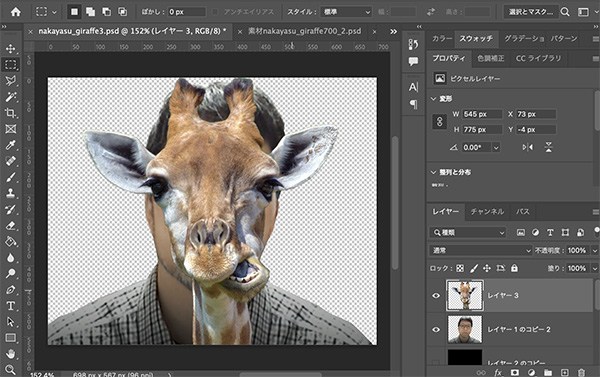
Adjust the position and size so that the feature points (such as the eyes and mouth) are as close together as possible.
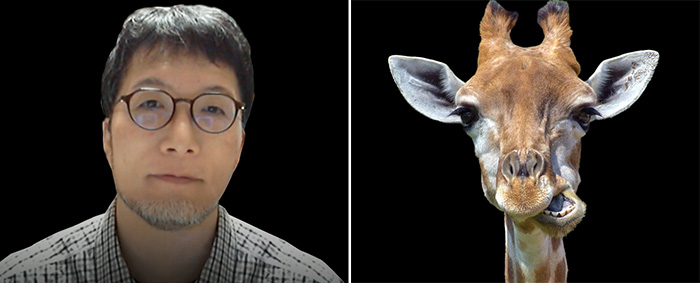
I prepared two images with black backgrounds.
4.3 Importing Footage into an After Effects Project
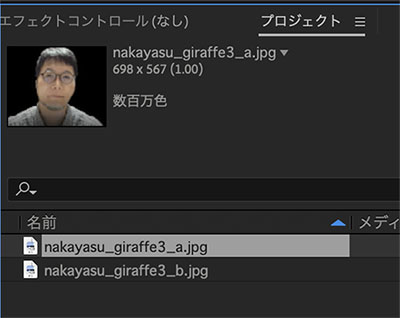
Load two images into the project.
4.4 Creating a Composition (Prework)
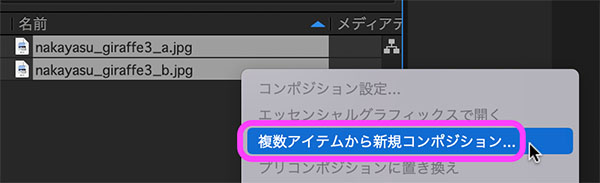
After selecting two pieces of footage (images), right-click and select “New Composition from Multiple Items” from the menu.
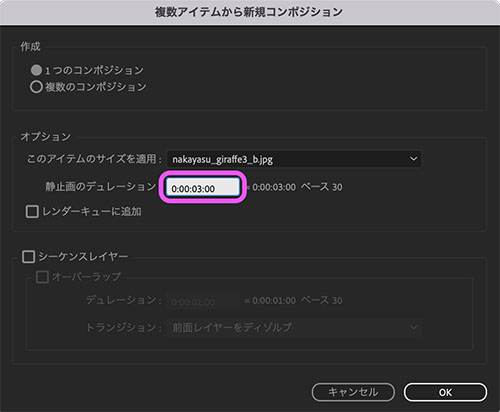
In the window shown below, set the duration of the still image to 3 seconds and click OK.
A composition is created with the two clips arranged as layers.
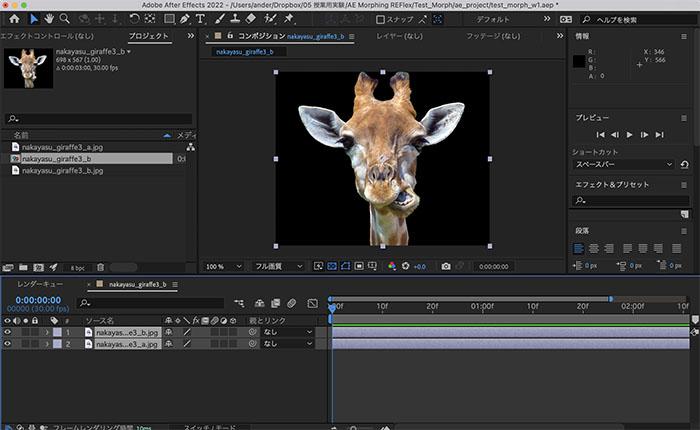
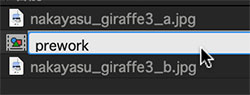
Since the composition name is the same as the original image file name, rename the composition in the Project panel (in the figure below, it is “prework”).
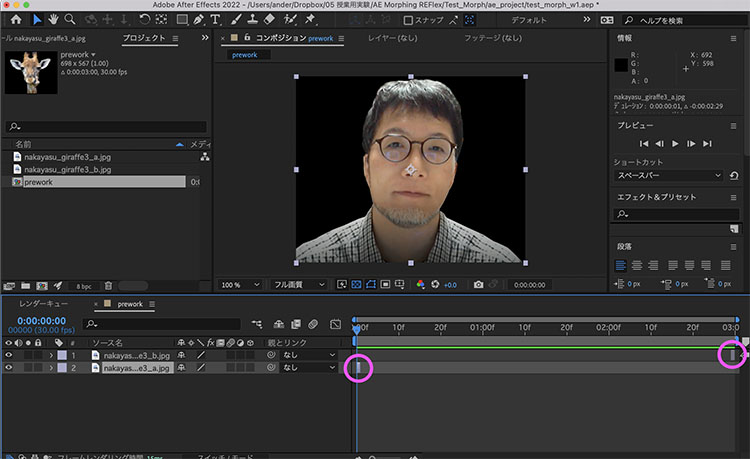
4.5 Adjusting the Start and End Frames
Set the 0-second mark to the pre-morphing image (Nakayasu photo) and the 2:29 mark to the post-morphing image (giraffe), adjusting the duration of each clip so that it lasts exactly one frame.
4.6 Creating a Composition (reflex_output)
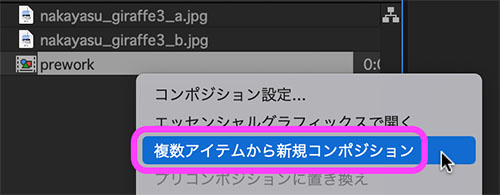
Right-click the “prework” composition in the Project panel and click “New Composition from Multiple Items.”
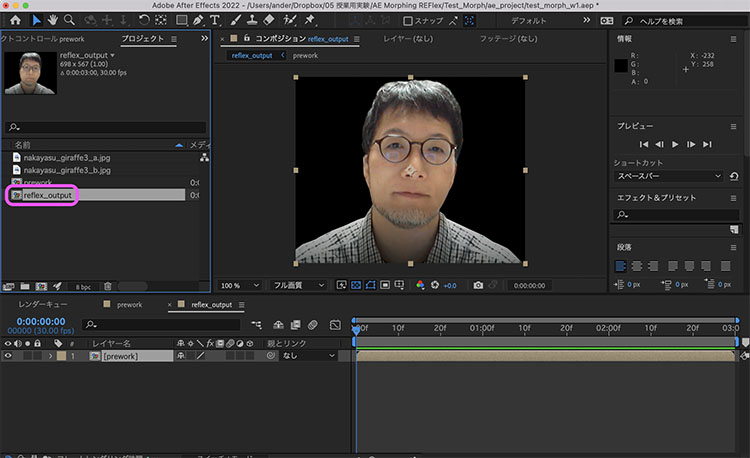
Rename the newly created composition to “reflex_output.” This will result in “prework” being contained within “reflex_output.”
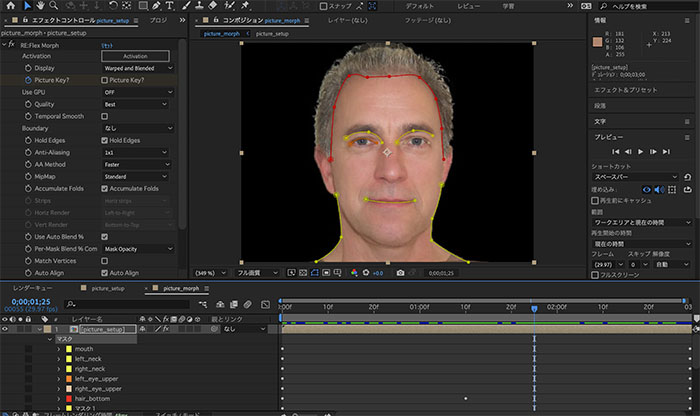
4.7 Configuring the RE:Flex Morph Effect
Select “prework” in the reflex_output menu, then click Effect Menu > RE:Vision Plug-ins > RE:Flex Morph.
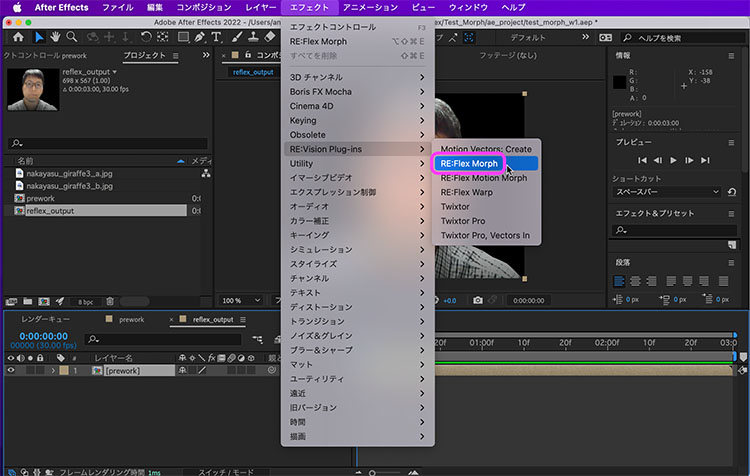
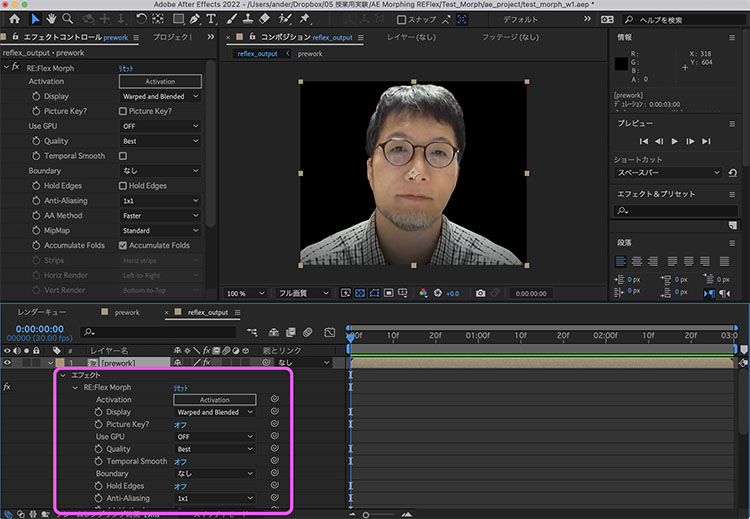
The Effect Controls panel appears in the Project panel on the left; open the layer’s properties to view the parameters for Effect > RE:Flex Morph.
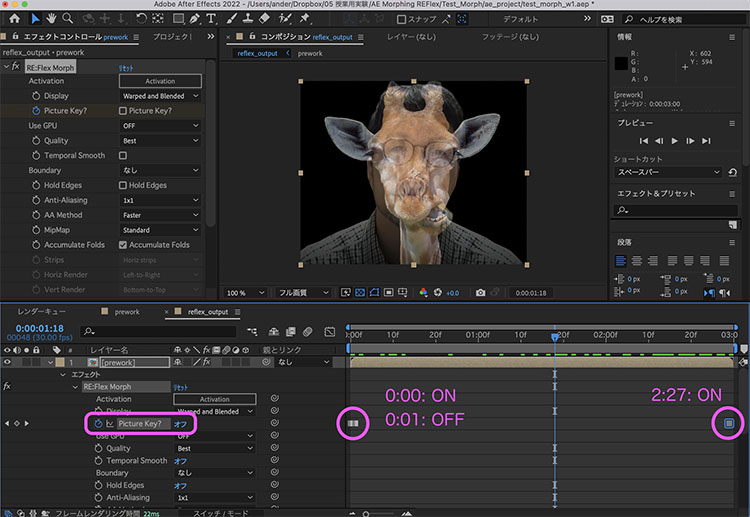
Set the Picture Key as shown in the figure below.
4.8 How to Make the RE:Flex Demo Version Less Prominent (For Reference)
If necessary, perform the following steps (starting with the second one).
- Use source images with the highest possible resolution (this is feasible for still images since pre-composing doesn’t require much processing)
- Specify the colors for the demo display under Effects > Keying > Color Range
- Place a crossfade of the source material on the layer below
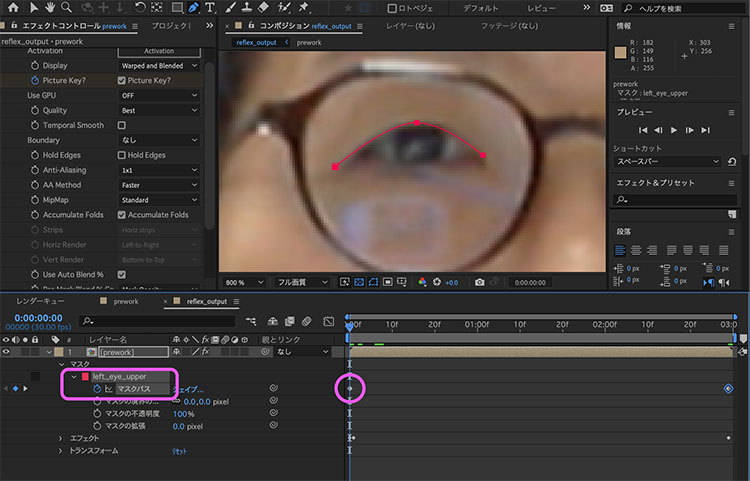
4.9 Creating a Mask
For instructions on how to draw a mask path, see section 4.10.
Move the time indicator to frame 0 and draw an open path (closed paths are not allowed) to serve as the reference for the morphing, as shown below. Add keyframes to the mask path. Since you will need many mask paths, rename them to something easy to understand (in the figure below, “left_eye_upper”). Change the color of the mask path to a lighter shade or similar as needed.
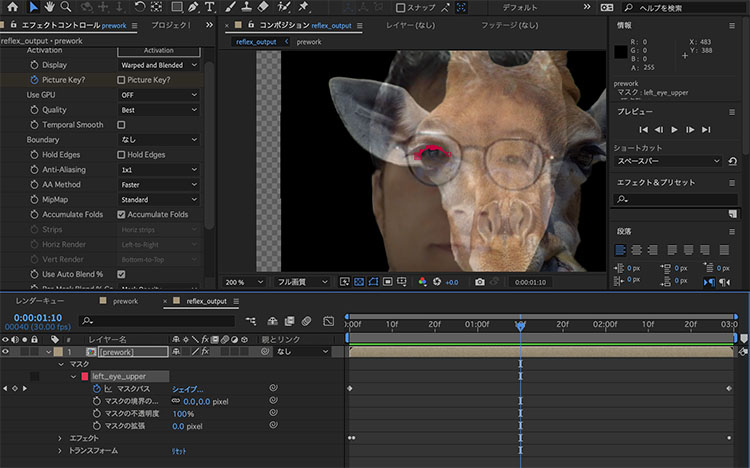
Move the time indicator to 2:29 and adjust the mask to fit the giraffe. Since keyframes are enabled for the mask path, keyframes will be added automatically as soon as you edit the path.
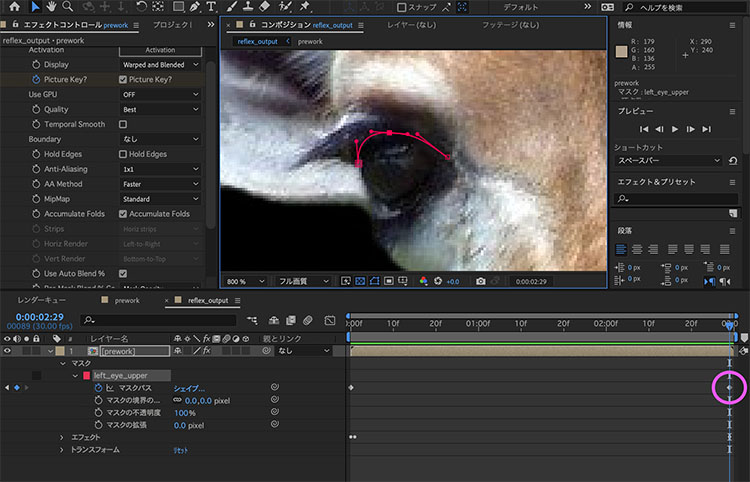
Drag the time indicator left and right to check the morphing effect. At this point, only the left eye is affected, so the effect isn’t very noticeable.
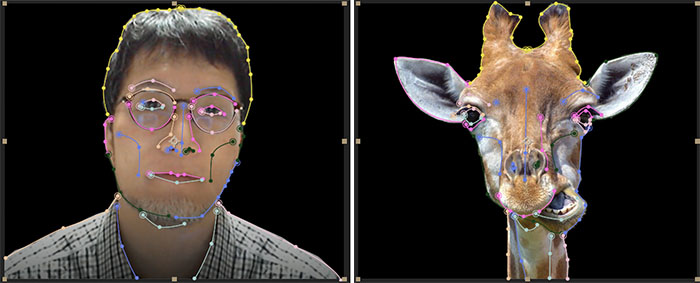
I add mask paths through trial and error. The image below shows 29 mask paths. This task alone takes about one to two hours.
4.10 Tips for Drawing Mask Paths (Takes Some Practice)
Note that while this works similarly to Illustrator’s Bézier curves, there are some differences. If you’re not familiar with Bézier curves, practice using the Bézier Curve Tutorial.
The following explains how to move and scale composition panels.
- Hand tool: Space bar + drag left
- Zoom tool: Scroll wheel
When drawing and editing paths, switch between the Pen Tool and the Selection Tool as shown in the figure below.
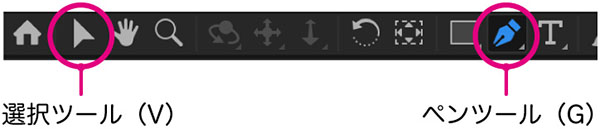
You can switch between tools by holding down the Pen tool, as shown in the figure below. In practice, the cursor automatically switches depending on the situation when adding or deleting vertices. Since you can also control the vertex selection tool using the Option key, you rarely need to switch tools via the menu.
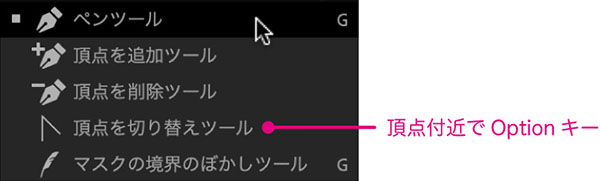
Once you’ve finished drawing a path, switch to the Selection tool. While you can move vertices using the Pen tool as long as you’re working around a selected vertex, since you may need to close the path, it’s safer to switch to the Selection tool to minimize mistakes.
When drawing mask paths, it’s easy to make mistakes until you get the hang of it. Unintentional clicks can create unwanted masks, and you might end up creating a shape layer with the Pen Tool when no layer is selected. You need to work carefully, keeping an eye on the timeline and using Cmd+Z to undo steps as needed.
4.11 Other Settings
Use the following settings as needed.
- Hold Edges: Setting to preserve the image’s rectangular dimensions. You can also use the “Boundary” option.
- Match Vertices: Effect of vertex positions
- Auto Align: Automatic adjustment of feature points
- Smart Blend: Setting for how to fill blank areas caused by distortion
4.12 Rendering
The rendering method will be explained in class.
Rendered footage.
Depending on the application, simply morphing at a constant speed can be a bit dull, so I’ve added ease-in and ease-out effects using time remapping. I’ll explain how to do this in class.
5. Tutorial Videos
There are some tips and tricks to drawing mask paths. Here is a helpful tutorial video.
Explanation of Auto Align, Smart Blend, and Hold Edges.