Face Tracking + TouchDesigner
1. はじめに
ここで紹介するFace Tracking手法は下記URLで紹介されている方法をまとめたもの。一般的なウェブカメラとTouchDesignerだけでFace Trackingを行うことができる。記事前半のみの実験であり、後半の68(Multi-PIE Mark-ups)は実装していない。
2. 開発環境
2.1 必要なソフトウェア
- NVIDIA Augmented Reality SDK
- TouchDesigner 2021.12380以降(Face Track CHOP、Face Track SOP実装)
- Anaconda
2.2 公式推奨環境・Windows 10, Windows 11 64-bit, Ubuntu 18.04
- NVIDIA GeForce RTX 20XX and 30XX Series, Quadro RTX 3000等
- NVIDIA Display Driver 465.89以上 詳細はGetting Started with NVIDIA Maxine2.3 今回のテスト環境・Mouse DAIV 5N
- Windows 11 Home 64bit
- インテル Core i7-1180H(8コア/16スレッド/2.3GHz)
- 32GBメモリ
- NVIDIA GeFrorce RTX 3060 Laptop 6GB
- NVIDIA Driver version 516.94
3. nvfファイルの生成手順
① NVIDIA Augmented Reality SDKのダウンロード
https://developer.nvidia.com/maxine-getting-started
上記URLの「Download the Latest Augmented Reality SDK」の下方、「I Agree To The Terms of the NVIDIA Maxine License Agreement.」にチェックを入れる。
Downloadボタンが現れるので、下図のように順にクリックしてDownload SDKからダウンロードを行う。
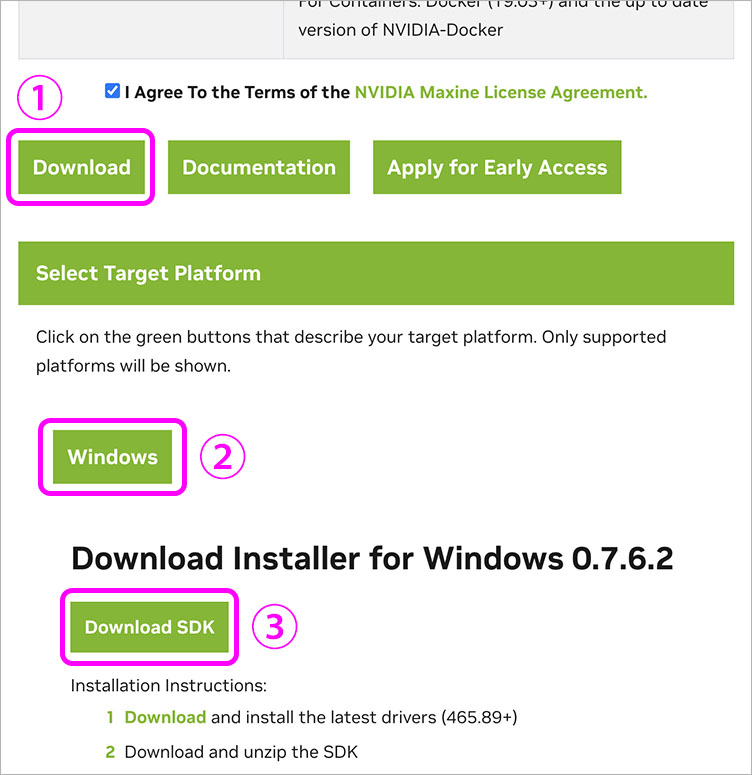
NVIDIA_AR_SDK_Win_****.zip(2022.8現在0.7.6.2)がダウンロードされる。
ダウンロード後、zipを解凍する。
② Surrey Face Modelファイルをダウンロード
https://github.com/patrikhuber/eos/tree/master/share
上記サイトから、以下のファイルのみダウンロードする。
- sfm_shape_3448.bin
- expression_blendshapes_3448.bin
- sfm_3448_edge_topology.json
- sfm_model_contours.json
- ibug_to_sfm.txt
③ データの準備
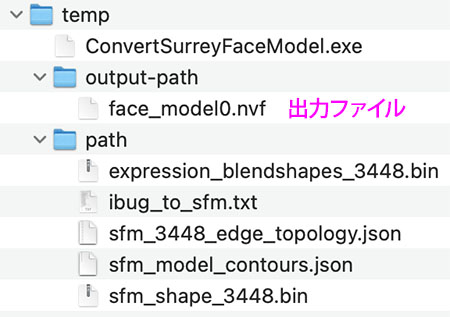
- tempフォルダを作成
- tempフォルダの中にoutput-path及びpathフォルダを作成
- ①の解凍後のフォルダのbinフォルダの中のConvertSurreyFaceModel.exeをtempフォルダルートにコピー
- ②の全てのデータをpathフォルダに移動
下図のような構成になる。下図output-path内のface_model0.nvfは次の処理後に生成されるので、まだ存在しない。
④ Anacondaのインストール
https://www.anaconda.com/products/distribution#Downloads
上記サイトから、インストーラ(Windows 64bit版)をダウンロードしてインストールする。
⑤ nvfファイルの生成
Anaconda Powershell Promptを起動する。
下記コマンドでデスクトップのtempフォルダ内に移動する。 cd C:\Users\ユーザー名\Desktop\temp
下記コマンドを入力してoutput-pathフォルダ内にnvfファイルを生成する。
ConvertSurreyFaceModel.exe –shape=path/sfm_shape_3448.bin –blend_shape=path/expression_blendshapes_3448.bin –topology=path/sfm_3448_edge_topology.json –contours=path/sfm_model_contours.json –ibug=path/ibug_to_sfm.txt –out=output-path/face_model0.nvf

4. TouchDesignerでFace Tracking
① nvfファイルの移動
TouchDesignerのFace Track CHOPは日本語パスに対応していないため、nvfファイルを日本語パスが含まれない場所に保存する必要がある。
今回の実験ではCドライブ直下にtd_facetrack_tempフォルダを作成して、その中にface_model0.nvfを移動した。
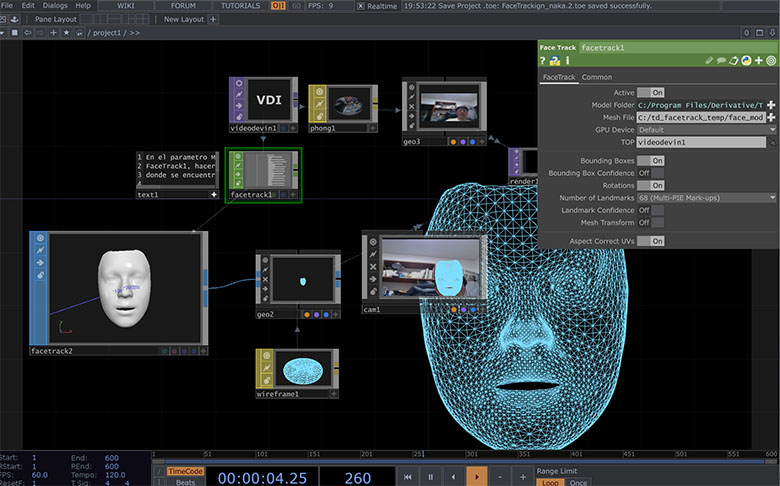
② TouchDesignerプロジェクトファイル(toe)の起動
http://qualia.social/wp-content/uploads/2021/04/FaceTracking.toe
上記URLでtoeファイルをダウンロードする。
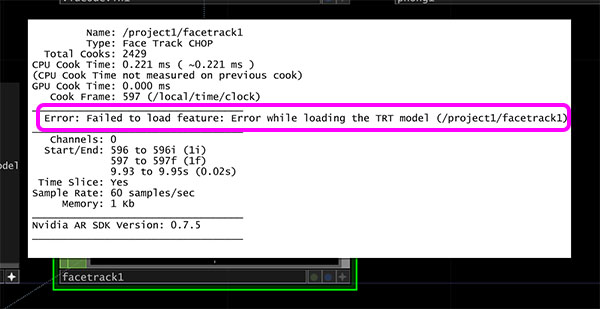
ダウンロードしたtoeファイルをダブルクリックして起動する。起動後、Face Track CHOPでnvfファイルの読み込みエラーが表示される。
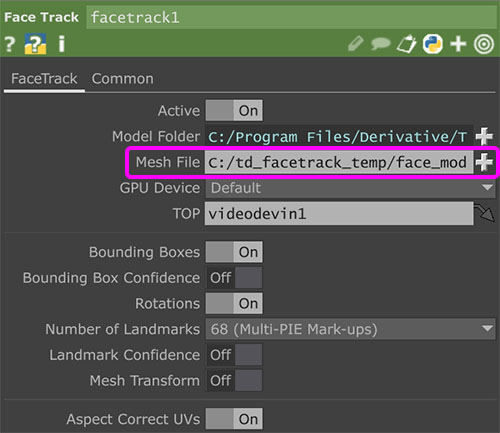
③ Face Track CHOPのMeshファイル設定
①で移動したface_model0.nvfをFace Track CHOPのMeshファイルに設定する。
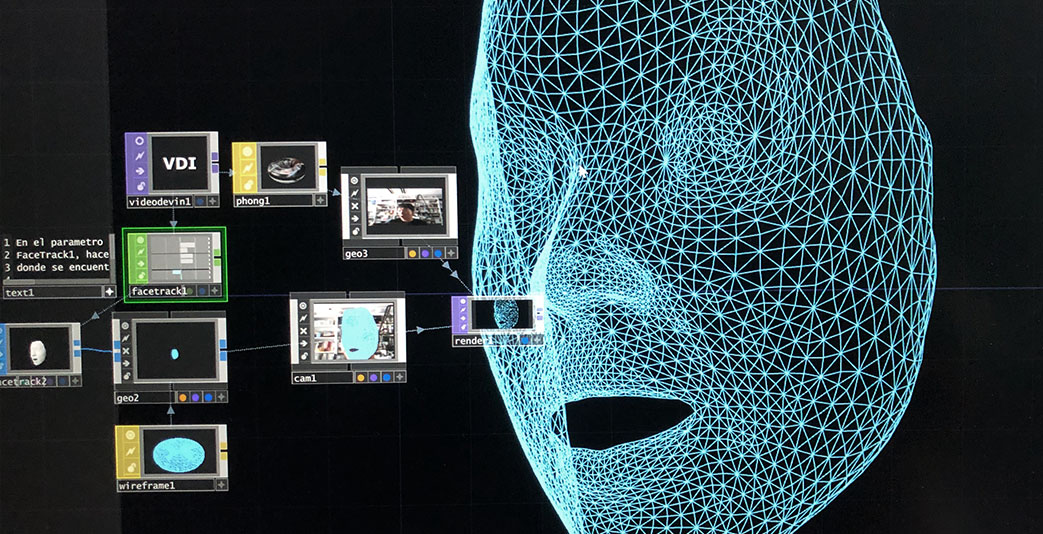
Face Trackingが動作成功すれば、下図のようにメッシュが表示される。